Bready or Not Original: Easy Flatbread Crackers
These Easy Flatbread Crackers are delicious, much better than anything you find in stores, and they are quick to make, too.
Anyone who knows me can figure out how I used these crackers: as a base for cheese. I need crackers to go with all kinds of cheese, so I don’t go heavy on savory flavors. The light seasonings here make for versatility. That versatility also makes these useful for dips, soups, or just eating straight.
A quick note on the cheese, too: whatever kind of Parmigiano-Reggiano or similar hard cheese you use inside these crackers, don’t get the pre-shredded kind if you can help it. Those shreds are coated with preservative, anti-stick stuff. That said, if you need to get shredded cheese for accessibility reasons, I understand–but be aware it can throw off recipes sometimes.
Bready or Not Original: Easy Flatbread Crackers
Equipment
- baking sheet
- parchment paper
- Rolling Pin
- pizza cutter or knife
Ingredients
- 1 1/2 cups bread flour plus flour for surface
- 1 1/2 teaspoons kosher salt
- 1 teaspoon white sugar
- 1/2 cup Parmigiano-Reggiano or a quality domestic version, freshly grated
- 1 teaspoon celery flakes
- 1/2 teaspoon dried thyme
- 1/2 cup cold water
- 3 Tablespoons extra virgin olive oil
- flaked sea salt to top
Instructions
- Preheat oven at 400 degrees. Line a baking sheet with parchment paper.
- In a medium bowl, toss together the flour, salt, sugar, and cheese. Add the herbs along with the olive oil and water, stirring until it just comes together as a dough. Add a touch more water if it’s too dry or flour if it is too wet.
- Transfer to a lightly floured surface and knead the dough briefly to smooth it out. It shouldn’t be sticky. Divide the dough in half.
- Roll out a portion on the floured surface. Use a pastry brush to lightly coat the top with water. Sprinkle with flaked sea salt. Use a pizza cutter or other blade to portion the dough into rectangles or other shapes a few inches in diameter. Transfer pieces to prepared parchment. Repeat process with remaining dough.
- Bake for 18 to 21 minutes, until lightly browned. Let harden and cool for at least an hour. Store in a sealed container for up to 3 days, or immediately freeze portions for later enjoyment.
OM NOM NOM!
Bready or Not: Cookie Butter-Chocolate Chip Cookies
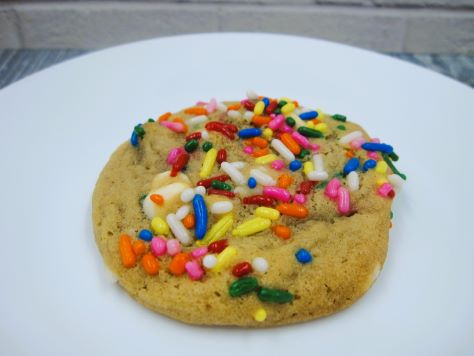
I like to say that cookie butter makes everything better. I would also add that rainbow sprinkles make everything better. These cookies feature both cookie butter AND rainbow sprinkles, and will absolutely blow your mind.
The recap, as there is always someone discovering cookie butter for the first time: it’s an addictive substance found near the peanut butter in most every grocery store in America; even my local Walmart has it in the main Biscoff brand or as a Walmart generic, and Trader Joe’s calls it Speculoos. It’s essentially pulverized cookies and oil. It has the exact same texture as peanut butter and can substitute for it in most any recipe. There is nothing healthy about it and it is incredibly delicious.
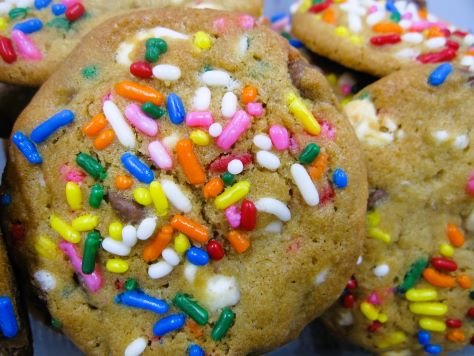
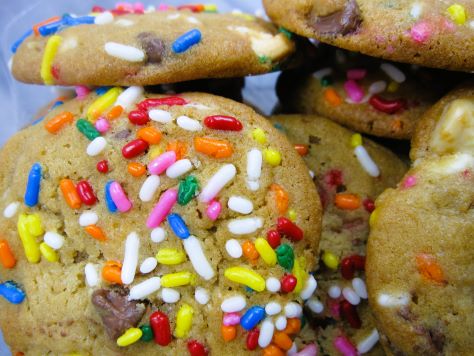
Cookie butter makes things taste like cookie dough. That’s outright magical when paired with chocolate. These cookies are especially pretty as they include white and brown chips along with the sprinkles.
Customize the sprinkles based on the season or reason. Red and green for Christmas, pink and/or red and/or white for Valentine’s, favorite sports team colors, whatever. Of course, basic rainbow sprinkles are always a great choice!
Modified from Food Network Magazine December 2022.
Bready or Not: Cookie Butter-Chocolate Chip Cookies
Equipment
- large cookie scoop
- baking sheet
- parchment paper
Ingredients
- 1 3/4 cups all-purpose flour
- 1/2 teaspoon baking soda
- 1/2 teaspoon salt
- 10 Tablespoons unsalted butter room temperature
- 1/2 cup smooth cookie butter such as Biscoff or Speculoos
- 1/2 cup brown sugar packed
- 1/4 cup white sugar
- 2 large eggs room temperature
- 1 teaspoon vanilla extract
- 3/4 cup white chocolate chips
- 3/4 cup milk chocolate chips
- 3 Tablespoons sprinkles plus more for topping
Instructions
- In a small bowl, combine flour, baking soda, and salt. Set aside.
- In a large bowl, beat together the butter, cookie butter, and both sugars until they are light and fluffy. Add the eggs one at a time. Add the vanilla.
- Gradually stir in the dry ingredients to form a cohesive dough. Fold in both kinds of chips along with the sprinkles. Cover the dough and chill in the fridge at least 2 hours, or up to a few days.
- Preheat oven at 350 degrees. Line a baking sheet with parchment paper. Pour some sprinkles into a bowl.
- Use a scoop or spoon to shape the dough. Dip the top into the sprinkles and compress to coat. Place spaced out a few inches on sheet–they will spread!
- Bake 11 to 12 minutes, until set and golden. Let them cool for about 5 minutes on the sheet, then transfer them to a cooling rack. Store them in a sealed container at room temperature.
OM NOM NOM!
2024 Conventions
Greetings! I haven’t posted anything beyond Bready or Not in a while, with good reason–I’ve been inordinately busy. Things are happening. Good things. Things I hope to share more about very soon.
Right now, I have a chance to catch my breath. This gives me an opportunity to share some other good news–I’m taking part in many cons this year! June in particular will be a busy month for me.
Here are the current plans:
4th Street Fantasy in Minneapolis: June 14-16
I don’t know if I’ll have panels, but I’ll be in attendance nevertheless, happy to chat and likely with some cookies on my person. Do note that I’ll be vigilant about masking, not simply because this convention requests it, but because I’m committed to another convention days later…
Origins Game Fair in Columbus, Ohio: June 19-22
I’m a special guest author at Origins this year! I’ve never been to this fair before, but I’ve heard great things. It looks like a smaller version of Gen Con, which is good, because Gen Con was way too much for my sensitive brain to handle. This will be my first time in Columbus! And there’s a cheese shop right near the convention! Yay!
World Fantasy Convention in Niagara Falls, NY: October 17-20
This is so far out, I’m still not fully sure when I’m arriving or leaving, so regard those dates as a rough estimate. I’ve only been to New York State once before, to the big city, and I’ve always wanted to see the falls. Much excitement! World Fantasy Cons are among my favorites because they are big and yet intimate at the same time. I hope to see a lot of people here that I haven’t seen in years.
#SFWAPro
Read MoreBready or Not Original: Apple Bundt Cake with Apple Cider Caramel Glaze
This Cider Bundt Cake is part of a series of apple cake experiments that will be on Bready or Not over the next while. They are all just a bit different.
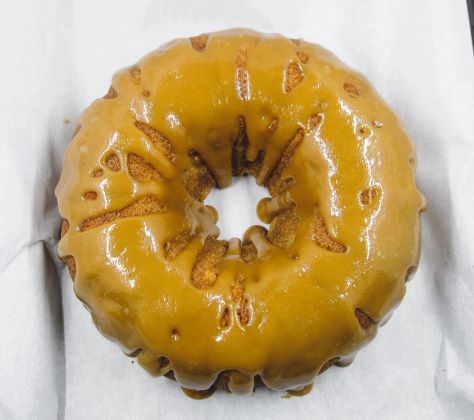
The thing that really sets this cake apart is the Apple Cider Caramel Glaze. Oh boy, this glaze. It’s truly thick, luscious caramel. The cake by itself is fairly standard–this glaze elevates it to star status.
Even better, you’ll likely have some glaze leftover. Store it covered in the fridge and use it in the coming days. Warm up a portion to make it pliable, then use it for dipping apples or cookies, or to top ice cream… or just eat it straight or add even more to the cake slices. Just don’t you dare let it go to waste.
Bready or Not Original: Apple Bundt Cake with Apple Cider Caramel Glaze
Equipment
- large bundt pan
- nonstick spray with flour
- cooling rack
- medium saucepan
Ingredients
Cake
- 3/4 cup unsalted butter (1 1/2 sticks) softened
- 1 cup white sugar
- 1 cup brown sugar packed
- 1 Tablespoon vanilla extract
- 3 large eggs room temperature
- 3 cups all-purpose flour
- 2 teaspoons baking powder
- 1 1/2 teaspoons cinnamon
- 1/2 teaspoon baking soda
- 1/2 teaspoon salt
- 1/2 teaspoon cardamom
- 1/2 cup buttermilk or soured milk (see note)
- 3 medium baking apples peeled and grated or finely diced
Apple Cider Caramel Glaze
- 1 cup nonalcoholic apple cider
- 1 cup brown sugar packed
- 1/2 cup unsalted butter softened
- 1/4 cup half & half
Instructions
- Preheat oven at 325 degrees. Apply nonstick spray with flour to a large bundt pan.
- In a large bowl, beat together butter, both sugars, and vanilla extract, until fluffy. Scrape down bottom of bowl. Add eggs, beating well after each addition.
- In another bowl, combine flour, baking powder, cinnamon, baking soda, salt, and cardamom. Gradually add the dry ingredients to the butter mixture, pausing to add the buttermilk at several points. Scrape the bottom of the bowl, then fold in the apple pieces.
- Scoop batter into the prepared pan. Even it out. Bake until a toothpick inserted into the cake comes out clean, 50 to 60 minutes. Let cool in pan for 20 minutes, then invert onto a rack to completely cool before making the glaze.
- In a medium saucepan, bring the cider to a low boil and keep it there for about 4 minutes, watching it closely to bring down heat if necessary to ensure it doesn’t boil over. Add the brown sugar, butter, and half & half, then bring to a boil for another 2 to 4 minutes, until it has thickened. Remove from heat to set and cool for about 15 to 20 minutes. While the caramel is still warm (if it’s not warm, heat it again gently to make it pliable), drizzle it over cake. (If you have any caramel leftover, let it cool and then refrigerate it for other delicious uses!)
- Let cake set in fridge. Keep covered under a dome or individually slice and wrap for storage, keeping it in the fridge. It'll keep for at least 5 days.


