


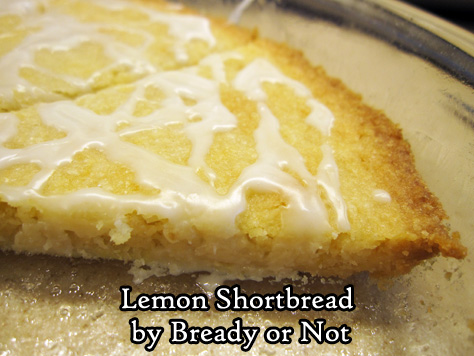
Bready or Not Original: Lemon Shortbread
My Shortbread recipe was the first I really mastered as a teenager beginning to bake. This new version uses that as a base, but modifies it into a delicious Lemon Shortbread.
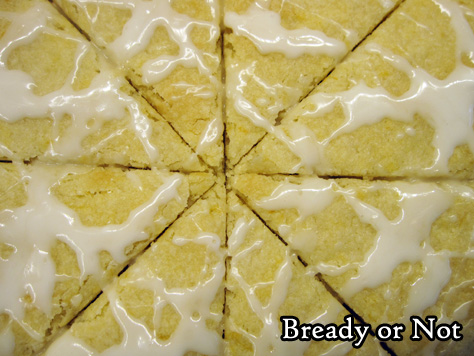
I love a good Scottish Shortbread. It’s so buttery and scrumptious. The fresh zing of lemon plays very well with that inherent butter flavor and texture.
This is not a crisp shortbread like the traditional Walker’s brand (which is delicious in its own right). No, this shortbread is cakey and soft, only crisp at the very edge.
Sometimes the first piece out of the pan can even be fussy and break in half; a metal pie spatula helps, but sometimes it can still happen. That’s no major problem, though, because of every bite of Shortbread is good, even if it’s not perfectly photogenic.
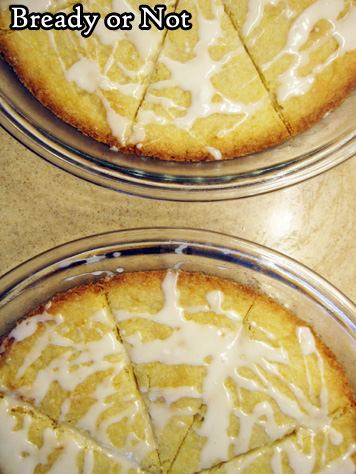
This new version does have a photogenic advantage, though, because the glaze is so very pretty. It should be just thick enough to drizzle, though if it’s a touch watery, that’s not the end of the world.
Enjoy this Lemon Shortbread for breakfast or snacks, or in proper fashion at tea time.
Bready or Not Original: Lemon Shortbread
Equipment
- 2 pie plates
Ingredients
Shortbread
- 1 lemon zested and juiced
- 2 cups all-purpose flour
- 3/4 cup white sugar
- 1/4 teaspoon salt
- 1 cup unsalted butter (2 sticks) softened
- 1 egg yolk
- 1 teaspoon lemon flavor
- 1/2 teaspoon vanilla extract
Lemon Glaze
- 3/4 cup confectioners’ sugar
- 1 Tablespoon lemon juice
Instructions
- Preheat oven at 375-degrees. Apply nonstick spray to both pie plates.
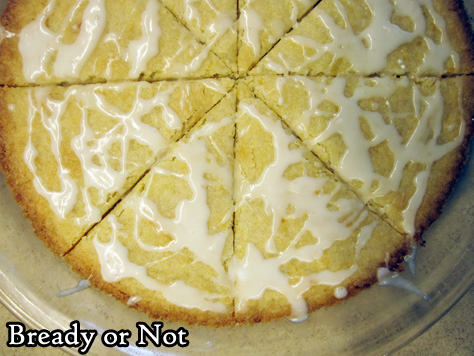
- Stir together the lemon zest, flour, sugar, and salt. Add butter, egg yolk, lemon flavor, and vanilla extract. Use hands to compress dough together to make a ball. Divide in half, placing one in each pie plate. Flatten dough with palms to create an even surface. Prick surface all over with a fork then use a knife to slash dough into triangular wedges.
- Bake for 18 to 22 minutes, until edges are golden brown and middle is set. Remove from oven and cut again along slash marks. Let shortbread cool completely.
- In a medium bowl, stir together confectioners’ sugar and lemon juice to create a glaze with a consistency to drip and keep shape. Drizzle all over shortbread. Let set, then cut again along existing marks.
- Shortbread keeps for several days at room temperature. It can be stored covered in pie plates, or stacked in a sealed container with wax paper between the layers.
OM NOM NOM!
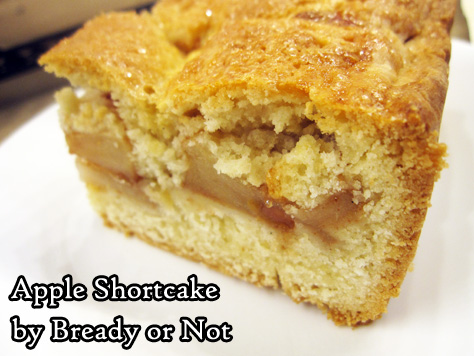
Bready or Not: Apple Shortcake
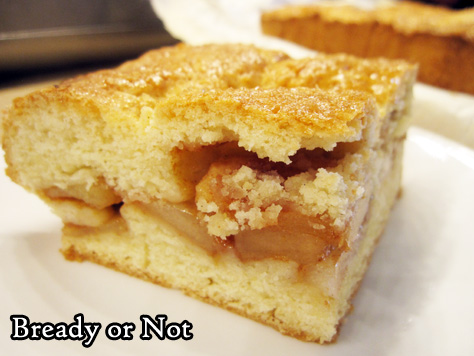
This Apple Shortcake is fussy to make, but the results are absolutely delicious!
I modified this from a recipe in Bake from Scratch, the September/October 2020 issue. There, they describe this style of shortcake as a New Zealand favorite.
Here in American, I grew up with strawberry shortcake (and loved the cartoon and toys for Strawberry Shortcake in my earliest years), and thought of fruit shortcakes as being simply made in individual portions. I was intrigued by this idea of it being like a cake and pie hybrid.
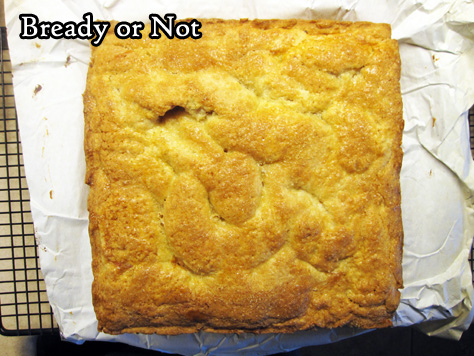
The most annoying thing about the recipe is that I found the dough to be quite sensitive–but this also might be an Arizona problem, as my kitchen year-round is hotter than many get. The good thing is that the recipe makes a lot of dough, so it’s easy to patch any tears or holes with a bit of the leftovers.
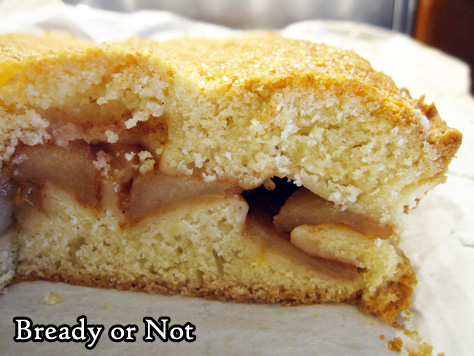
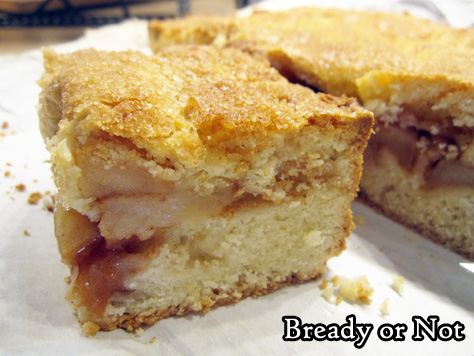
The baked shortcake is dense and delicious, with perfectly-spiced apples in a kind of shortbread sandwich.
The shortbread keeps okay at room temperature up to 2 days. If you’re feeding a small crowd, no prob–cut it into individual pieces, encase in plastic wrap, and freeze. It keeps fantastically that way.
Modified a lot from Bake from Scratch, September/October 2020 issue.
Bready or Not: Apple Shortcake
Equipment
- food processor
- food scale
- 9×9 pan
- Rolling Pin
- pastry brush
Ingredients
- 4 cups all-purpose flour plus more for rolling
- 1 cup plus 3 Tablespoons white sugar divided
- 1 3/4 teaspoons baking powder
- 1 1/4 teaspoons plus 1/8 teaspoons kosher salt divided
- 1 cup cold unsalted butter
- 3 large eggs divided
- 3/4 teaspoons almond extract
- 1/2 teaspoon vanilla extract
- 3 large apples such as Granny Smith and Pink Lady
- 1 lemon zested and juiced
- 2 teaspoons corn starch
- 1 teaspoon ground cinnamon
- turbinado sugar optional to sprinkle on top
Instructions
Make the crust
- In the bowl of a food processor, pour in the flour, 1 cup sugar, baking powder, and 1 1/4 teaspoons salt, then pulse until combined. Cut the butter into cubes and add to the bowl, pulsing until the mixture resembles coarse crumbs. Add 2 eggs and the extracts. Pulse to bring the dough together so that it's moist but not sticky; if it doesn't come together, add a small amount of water and pulse more.
- Turn out the dough to press it together. Use a food scale to weigh the dough and divide it in two. Wrap each piece with plastic wrap. Chill in fridge for at least 30 minutes, or up to a few days.
Assemble the shortcake
- Preheat oven at 350-degrees. Let the dough stand at room temperature for about 10 minutes. Sprinkle flour on a flat surface and roll out one portion of dough to make a 13-inch square. Set the pan on top as a guide to cut an even 9×9 square.
- Line pan with foil and apply nonstick spray. Place cut square inside. It’s okay if it tears as its being moved–patch it with fingertips. Pat the leftover dough up the sides of the pan to completely cover, sealing the edges together along the bottom and at the corners. Chill pan during the next step.
- Peel the apples and cut into quarter-inch slices, placing them in a large bowl. Add the lemon zest and 2 teaspoons of juice. Stir to coat apples. Add the cornstarch, cinnamon, remaining 3 Tablespoons sugar, and last bit of salt. Toss everything together, coating the apples. Spread the apples evenly across the bottom of the pan.
- Roll out remaining dough to make a 10-inch square to completely cover the top of the apples. Press overlapping edges to seal together, trimming dough if needed. Lightly beat the remaining egg then brush it over the top crust. Use a fork to poke the crust all over to create vents. If desired, sprinkle turbinado sugar across the crust.
- Bake until crust is golden brown, about 50 minutes to 1 hour. The apples should be tender if poked with a toothpick. Let cool in pan for at least an hour. Use foil to lift shortcake onto a cutting board for easy slicing.
- Store cake in sealed container at room temperature for up to 2 days. It can also be cut into individual slices and frozen for later enjoyment.
OM NOM NOM!
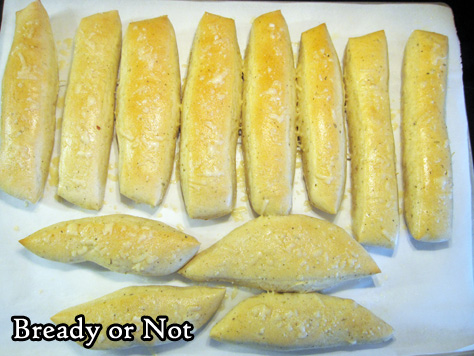
Bready or Not: Soft Breadsticks from the Bread Machine
Soft Breadsticks are so very cozy and comforting. They are even better when they are easy to make from-scratch at home, thanks to a bread machine.
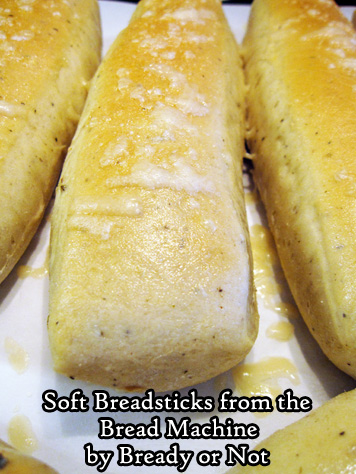
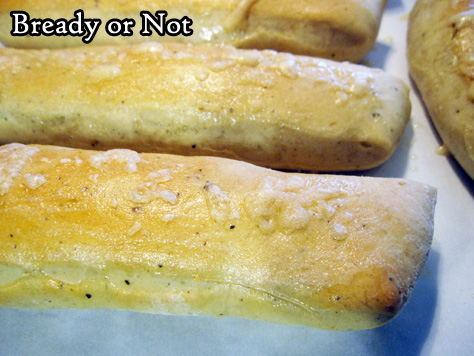
These are truly classic breadsticks. Doughy. Buttery. Just a touch of cheese on top.
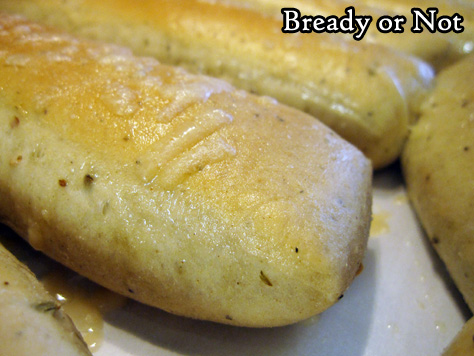
Season these however you want. Italian seasoning is great; I have Penzey’s pizza seasoning around, and I found it delicious in this recipe.
Sometimes I try to be precise with bread recipes when it comes to the baking stage–I pull out my food scale and weigh each round to get equal rolls. Not so here. I just wanted things that were, generally, in stick form.
If you have any leftovers, the sticks do keep well for two days at room temp, or you can freeze them for later. Just wrap them in foil to reheat in an oven or toaster oven.
Modified from the fantastic cookbook Making Artisan Breads in the Bread Machine by Michelle Anderson, available at Amazon, Bookshop, and other stores. [affiliate links]
Bready or Not: Soft Breadsticks from the Bread Machine
Equipment
- large baking sheet
- parchment paper
- pastry brush
Ingredients
- 1 1/4 cups lukewarm water (100-110 F degrees)
- 2 Tablespoons olive oil
- 1 Tablespoon white sugar
- 1 Tablespoon dry Italian seasoning or pizza seasoning
- 1 1/2 teaspoons sea salt
- 3 3/4 cups bread flour plus more for the work surface
- 2 1/4 teaspoons instant dry yeast
- 2 Tablespoons melted butter
- 1/4 cup grated Parmesan cheese or Grana Padano
Instructions
- Follow ingredient order for your bread machine; for most, that means liquids first. Place water, oil, sugar, seasoning, and salt in the bread machine bucket. Add the flour and the yeast. Start the machine on DOUGH cycle.
- Check on the dough as it mixes, if possible, and add a touch more liquid or flour as necessary. Dough should be soft and plush.
- Prepare a large baking sheet with parchment paper. Once the dough cycle is done, transfer the dough to a clean, floured work surface. If equal breadsticks are desired, use a food scale to weigh the dough and divide–or simply pat out the dough and use a pizza cutter or bench knife to slice the bread into stick form. Transfer them to the baking sheet. Cover them with plastic wrap or a towel and let them rise for another 45 minutes to an hour, until nicely puffed.
- Preheat oven at 350-degrees.
- Bake time will vary dependent on their size. If about 12 breadsticks are on the sheet, bake for about 12 minutes. Pull out of oven briefly to brush on melted butter. Sprinkle cheese all over top. Place breadsticks back in oven to bake for another 3 to 5 minutes, until sticks are more golden and cheese is melted.
- Eat breadsticks warm. Store any leftovers in a sealed plastic bag at room temperature for up to 2 days. They can also be frozen for later enjoyment.
OM NOM NOM!
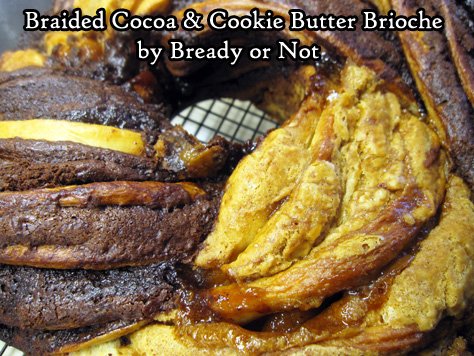
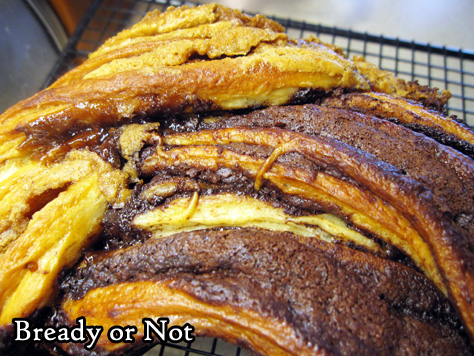
Bready or Not: Braided Cocoa and Cookie Butter Brioche
This Braided Cocoa and Cookie Butter Brioche is stunning in appearance and taste, so be warned: there are more pictures than usual for this post, including some process photos.
When I set out to rewrite the original recipe, featured in the January/February 2019 issue of Bake from Scratch, I knew this bread would be time-consuming. Intimidating, even.
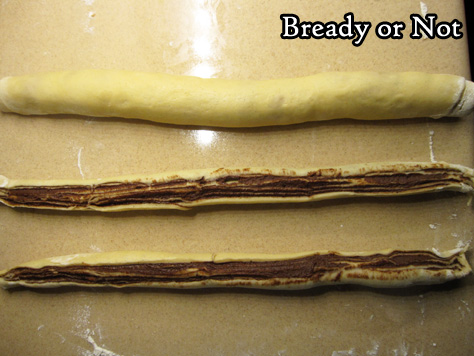
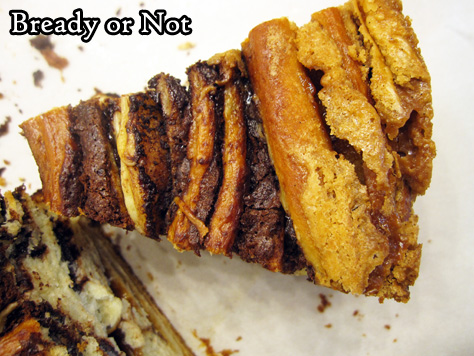
The braiding process, shown here, had me worried to start, but that turned out to not be so bad after all.

What ended up being the most tedious aspect was all the necessary dishwashing between the various stages! This recipe would be a great time to have some helpful assistants around.
The original recipe used special black cocoa paired with peanut butter. I went with normal baking cocoa (Penzey’s), which is less dramatic in color but great with flavor, and my stalwart baking favorite, cookie butter.
Despite my evangelizing, some people are always meeting cookie butter for the first time. It’s found in jars near the nut butters in stores. Trader Joe’s carries it under the name Speculoos. The other major brand is Biscoff. It tastes like spice cookies pureed in oil, because that’s exactly what it is.
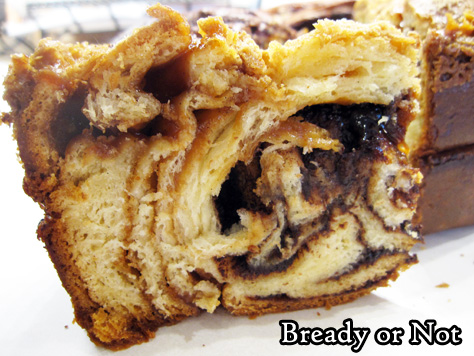
It’s also incredible to bake with because it can even make cookies taste inherently more cookie-like. Here, when it’s used with chocolate, cocoa, and fresh bread, it’s truly amazing.
During baking, I found the exposed swirls of cookie butter actually caramelized, creating a wonderful crunch in the same bite as tender enriched bread. That, along with chocolate?
Oh wow. Oh wow.
Bready or Not: Braided Cocoa and Cookie Butter Brioche
Equipment
- stand mixer
- food scale
- Rolling Pin
- uneven spatula
- bench knife
- pastry brush
Ingredients
- 1 cup warm milk (105-110-degrees F)
- 2 1/4 teaspoons active dry yeast
- 2 large eggs room temperature
- 1/2 cup unsalted butter (1 stick) melted
- 4 teaspoons vanilla extract or vanilla bean paste, divided
- 4 1/2 cup all-purpose flour plus more if needed
- 1/4 cup white sugar
- 1 Tablespoon kosher salt
- 3/4 cup plus 2/3 cup confectioners' sugar divided
- 2/3 cup creamy cookie butter
- 3 Tablespoons unsalted butter melted
- 1/2 cup unsalted butter softened
- 1/2 cup semisweet chocolate melted
- 1/3 cup cocoa powder sifted
- 1 large egg white
- 1 Tablespoon water
Instructions
- In a stand mixer with a paddle attachment, stir together warm milk and yeast, letting it stand about 5 minutes to get foamy.
- Mix in the eggs, 1 stick melted butter, and 2 teaspoons vanilla. Follow up with the flour, sugar, and salt, beating until combined. Switch to the dough hook and beat for about 4 minutes, until smooth.
- Use nonstick spray on a large bowl. Lightly flour a flat surface and turn out the dough to form it into a round. Place it in a bowl, rotating it to grease the entire surface. Cover and let rise for about 1 hour, until it doubles in size.
- Clean everything and return to the stand mixer. Using the paddle attachment, beat the 2/3 cup confectioners’ sugar with the cookie butter, 1 teaspoon vanilla, and 3 Tablespoons melted butter, until smooth. Transfer the mixture to another bowl. set aside.
- Clean the mixer and paddle attachment again. Beat the final stick of softened butter, the melted chocolate, cocoa, remaining 3/4 cup confectioners’ sugar, and last 1 teaspoon vanilla, until smooth. Set aside.
- Lightly flour a flat surface again. Punch down the dough and turn it onto the surface. Use a food scale to divide the dough in half. Stash one half back in the bowl for now, covered to prevent drying. Roll the other half into a 20 by 9 rectangle. Use an uneven spatula to spread the cookie butter filling onto the dough, up to 1/2-inch of the edges all the way around. Starting on a long side, tightly roll up the dough, pinching the seam to seal. Set aside with the seam faced down.
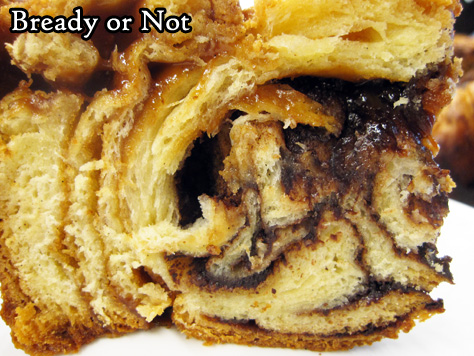
- Roll out the other dough in the same way, this time spreading on the chocolate-cocoa filling. Roll it up as well, placing the two dough rolls side by side. Use a bench knife to cut each roll in half, lengthwise. With the multi-layered middles facing up, twine the strips together.
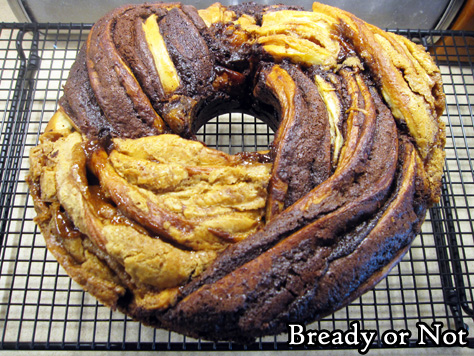
- Apply nonstick spray on tube pan. Lift braid into the pan and tug it to form a complete circle, tucking the ends beneath. Cover the bread and let it rise in a warm spot until it’s puffed, about 30 minutes.
- Preheat oven 350-degrees.
- In a small bowl, whisk together the egg white and water. Brush the top of the dough, touching the cookie butter strands first, then the chocolate; this will prevent the chocolate from smearing too much.
- Bake for about 50 to 55 minutes, covering the bread with foil halfway through to prevent too much browning. When done, the top should be golden and an instant-read thermometer should be above 190-degrees.
- Let cool in pan for about 15 minutes. Turn out onto a plate, then tip it back onto a rack to completely cool, top-up.
- The bread is best eaten within a day, but it can also be sliced up and frozen in pieces. It'll thaw later and taste beautifully fresh! Eat at room temperature or slightly warmed.
