


Bready or Not: Sugar-Dipped Butter Cookies
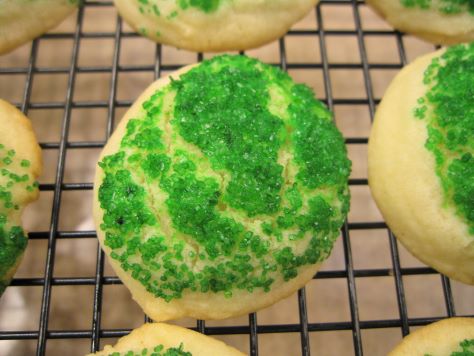
These Sugar-Dipped Butter Cookies are an absolute classic. Easy to make. Nothing fancy. Great to make with kids.
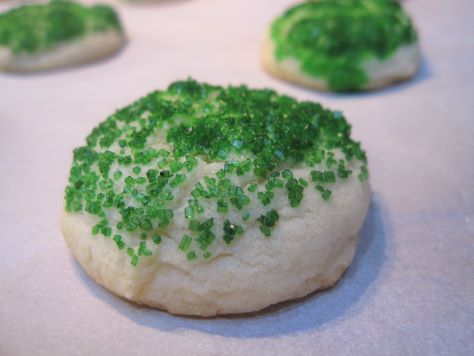
As simple as these cookies are, this recipe suggests a fantastic technique that will be great to apply to other recipes: shape the dough ball, then dip it into water, then dip it in the colored sugar. This gets the sugar to adhere beautifully.
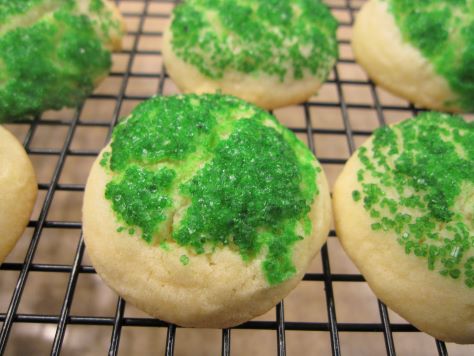
One thing I love about these cookies is that you can mix up the sugar dependent on the season. Making them for Christmas? Go red and green. Make them for a sports gathering? Use team colors. Make them for a birthday? Use favorite colors.
Really, this is a recipe that has fun dough, and is a fun one to make all the way through. Plus, the cookies are tasty, especially with some milk, coffee, or tea.
Bready or Not: Sugar-Dipped Butter Cookies
Equipment
- teaspoon scoop
- baking sheet
- parchment paper
Ingredients
- 1 cup white sugar
- 3/4 cup unsalted butter (1 1/2 cubes) room temperature
- 1 large egg room temperature
- 2 cups all-purpose flour
- 1 teaspoon baking powder
- 1/4 teaspoon salt
- 1/3 cup colored sugar
- water
Instructions
- Preheat oven at 375-degrees. Line baking sheet with parchment paper.
- Beat together white sugar and butter until creamy. Add egg. Mix in flour, baking powder, and salt.
- Place colored sugar in a bowl. Put a small amount of water in a saucer.
- Shape dough into 1-inch balls. Dip top of ball in water, then in sugar. Place colorful side-up on baking sheet, spaced out.
- Bake for 10 to 12 minutes, until set with golden edges. Let cool on a rack, then pack into a sealed container.
OM NOM NOM!
Updated Bibliography December 2022
The Bibliography page has been updated with an array of news and publications:
Big News:
“The Bookstore” (NewMyths) won long form Rhysling Award for 2022!
Short story:
“P is for Pet” (reprint), Paradoxical Pets anthology for middle grade readers
Translated short story:
“Raue Sitten” (Rough Manners) (originally “Canopy of Skulls”), Spektrum.de (Oct 12 2022)
Podcast:
“The Library is Open” (reprint), Manawaker Studio’s Flash Fiction Podcast
Poetry:
“Doing Her Part to Combat Sexism in the Sciences” and “Mother, Grandmother, God,” Star*Line 45.3 Summer 2022
“Better Off,” Star*Line 45.4 Fall 2022
“Summer Evenings,” Frozen Wavelets issue 7
#SFWAPro
Read MoreBready or Not: Chocolate Gingerbread Cookies
These Chocolate Gingerbread Cookies are a fantastic holiday treat. They truly do taste like gingerbread and chocolate together, a great combo if ever there was one.
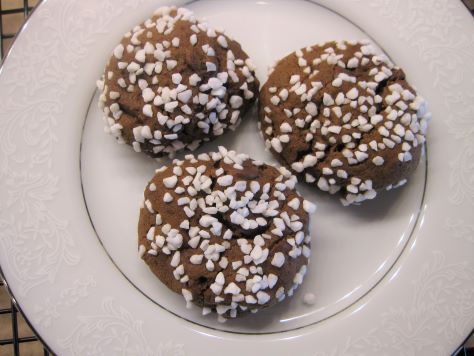
These are made even better by the crunchy outer coating of Swedish pearl sugar, too. If you haven’t baked with it before, you’re in for a treat, This stuff is great on cookies and also pastries. You can find it on Amazon. [affiliate link]
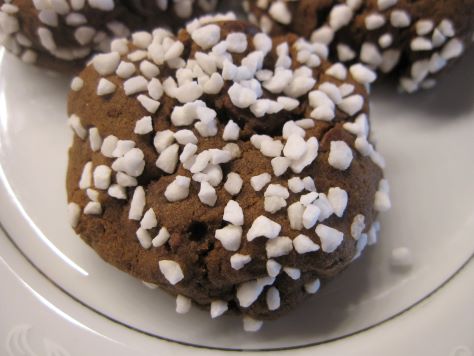
The end result is a cookie that is firm to hold, but soft and chewy to bite into, with the sugar crunching pleasantly between the teeth.
Need other recipes with Swedish pearl sugar? I can help!
Swedish Cinnamon Rolls in the Bread Machine
Bready or Not: Chocolate Gingerbread Cookies
Equipment
- baking sheet
- parchment paper
- teaspoon scoop
Ingredients
- 1 3/4 cups all-purpose flour
- 1 teaspoon baking soda
- 2 teaspoons ground ginger
- 1 teaspoon ground cinnamon
- 1/4 teaspoon cloves
- 1/4 teaspoon nutmeg
- 1/2 teaspoon salt
- 1 Tablespoon baking cocoa or Dutch-process cocoa, sifted
- 1/2 cup unsalted butter (1 cube) room temperature
- 1/2 cup brown sugar packed
- 1/2 cup molasses
- 1 cup semisweet chocolate chips
- 7 Tablespoons Swedish pearl sugar
Instructions
- Preheat oven at 325-degrees. Line baking sheet with parchment paper.
- Stir together flour, baking soda, ginger, cinnamon, cloves, nutmeg, salt, and cocoa. Set aside.
- In a mixing bowl, beat the butter and brown sugar until they are light and creamy. Add molasses. Gradually mix in the dry ingredients. Fold in the chocolate chips.
- Measure the pearl sugar into a bowl. Use a scoop or spoon to create balls of dough. Roll them in the pearl sugar and then set spaced out on pan.
- Bake for 7 to 10 minutes. Let sit on pan for 10 minutes, then transfer to a cooling rack.
- Store in a sealed container at room temperature.
OM NOM NOM!
“The Bookstore” won the long form Rhysling Award!
Wow. This was a shock. My poem “The Bookstore,” originally published in NewMyths #56/57, was recently announced as the winner of the long poem Rhysling Award. You can read the poem here.
This is a fictional autobiographical piece. I wrote it soon after my grandma died. I couldn’t go to the funeral. This poem imagines my visit to a very special bookstore, but many of the details throughout are true to my life. I wrote this in a single sitting, and it was an exercise of grief. That makes this level of recognition all the more extraordinary.
#SFWAPro
Read More