


Recent Poetry Publications
… And by recent, I mean the latter half of 2023. These updates have really fallen through the cracks as I’ve worked on other big projects since the move. I am now, however, temporarily caught up. Huzzah!
- “The Permanence of Stone” (co-written with Rhonda Parrish) and “Bottom of the Jar,” Star*Line 46.4 Fall 2023
- “Just a Girl and Her Stuffed Animals,” Worlds of Possibility (October 2023)
- “Wherein I Assess Viscount Pettigrew and Find Him an Inadequate Match,” Kaleidotrope (October 2023)
- “Persuasive Argument Essay by Mackenzie, Age 8,” Penumbric (June 2023)
- “More Than Big,” Daikaijuzine #4
- “Music” and reprinted “The Bookstore” and “A Sip of Starlight,” Cosmic Muse: Best of NewMyths Volume 4
- “Welcoming the New Girl,” Penumbric (October 2023)
- “As Does the Crow,” Uncanny Magazine issue 53
- “How Magic Will Help You Take the Bastards Down,” The Future Fire issue 2023.67
#SFWAPro
Read MoreBready or Not: Southern Cream Cheese Pound Cake
This Southern Cream Cheese Pound Cake is simple but oh so good. Rich flavors of butter, vanilla, and cream cheese infuse the whole thing.
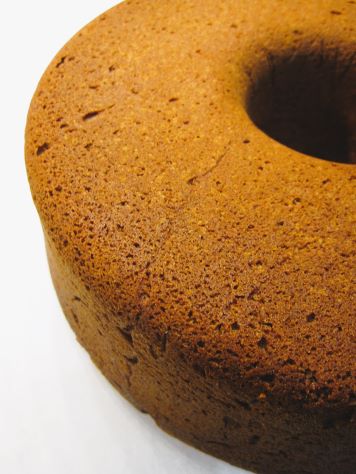
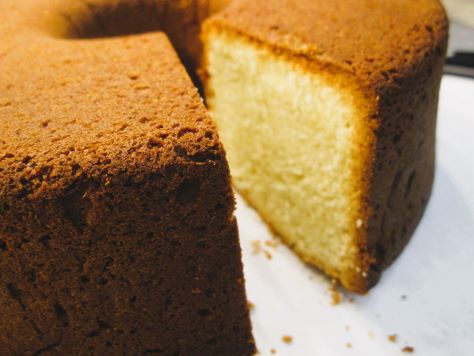
The middle features a velvety crumb while the crust is browned and crisp, creating a wonderful contrast. This has All the Textures.
In full disclosure, this is a recipe that will test your mixer. My poor Kitchen Aid strained to handle this thick, massive quantity of batter. It kept tripping the circuit at the end!
The annoyance was worthwhile, though. This cake is extraordinary. So basic in appearance, and then you take a bite and your mind is blown. Make this one for the holidays this year, and you’ll feed a crowd and awe them while you’re at it.
Modified a lot from Bake from Scratch: Cake 2019.
Bready or Not: Southern Cream Cheese Pound Cake
Equipment
- nonstick spray with flour
- large straight-sided tube pan or angel food cake pan
- stand mixer
Ingredients
- 1 1/2 cups unsalted butter (3 sticks) room temperature
- 8 ounces cream cheese (1 box) room temperature
- 3 cups white sugar
- 1 Tablespoon vanilla extract
- 1 1/2 teaspoons kosher salt
- 6 large eggs room temperature
- 3 cups cake flour
Instructions
- Preheat oven at 325-degrees. Generously coat the interior of the pan with nonstick spray with flour.
- In a stand mixer with a paddle attachment, beat together the butter, cream cheese, sugar, vanilla, and salt until they are fluffy and pale, about 8 minutes, scraping the bowl several times during the process. Add the eggs one at a time, making sure the recent addition is fully mixed in before adding the next. Scrape the bottom of the bowl again. Mix on medium-high for about 3 minutes, until everything is light and airy.
- Gradually add the flour. If the paddle attachment can't handle the load (and/or it is too messy), remove the paddle and use a spatula to incorporate the flour.
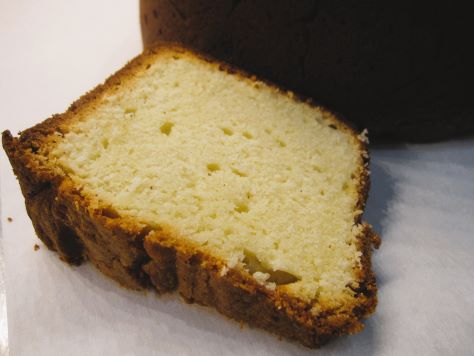
- Scoop the batter into the prepared pan. Level out the top. Bake for about 1 hour and 30 minutes to 1 hour and 40 minutes. When it is done, the top will be golden brown and the middle will pass the toothpick test. Let it cool in pan for about 20 minutes, then invert it onto a rack to cool completely.
- Slice into pieces. It is delicious by itself or can accompany fruit and/or ice cream. Store covered or in individually wrapped pieces at room temperature.
OM NOM NOM!
Notes
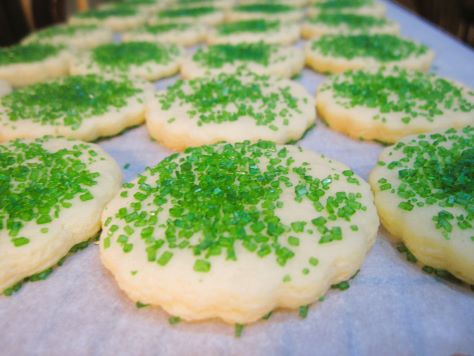
Bready or Not Original: Lemon Butter Cookies
Let’s say you need a lot of cookies. They don’t need to be fancy. You just need something sweet and good that kids and adults will both like. Well, these Lemon Butter Cookies might be just about perfect.
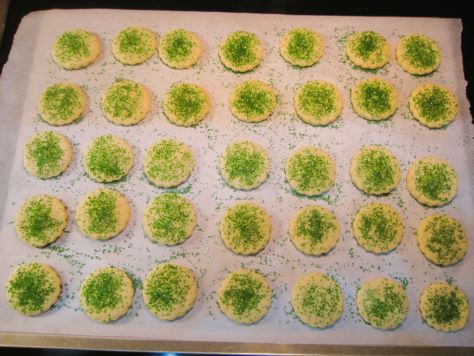
Another thing to know about this recipe: it makes a lot. The entire batch produces over 100 cookies. The nice thing is, though, it’s also a great recipe to divvy up. It’s no problem to keep half the batch wrapped in the fridge to make a day or two later, while the other half is frozen.
Or make them all at once and pretend you can swim through piles of cookies like Scrooge McDuck through his money bin.
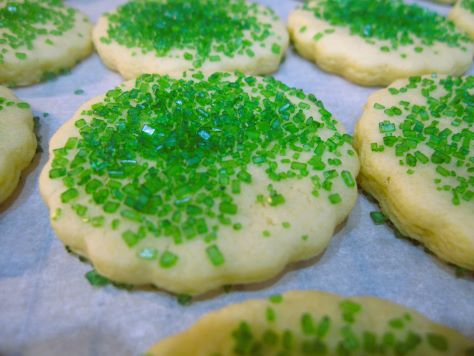
The lemon flavor may make some people think of spring and summer, but I’m of the opinion that good food is good all year long. Plus, you can use different colored sugars to customize it for sports teams or holidays.
Bready or Not Original: Lemon Butter Cookies
Equipment
- parchment paper
- cookie cutter
- cooling rack
Ingredients
- 1 cup unsalted butter (2 sticks) room temperature
- 2 cups white sugar
- 2 large eggs room temperature
- 1/4 cup milk or half & half
- 3 teaspoons lemon extract
- 1 teaspoon vanilla extract
- 4 1/2 cups all-purpose flour
- 2 teaspoons baking powder
- 1/2 teaspoon salt
- 1/4 teaspoon baking soda
- colored sugar for topping, optional
Instructions
- In a large bowl, cream together the butter and sugar until they are light and fluffy. Mix in the eggs one at a time followed by the milk and both extracts. Scrape the bottom of the bowl.
- In another bowl, stir together the flour, baking powder, salt, and baking soda. Gradually add to the wet mix to create a cohesive dough (and it makes a LOT of dough!).
- At this point, the dough can be divided to rest in the fridge or placed in the freezer for weeks. If the cookies will be made today, chill the dough, covered, for about 30 minutes. (Note that if the dough is chilled for a longer time, it will need to sit at room temperature for a bit to become soft enough to roll out.)
- Preheat oven at 350-degrees. Prepare a cookie sheet with parchment paper.
- Lightly flour a clean, flat surface. Roll out the dough to 1/8-inch thickness. Parcel out using a 2-inch inch cookie cutter. Place spaced out a bit on cookie sheet. If using colored sugar, sprinkle atop each cookie to coat. Bake for 8 to 9 minutes, until set. Let the cookies idle on the sheet for a few minutes, then transfer to a cooling rack. Repeat process to make more cookies. Store in a sealed container at room temperature.
- The full batch of cookies will make 100-120, dependent on the thickness.
OM NOM NOM!
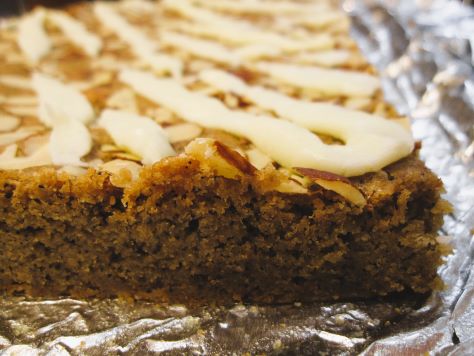
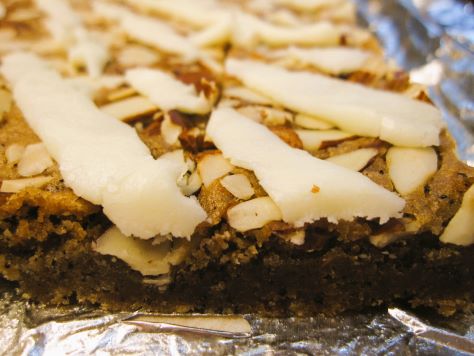
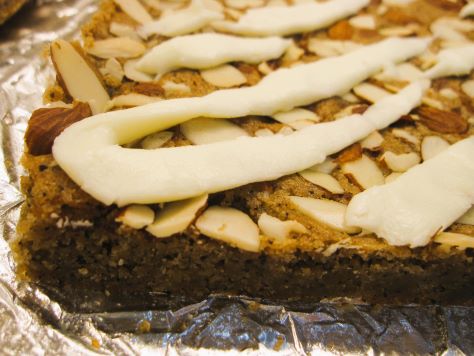
Bready or Not: Irish Coffee Blondies
This Irish Coffee Blondies recipe is a long-overdue revamp of a recipe I first shared over a decade ago on the first iteration of Bready or Not on LiveJournal. I made it a few times after that, only for the paper to be buried amid many other recipes.
As I culled my recipe collection prior to moving, I rediscovered the print-out and knew I had to make it again soon because it’d help me use up some ingredients. Namely, sliced almonds and vanilla extract.
My husband now mostly uses k-cups for his coffee, a brewing method we didn’t have available back when I first baked this. I found that the 3 Tablespoons of ground coffee called for in this recipe were the exact contents of a Starbucks k-cup. I love when things work out like this!
This recipe would make a great dessert, but really, with the flavors, it’s even better for a breakfast or brunch. It’ll go great with coffee or tea!
Bready or Not: Irish Coffee Blondies
Equipment
- 9×13 pan
- aluminum foil
- nonstick spray
- uneven spatula
Ingredients
Blondies:
- 2 cups all-purpose flour
- 1 teaspoon baking powder
- 1/4 teaspoon baking soda
- 1 cup unsalted butter (2 sticks) melted
- 2 cups brown sugar packed
- 3 Tablespoons ground coffee equals 1 K-cup
- 1 teaspoon salt
- 2 large eggs room temperature
- 2 teaspoon pure vanilla extract
- 1/2 cup sliced almonds
Glaze:
- 1 Tablespoon unsalted butter melted
- 1 teaspoon almond extract or vanilla extract
- 1 teaspoon water plus more if needed
- 3/4 cup confectioners' sugar
Instructions
Make the blondies
- Preheat oven to 350 degrees. Line a 9-by-13-inch baking pan with foil and apply nonstick spray.
- In a big bowl, whisk together flour, baking powder, and baking soda. Set aside.
- Place the melted butter into a mixing bowl. Add the brown sugar, ground coffee, and salt. Stir to combine.
- Add eggs one at a time followed by the vanilla extract. Stir in flour mixture until just combined. Pour batter into pan and level out; an uneven spatula makes that easy. Sprinkle with almonds.
- Bake 27 to 30 minutes, until the middle passes the toothpick test. Let cool completely.
To complete with glaze
- Mix together the melted tablespoon butter and extract. Gradually whisk in confectioners’ sugar. Add teaspoons of water, as needed, until the glaze is thick but can be drizzled. Place it in either a pastry bag fitted with a plain round tip or a sandwich bag of which a corner will be snipped off. Drizzle glaze over blondies in a rough crosshatch pattern. Let glaze set for 1 hour before cutting blondies into squares. Store in a sealed container at room temperature. If making these in a warm place, put waxed paper between the stacked layers of blondies.
OM NOM NOM!
Follow me


