Bready or Not Original: Chewy Coffee-Cocoa Nib Cookies
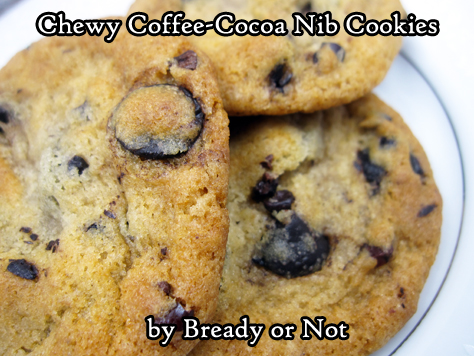
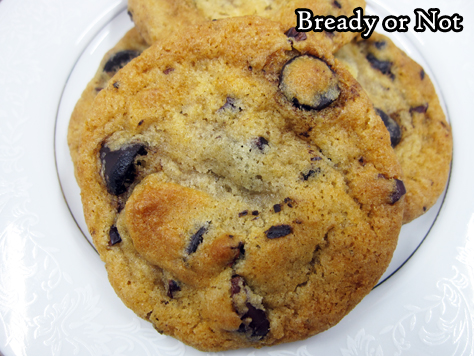
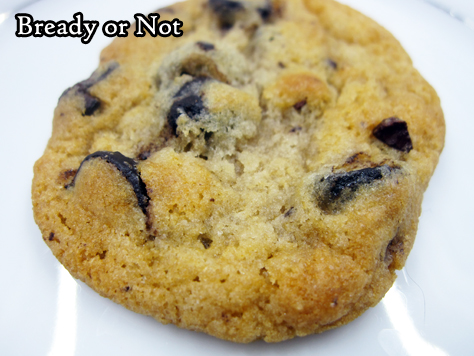
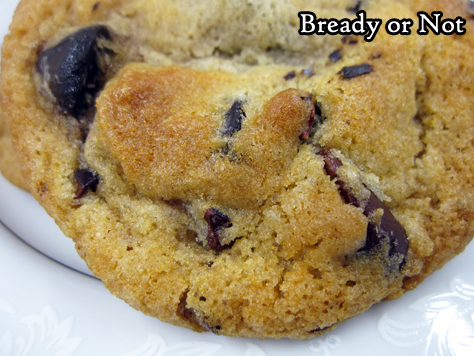
Espresso-flavored chocolate chips are a new fad in American grocery stores, and I use them in this original recipe for Chewy Coffee-Cocoa Nib Cookies!
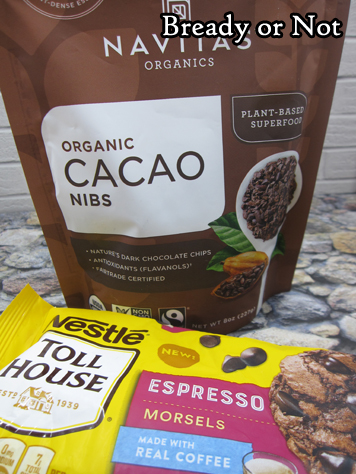
I’ve tried two kinds of espresso chocolate chips. My favorite of the two was Tollhouse, which had a nice, clean coffee flavor that stayed nice and strong in the baked cookies, too.
I also mixed in cocoa nibs. Nibs are VERY strong in flavor, so you don’t need much to add a boost of flavor and crunch.
The flavor in these cookies is up-front when they are fresh from the oven, but after a day, I found the flavors deepened a good deal.
These make for a perfect snack paired with coffee or tea, and remember, they contain some caffeine! Perhaps eat them for breakfast rather than as a midnight snack.
Bready or Not Original: Chewy Coffee-Cocoa Nib Cookies
Ingredients
- 3/4 cup unsalted butter 1 1/2 sticks, softened
- 1/2 cup light brown sugar packed
- 1/2 cup white sugar
- 2 Tablespoons honey
- 1 large egg room temperature
- 1 Tablespoon vanilla extract
- 1 cup bread flour
- 1 cup all-purpose flour
- 2 teaspoons cornstarch
- 1 teaspoon baking soda
- 1/2 teaspoon salt
- 1 cup espresso-flavored chocolate chips Tollhouse recommended
- 1/3 cup cocoa nibs
Instructions
- In a large bowl, beat the butter until smooth. Add the sugar and honey and beat until creamy and fluffy, about 3 minutes. Scrape down the sides of the bowl and then mix in the egg and vanilla extract.
- In a separate bowl, combine the dry ingredients: bread flour, all-purpose flour, cornstarch, baking soda, and salt. Sift together.
- Slowly stir together the wet ingredients and flour mix until just combined. Sprinkle in the chocolate chips and nibs. Wrap the dough in plastic wrap and stash in the fridge for several hours or days; dough can also be frozen at this stage.
- When ready to bake, preheat the oven at 350-degrees. Use greased stoneware, parchment paper, or silpat mats. The cookie dough, even straight from the fridge, has a soft Play-Doh-like consistency, and will spread when it bakes; keep this in mind when spacing cookie dough.
- Teaspoon-sized cookies need to bake 9 to 12 minutes; Tablespoon-sized take 11 to 13 minutes. Let set on cookie sheets for 10 to 15 minutes before moving to a rack to cool completely.
- Store cookies will keep in a sealed container, between waxed paper or parchment layers. Coffee and chocolate flavors will likely deepen after a day,.
OM NOM NOM!
West Valley View piece on my newest Chicken Soup for the Soul story
My local paper the West Valley View did a story about my nonfiction tale in the new release Chicken Soup for the Soul: The Magic of Cats. Read that here!

Bready or Not Original: Mixed Nut Bars
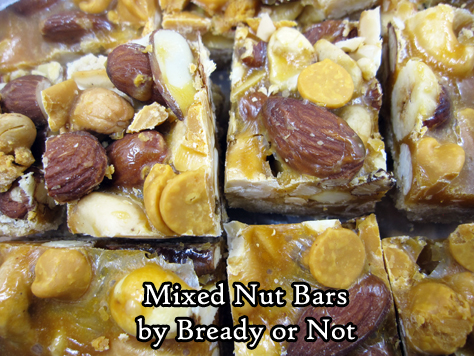
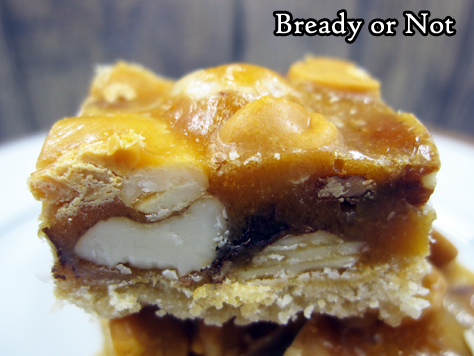
This has been a nutty year. Time to make it nutty in a delicious way with these Mixed Nut Bars.
The amount of nuts here is the equivalent of the can size found in many American stores, but I buy my nuts in bulk. (I’m cheap like that.)
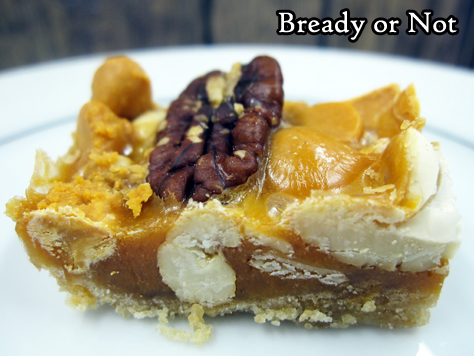
Use whatever combination of nuts you like. I would recommend having at least two kinds mixed in, to make it fun. Really, throw in what you like.
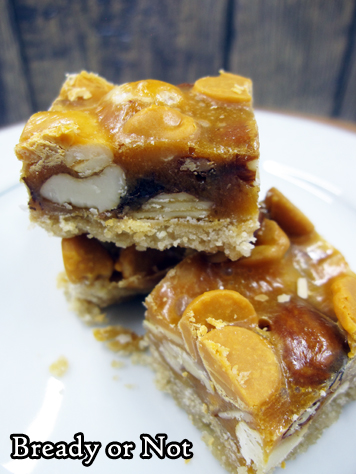
If you’ve followed Bready or Not for a while, you know I love caramel chips. They are awesome in this recipe! They make these bars sweet without it being overkill.
Make this to share with numerous folks. You essentially end up with a 13×9 pan of little candy bars. I imagine that they will keep well for days or even a week, but I can’t testify as to how long. When my husband took these to his work (in those halcyon days when that was allowed), they were gone in hours.
Bready or Not Original: Mixed Nut Bars
Equipment
- 13x9 pan
Ingredients
Dough
- 1 1/2 cups all-purpose flour
- 3/4 cup brown sugar packed
- 1/4 teaspoon salt
- 1/2 cup unsalted butter 1 stick
Nutty layer
- 11 1/2 ounces mixed nuts
- 1 cup caramel chips plus extra 1/2 cup for top, optional
- 2 Tablespoons unsalted butter
- 1/2 cup light corn syrup
- 1/2 teaspoon vanilla extract
Instructions
- Preheat oven at 350-degrees. Line a 13x9 pan with aluminum foil and apply nonstick spray.
- In a small bowl, stir together flour, sugar, and salt. Cut in the cube of butter until it resembles coarse crumbs. Dump into prepared pan and compress into an even layer; a strip of waxed paper and a heavy glass make this easier.
- Bake base layer for 10 to 12 minutes, until it looks set. Sprinkle nuts over the baked dough.
- In the microwave, melt 1 cup caramel chips with the 2 Tablespoons butter by cooking for 20 second increments and stirring well between each pass, until smooth. Stir in corn syrup and vanilla extract. Pour over the nuts to cover as much as possible.
- Bake for 12 minutes. If adding extra caramel chips, do so now, covering any thinner areas atop crust. Bake another 5 minutes.
- Cool completely at room temperature. Use foil sling to lift contents onto a large cutting board. Slice into bars.
- Store at room temperature in sealed containers.
OM NOM NOM!
Bready or Not: Jam and Cream Brioche Tart
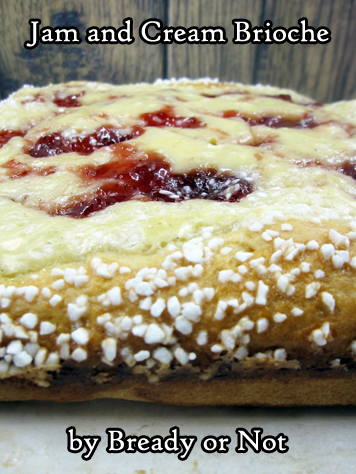
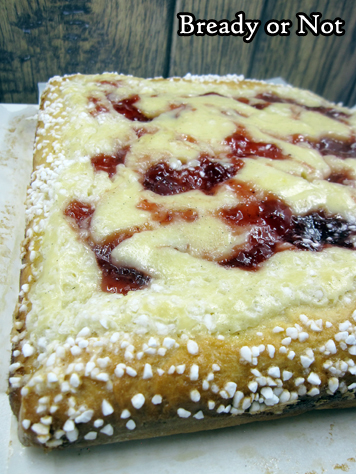
This Jam and Cream Brioche Tart is probably among the most extraordinary things I’ve ever baked, and that is saying something.
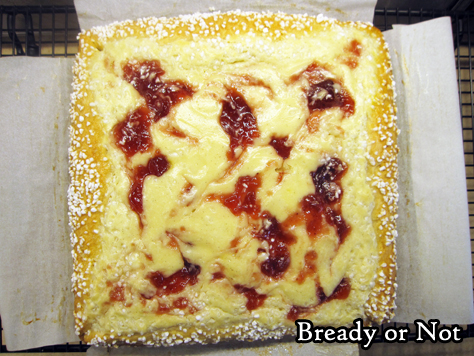
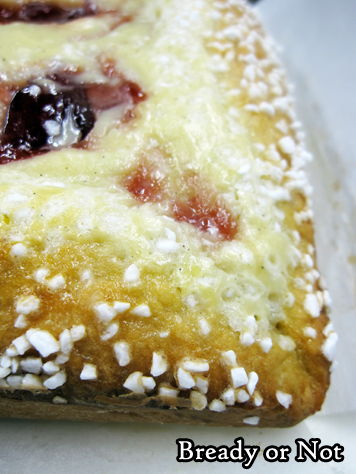
First of all, the end result is gorgeous. Golden, thick crust freckled by pearl sugar. Marbled cream cheese and contrasting jam, with flecks of vanilla bean throughout.
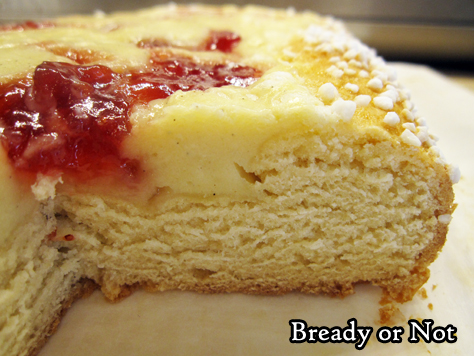
The tart is as delicious as it looks, too. The enriched dough is sweet and soft, providing a luscious base for the different kind of sweet-and-soft offered by the filling.
This is a showstopper of a dessert or breakfast.
The only unusual ingredient involved is the Swedish pearl sugar. I bought it on Amazon. I consider it a worthwhile investment, as there are a number of other pastry recipes I want to try that also use it. Plus, heck, you could even throw them on waffles or fruit or whatever.
Another not-quite-so-obscure ingredients I suggest you use is vanilla bean paste. This is VERY useful if you’re making fancy desserts because you get the flecks of vanilla beans without the high cost of using actual vanilla beans.
In a cream cheese filling or frosting, those flecks really stand out, and they add a lot to the WOW factor. Which this tart already has, many times over.
Recipe modified from Bake from Scratch, Sep/Oct 2019.
Bready or Not: Jam and Cream Brioche Tart
Equipment
- 9x9-inch pan
- parchment paper
Ingredients
For Brioche
- 1/3 cup plus 1 tablespoon whole milk or half & half
- 2 3/4 cups all-purpose flour
- 3 Tablespoons white sugar
- 2 1/4 teaspoons instant yeast
- 1 1/2 teaspoons kosher salt
- 3 large eggs room temperature and divided
- 1 teaspoon vanilla extract
- 6 tablespoons unsalted butter softened
For Cream Cheese Filling
- 2 tablespoons unsalted butter softened
- 1/3 cup white sugar
- 1 teaspoon vanilla bean paste or substitute vanilla extract
- 1/4 teaspoon kosher salt
- 8 ounces cream cheese softened
- 1 large egg room temperature
- 3 Tablespoons all-purpose flour
To Finish
- 2 Tablespoons fruit preserves use good quality stuff with nice chunks
- 1 Tablespoon water
- 1 1/2 Tablespoons Swedish pearl sugar
Instructions
- Using the microwave and a safe dish, heat the milk to between 120 and 130 degrees. Set aside.
- In the bowl of a stand mixer with a paddle attachment, beat the flour, white sugar, yeast, and salt at very low speed until combined, about 30 seconds.
- Slowly add the warm milk to incorporate. Add 2 of the eggs along with the vanilla, and beat for about 1 minute. Switch to the dough hook attachment. Beat at low speed until smooth and elastic, about 8 minutes.
- Add butter, about 1 tablespoon at a time, letting each piece incorporate before adding the next, about 8 minutes total. (If it refuses to incorporate, switch back to the paddle for this stage.) Beat until a smooth and elastic dough forms, about 6 minutes.
- Lightly flour a stretch of counter or tabletop and dump the dough there. Knead it for a minute or so and form it into a smooth round.
- Apply cooking spray inside a large bowl. Place the dough inside and give it a spray, too, to prevent sticking. Cover with a towel or plastic wrap in a warm spot to rise until doubled, 30 to 45 minutes.
- Cut parchment paper to line pan going up all four sides. Apply nonstick spray to pan, then lay both strips inside the pan and spray the top-most sides.
- On a lightly floured surface, roll the dough into an 11-inch square. Score a 9-inch square in center of dough (using the pan as a reference, if needed). Fold outside 2 inches over score mark, creating a crust around edges.
- Place dough in the prepared pan, making sure it is even and fills corners of pan. Cover and let rise until puffed, 20 to 30 minutes.
- Meanwhile, prepare the cream cheese filling. Beat together the butter, sugar, vanilla bean paste (or extract), and salt until well combined. Gradually add cream cheese, beating until smooth. Add egg to incorporate, followed by the flour.
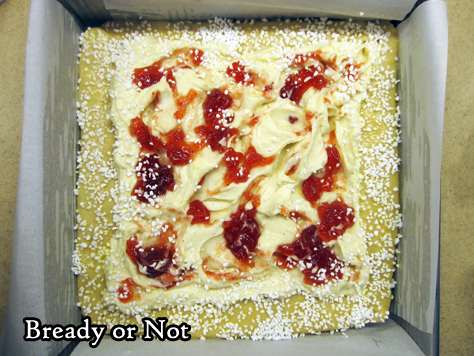
- Preheat oven to 325-degrees. Using your fingertips to dimple the center of dough back down, leaving outside crust as is. Pour the cream cheese mix into the center of dough. Make small indentations in the cream cheese then add dollops of the preserves. Use a knife to swirl the fruit in a bit more.
- In a small bowl, whisk together the 1 tablespoon water and remaining egg. Brush the crust with the egg wash, then finish by sprinkling the pearl sugar all over the edge.
- Bake until the crust is golden brown with the filling set around outside edges, about 35 to 40 minutes. (If desired, check the temp: an instant-read thermometer inserted in center of filling should register 175°F.)
- Let cool in pan for 10 minutes then use the parchment sling to lift up the tart onto a serving plate or rack. Eat fresh, or let cool.
- Tart keeps for days well-wrapped in fridge. Eat slices cold, or make pieces even more delicious with a short zap in the microwave.
OM NOM NOM!
Listen to “Toilet Gnomes at War” at The Overcast
Are you taking proper care of your household gnomes? You’ll find out the hard way if you don’t!
My story “Toilet Gnomes at War” is an old favorite for many of my readers, and it has now been podcast for the first time! If you want to start your week with a story that is fun and whimsical with a lot of genuine heart, this is the story for you.
Listen to it at The Overcast!
#SFWAPro
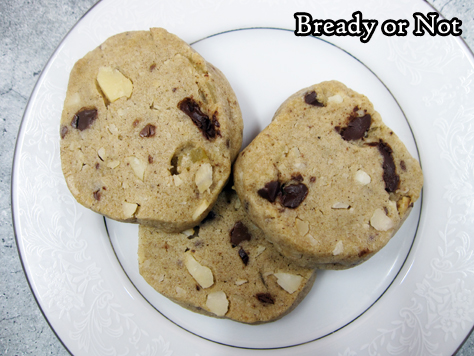
Read MoreBready or Not Original: Spiced Maple Macadamia Nut Cookies
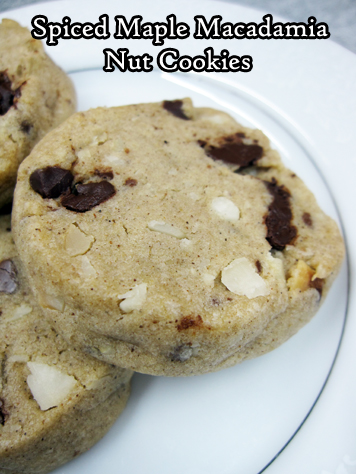
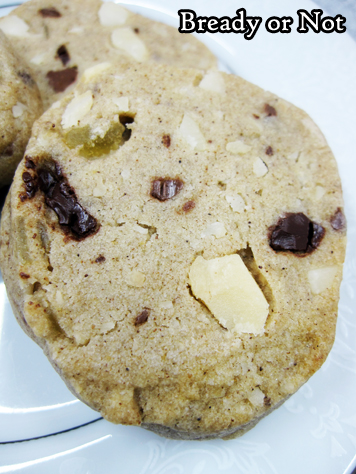
These Spiced Maple Macadamia Nut Cookies mix maple sweetness and warm spices and chocolate with the wonderful crunch of macadamias. They are perfect for fall–and throughout the year.
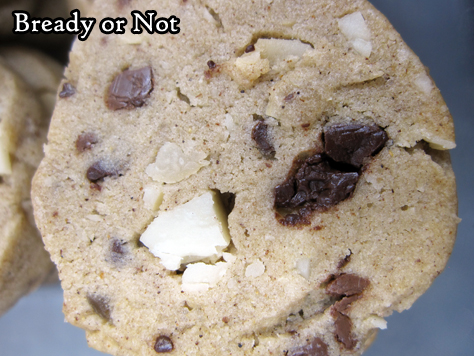
A food processor will be a big help in this recipe. The nuts and chocolate need to be in fine slivers. If the chunks are too big, the sliced cookies won’t be cohesive.
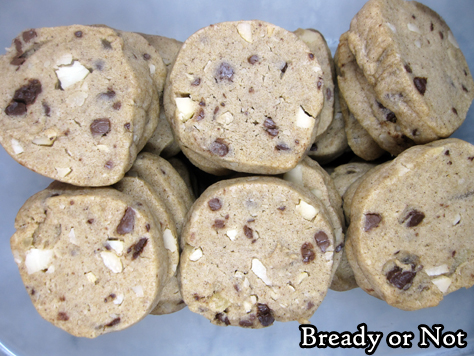
These are fridge cookies. Form the dough into tube shapes, wrap up well, then stash them in the fridge or freezer. Then thaw, slice, and bake when you need cookies.
If you do the full batch at once, you’ll likely get a lot of cookies, depending on your tube size and how you slice them. I got about 70 cookies.
These are perfect cookies to warm up your belly on a cool autumn or winter night (or in Arizona, to make-believe in such a temperature shift).
Bready or Not Original: Spiced Maple Macadamia Nut Cookies
Equipment
- food processor
Ingredients
- 1 1/2 cups unsalted butter 3 sticks, room temperature
- 1/2 cup white sugar
- 3/4 cup real maple syrup
- 4 cups all-purpose flour
- 3 teaspoons ground ginger
- 3 teaspoons ground cinnamon
- 1 teaspoon allspice
- 1/2 teaspoon ground cloves
- 1 teaspoon salt
- 1 1/2 teaspoons baking soda
- 1 cup macadamia nuts
- 3/4 cup chocolate chips semisweet or dark or mixture
- 1/3 cup candied ginger finely chopped
Instructions
- In a food processor or by knife, finely chop macadamia nuts, followed by the chocolate chips. Set aside. (If these are not in fine pieces, the dough will fall apart when sliced.)
- In a large bowl, cream together butter and sugar until light and fluffy. Beat in maple syrup.
- In a separate bowl, stir together the flour, spices, salt, and baking soda. Gradually work this into the creamed mixture. Fold in the nuts, chocolate, and candied ginger until incorporated.
- Divide dough in half and shape into foot-long logs. Encase in plastic wrap. Chill at least two hours, or freeze for later baking.
- Preheat oven at 350-degrees. Unwrap log and cut dough into 1/4-inch thick medallions, reshaping with fingers as needed. Place spaced out on parchment-covered cookie sheet.
- Bake for 10 to 12 minutes, until set with a firm, golden base. Cool on pan for 5 minutes then move to rack to completely cool.
- Cookies keep for at least 3 days in sealed containers at room temperature.


