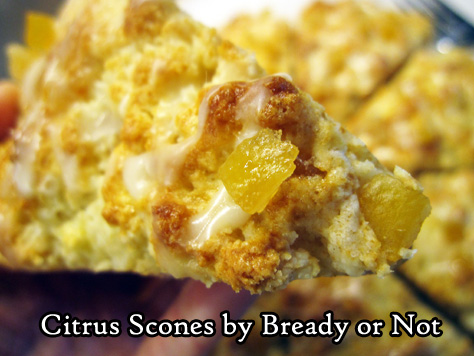
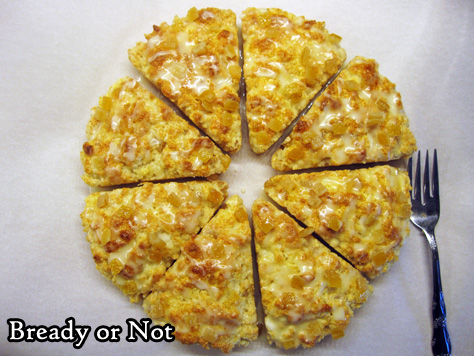
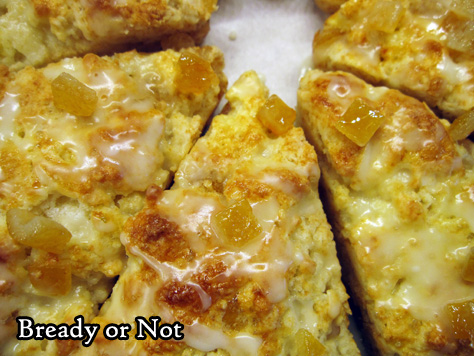
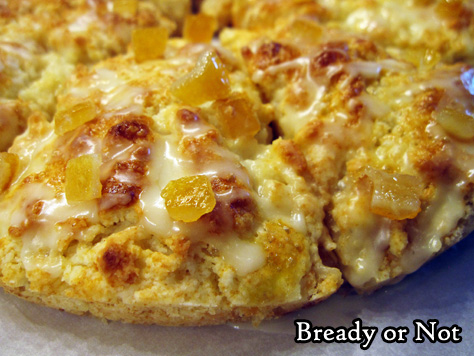
Bready or Not Original: Citrus Scones
These citrus scones offer a bright way to start the day in portable and delicious form!
I managed to score a container of candied citrus peel–the stuff usually used in fruitcakes–on an after-Christmas clearance. “Oh, what to do with us?” I wondered.
Finally, it hit me: scones! An original scone recipe that my husband could enjoy before work.
Of course, I had to add a glaze. Orange juice and confectioners’ sugar made that easy.
Plus, I found that the scones freeze like a charm, even while glazed! They thaw quickly at room temperature, too.
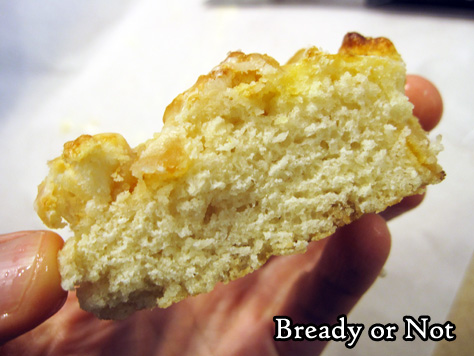
Unlike other scone recipes I’ve made, this one produces soft, fluffy results. Not dry or crumbly at all. I credit the sour cream for that. It sure works wonders in cakes and bars, too.
Bready or Not Original: Citrus Scones
Ingredients
Scones:
- 1 3/4 cups all-purpose flour
- 1/4 cup white sugar
- 4 teaspoons baking powder
- 1/8 teaspoon salt
- 5 Tablespoons unsalted butter
- 1/2 cup plus 1 Tablespoon milk or half & half
- 1/4 cup sour cream
- 1/3 cup candied orange peel
- 1 egg lightly beaten
Glaze:
- 1/2 cup confectioners' sugar
- 3 teaspoons orange juice [or water]
- sprinkle of additional orange peel optional
Instructions
- Preheat oven at 400-degrees.
- In a large bowl, whisk together flour, sugar, baking powder, and salt. Cut in the butter until it resembles coarse crumbs.
- In a different bowl, stir together 1/2 cup milk and sour cream. Stir into dry ingredients until it just holds together, adding more milk if needed. Fold in the candied citrus peel.
- If using a scone pan, pack the dough into the triangular holes. If shaping by hand, transfer the cohesive dough to a large piece of parchment paper on a large cookie sheet. Shape into a large, even circle. Slice into eight wedges and separate them slightly.
- Whisk egg and remaining tablespoon of milk and brush them atop each scone.
- Bake until scones are golden brown, 15 to 17 minutes. Leave on pan to cool for 20 minutes.
- To glaze, mix together confectioners' sugar and orange juice to create a thick, dribbly consistency. Spoon atop scones. Immediately sprinkle on more candied orange peel and gently press into tops of scones.
- Scones are best eaten within the day, but they can be frozen even while glazed. Freeze on waxed paper then transfer to a freezer bag or plastic container. They thaw quickly at room temperature.
- OM NOM NOM!
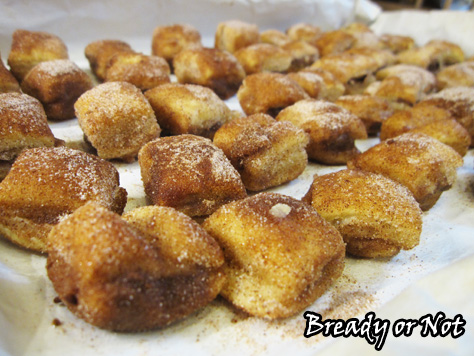
Bready or Not: Stuffed Churro Nuggets
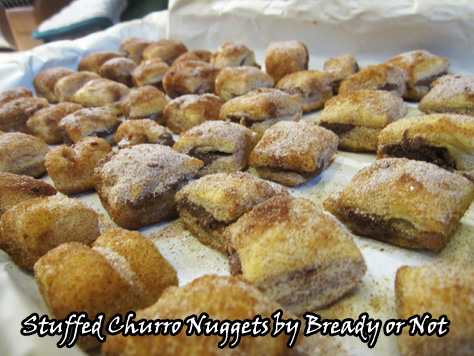
With Cinco de Mayo two days away, let’s revisit a classic Holy Taco Church recipe: Stuffed Churro Nuggets.
This recipe is EASY. It uses store-bought puff pastry. (I mean, you can use a homemade version, but even the great Mary Berry of the Great British Bake Off says she prefers the store kind.) I haven’t tried it with gluten-free puff pastry, but I know that it exists; if anyone uses that with this recipe, let me know how it turns out!
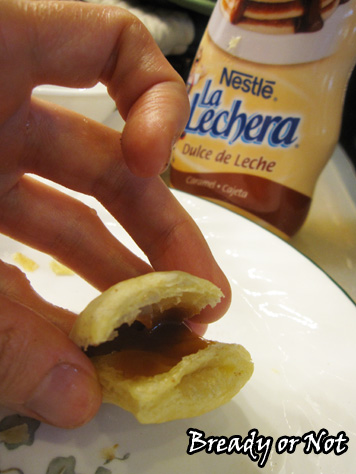
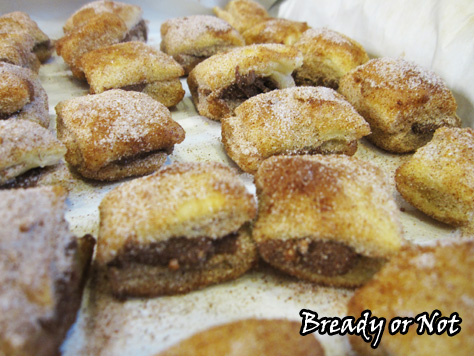
You can choose whatever filling you want. I like to make this and fill half with Nutella and half with Dulce de Leche, but you could try this with any kind of thick, spreadable delicious stuff.
Maybe try peanut or other nut butters? Or maple butter? (OOOOOOOOH.) But trust me, you can’t go wrong with Nutella and Dulce de Leche (and if you can find the squeeze bottle Dulce de Leche, it’s especially convenient).
These nuggets are best eaten the same day, but if you take this to any sizable gathering, that won’t be a problem. These are a perfectly-sized hors d’oeuvres, and I doubt that anyone will have just one!
Bready or Not: Stuffed Churro Nuggets
Ingredients
Nuggets
- 1/2 package puff pastry 1 bag out of a 2 pack box
- 1/4 cup unsalted butter 1/2 stick
- 1/2 cup white sugar
- 1 Tablespoon cinnamon
Choose your stuffing! One of these or something else
- Nutella
- Dulce de leche squeeze bottle, can, etc
Note that if your filling is stiff, you can make it more spreadable with a zap in the microwave. Make sure you do so in a microwave-safe container.
Instructions
- Let puff pastry come to room temperature. Preheat oven at 425-degrees.
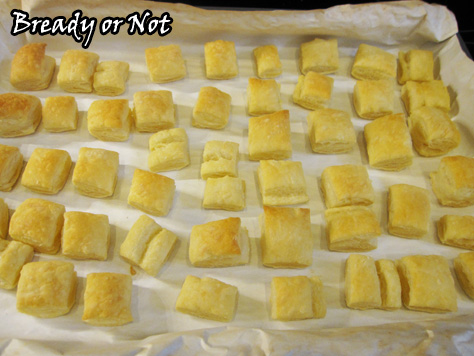
- Get out a large cookie sheet and line it with parchment paper. Unfold puff pastry onto the surface and use a pizza cutter to quickly cut the dough into 1-inch cubes.
- Bake for 10 to 15 minutes, until the squares are puffed and golden.
- Set out whatever will be used to stuff the nuggets. Mix together the sugar and cinnamon in a bowl. In another bowl, melt the butter.
- Remove the puff pastry from the oven. Pop open each cube by removing the top completely or opening it as if on a hinge--it's surprisingly easy, with those flaky layers--and add a dab of filling. Close the pastry, then roll it in butter and then in cinnamon-sugar.
- Churro Nuggets are best eaten the same day. Store them in a sealed container, with parchment or waxed paper between layers.
- OM NOM NOM!
Goodreads Book Giveaway
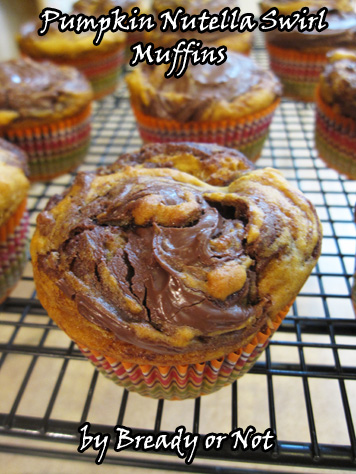
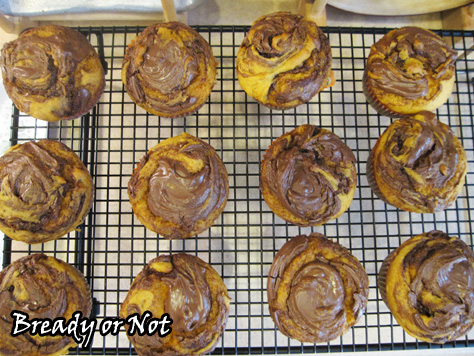
Bready or Not: Pumpkin Nutella Swirl Muffins
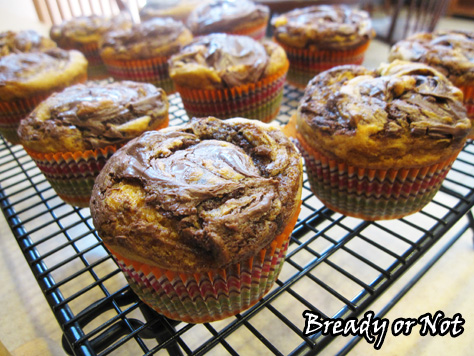
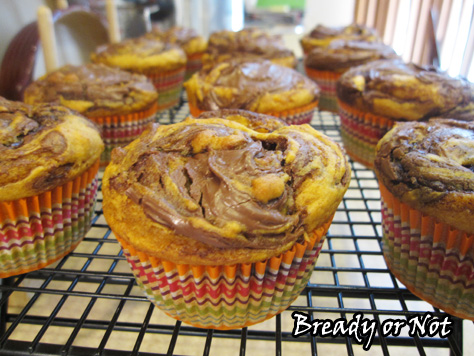
Some foods are delicious but not particularly photogenic. These Pumpkin Nutella Swirl Muffins, however, have it all going on.
Chocolate and pumpkin are a fantastic pairing. Nutella works so well here, creating a shiny chocolatey cap to these bright orange muffins.
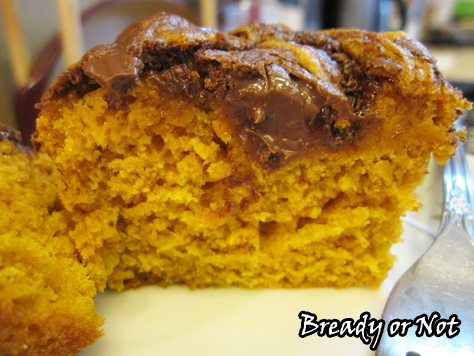
The texture of these is magnificent: cakey and fresh, with a light pumpkin taste. Plus Nutella. We can’t forget the Nutella.
Speaking of which… if your Nutella is older or you’re near the bottom of the jar, it can be lumpy and hard to spread. To fix that, put the Nutella in a microwave-safe dish and give it a zap in the microwave.
Trust me, that lumpy Nutella may still be delicious, but you want it to be soft enough to create a beautiful swirl on these muffins!
Modified from The Novice Chef.
Bready or Not: Pumpkin Nutella Swirl Muffins
Ingredients
- 2 cups all-purpose flour
- 1 teaspoon baking soda
- 1 teaspoon baking powder
- 1/2 teaspoon salt
- 1 cup pumpkin puree
- 1/2 cup white sugar
- 1/2 cup brown sugar packed
- 1 large egg room temperature
- 2 Tablespoons vegetable oil
- 2 Tablespoons milk or almond milk
- 2 teaspoons vanilla extract
- 1/3 cup Nutella or other hazelnut cocoa spread
Instructions
- Preheat oven at 350-degrees. Line muffin pan with liners and apply nonstick spray.
- In a medium bowl, whisk together the flour, baking soda, baking powder and salt. Set aside.
- In large bowl, combine the pumpkin puree, white sugar, and brown sugar. Beat in the egg, vegetable oil, milk, and vanilla extract. Slowly mix in the dry mixture until it is just blended.
- Add the batter to the muffin pan, filling each about 3/4 full. Top each muffin with about a teaspoon of Nutella and use a butter knife to swirl it into the batter.
- Bake muffins for 14-16 minutes, or until a toothpick inserted in a center muffin comes out clean.
- Serve warm or at room temperature. Store in a sealed container.
- OM NOM NOM!
Read More
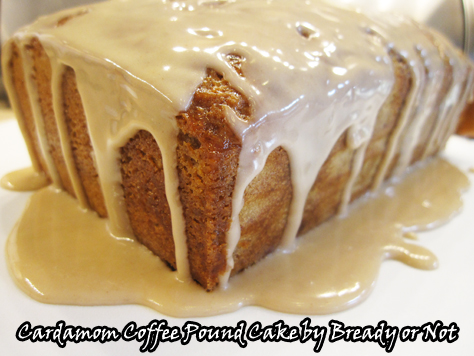
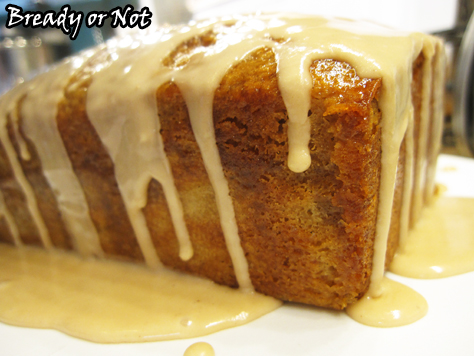
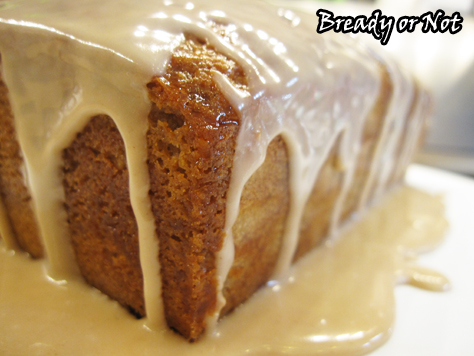
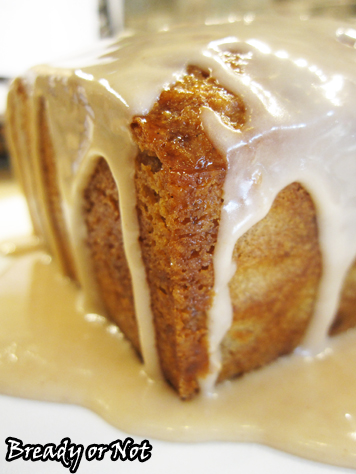
Bready or Not: Cardamom Coffee Pound Cake
Eat your morning coffee in this luscious Cardamom Coffee Pound Cake!
Weird fact: I actually considered skipping the glaze on this because I figured it would be a delicious cake on its own. What was I thinking? The glaze makes this cake.
My husband’s workplace lives on coffee. He brought this loaf cake and it was consumed almost instantly. Apparently, the loaf was practically divine when paired with a hot cup of coffee.
This recipe has coffee going on all over the place, too. Espresso powder is in the cake batter. Brewed coffee is infused in the baked cake, and is also the primary liquid in the glaze. Plus, it uses one of my favorite spices: cardamom. Which happens to be perfect along with coffee.
Modified from Relish Magazine.
Bready or Not: Cardamom Coffee Pound Cake
Ingredients
For the cake:
- 1 1/2 cups all-purpose flour
- 2 teaspoons baking powder
- 1/2 teaspoon salt
- 1 teaspoon cardamom
- 1 cup vanilla low fat yogurt or vanilla or plain Greek yogurt, or sour cream
- 1 cup white sugar
- 3 eggs room temperature
- 1/2 teaspoon vanilla extract
- 1 teaspoon espresso powder dissolved in 1 teaspoon water
- 1/3 cup olive oil or vegetable oil
For coffee infusion:
- 1/4 cup brewed coffee
- 1/4 cup white sugar
For icing:
- 1 cup confectioners' sugar sifted
- 2 Tablespoons brewed coffee
- pinch cardamom
Instructions
- Preheat oven to 350-degrees. Cut a piece of parchment paper to act as a sling across the wide part of a 8 1/2 by 4 1/4-inch loaf pan. Grease the pan well, press in the parchment paper inside so it sticks up on either end, and grease the paper as well.
- In a medium bowl, combine flour, baking powder, salt and 1 teaspoon cardamom. Set aside.
- In a large bowl, combine yogurt/sour cream, 1 cup sugar, eggs, vanilla extract, hydrated espresso powder, and oil; whisk well.
- Gradually stir in flour mixture.
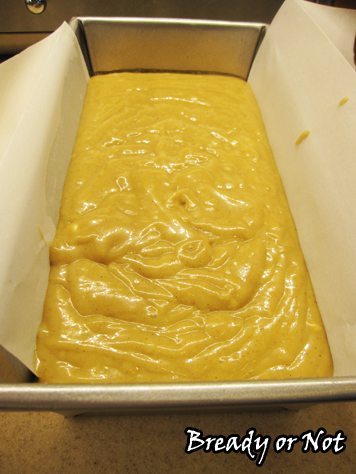
- Pour batter into prepared pan and bake 50 to 55 minutes, until it passes the toothpick test in the middle of the loaf. Let it cool in pan for 10 minutes then lift out by the parchment and place on a wire rack over a sheet pan. You can reuse the parchment by placing it beneath the rack to make the next clean up stage easier, too.
- While the loaf is still warm, use a chopstick or skewer to poke deep holes all over the top and sides. Use a saucepan to heat up the 1/4 cup brewed coffee and 1/4 cup sugar until the sugar is dissolved. Slowly spoon the coffee mix over the cake, giving the liquid time to soak in; use it all, with the excess dripping into the pan below.
- When the loaf cake is completely cool, make the icing. Combine sifted powdered sugar, remaining 2 tablespoons brewed coffee, and pinch of cardamom. Stir until smooth. Add more sugar or a touch of coffee (or milk or water, in a pinch) if needed for consistency. Drizzle glaze over cake.
- OM NOM NOM!
Read More
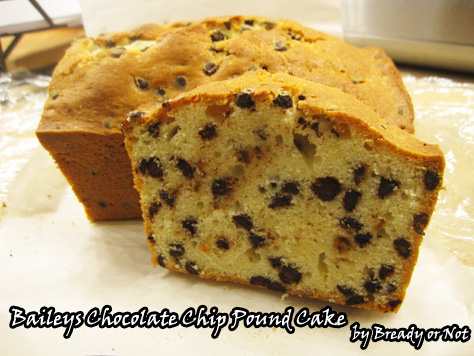
Bready or Not: Baileys Chocolate Chip Pound Cake
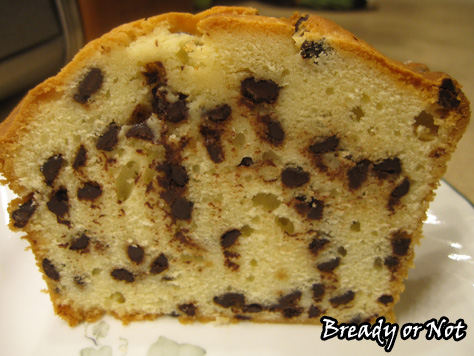
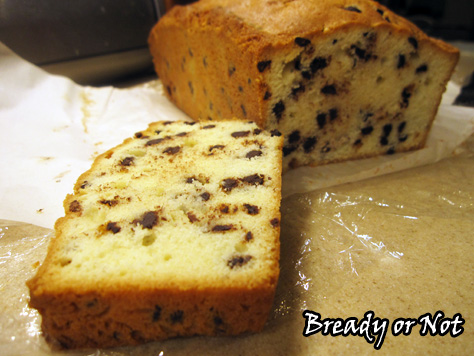
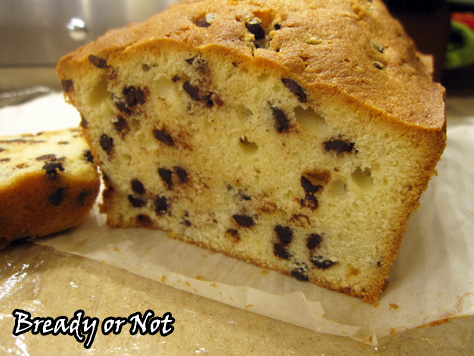
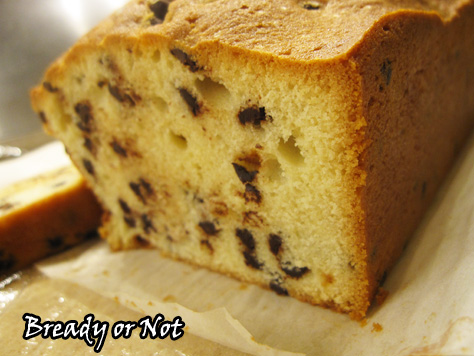
Today we wrap up the Baileys Coffee Creamer theme with an amazing pound cake that’s perfect for breakfast or snack.
The original version of the recipe used alcoholic Baileys and also included it in a chocolate glaze. I decided to do without the glaze (I know! Gasp!) but I think it was a good call. The cake is perfectly sweet on its own, and the mini chips add the perfect amount of chocolate taste.
The combination of the nonalcoholic coffee creamer and sour cream lend this a tender yet dense crumb. It slices easily because of the mini chips.
The most impressive thing about this pound cake was that it was delicious fresh, and it was just as delicious five days later. We kept it shrouded in plastic wrap at room temperature.
This is a pound cake you’ll want to pound into your mouth, again and again.
Modified from Lemon Tree Dwelling.
Bready or Not: Baileys Chocolate Chip Pound Cake
Ingredients
- 1/2 cup unsalted butter 1 stick, room temperature
- 3 eggs
- 1/4 cup sour cream
- 1/4 cup Baileys Irish Coffee Creamer or Irish Cream
- 1 1/2 cups all-purpose flour
- 1/4 teaspoon baking powder
- 1/8 teaspoon baking soda
- 1 cup white sugar
- 1 cup mini chocolate chips
Instructions
- Prepare the loaf pan by coating with nonstick spray, then cutting a sling of parchment paper to fit the width of the pan that can stick up on either side. Apply nonstick spray on that as well.
- Preheat oven at 325-degrees.
- In a mixing bowl, beat butter until it's creamy. Gradually add the sugar and continue to beat 4 or 5 minutes, or until it's light and fluffy. Stop and scrape the bowl a few times.
- While that is beating, in a separate small bowl combine the flour, baking powder, and baking soda. In another bowl, whisk together the Baileys and sour cream. It's okay if it's a bit lumpy.
- In the butter-sugar bowl, add the eggs one at a time and mix well in between. Pour in the dry mix and the Baileys mix a bit at a time, going back and forth, until everything is just combined. Stir in the mini chocolate chips. Pour batter into the prepared loaf pan.
- Bake for 65-75 minutes or until it passes the toothpick test in the middle of the loaf.
- Cool on a rack for 20 minutes then use the paper sling to lift it up to cool completely. Store in layered plastic wrap at room temperature. Keeps well for at least 5 days.
- OM NOM NOM!
Read More
Bready or Not Guest: Megan E. O’Keefe with Baklava
I’m happy to welcome author Megan E. O’Keefe! Her debut novel Steal the Sky is out from Angry Robot on January 5th. It features airships and con men and a gorgeous cover. She’s here today to share a delicious-looking recipe for baklava.
When I was first considering what to bake for Bready or Not I knew that, due to the time of year, I wanted to do a holiday bake. Something the people of the Scorched Continent would make for a winter celebration. My first thoughts were fruitcake-esque, as dried fruit is pretty much the only way people on the Scorched eat fruit, but that didn’t quite work.
You see, the Scorched Continent, as its name implies, is an arid climate. It’d be okay for growing wheat, if it weren’t for the fact the whole continent suffers a really nasty monsoon season once a year. Great for replenishing aquifers, not so great for growing wheat.
Which isn’t to say they don’t get wheat. They do – they just have to import it from their mother empire. So by the time mid-winter rolls around, wheat is looking pretty scarce. Which means no cake, unless you’re stupidly rich. There are some people on the Scorched who could afford such a luxury, but I wanted to capture a snack that the everyday populace might stand a chance of getting their hands on.
Enter: baklava.
The Scorched is also home to a species of wild, oversized bee which builds massive hives. This means that honey and beeswax are both plentiful, and cheap. Another common foodstuff on the continent is a wide variety of nuts, as they preserve well and are full of protein. And what better way to make use of scarce wheat than to roll it into a very, very thin sheets?
I’d never made baklava before, but I figured hey, if I’m assuming my characters can do it, so can I! Of course my characters can also move magical gas around and take one hell of a beating, but that’s beside the point.
Ingredients:
1 cup caster sugar
1 cup water
1/2 cup honey
1 tsp vanilla
1 package phyllo dough (16oz) defrosted
1 cup butter
1 lbs chopped nuts
1 1/2 tsp cinnamon
Method:
The real secret to baklava is that, to keep it crispy, you either have to combine cold baklava with hot syrup, or cold syrup with hot baklava. Hint: it’s much easier to do it the second way. So, before you even preheat that oven, combine 1 cup caster sugar, 1 cup water, and boil until all the sugar is melted.
Is the sugar melted? Coolio. Throw in 1/2 cup honey and a tsp vanilla. Well, don’t actually throw it, because boiling sugar water splash back is enough to peel skin. Pour it gently. If you’re having trouble getting all of the honey out of your 1/2 cup scoop, and if your scoop is metal, just scoop up some of the hot sugar water and swish it around until the scoop is clean. Don’t do this with plastic. If I have to tell you why, you probably shouldn’t be reading this. Mix until everything is combined, lower your heat and simmer it for 20-25 minutes until it’s begun to slightly thicken, then set aside to cool.
Get yourself a wee tiny saucepan, and chunk about a cup of butter into it, then set it on the very lowest setting to melt.
While you’re simmering and melting, best prepare your nuts. You can use any kind of nuts you’d like for baklava, though the traditional varieties are walnuts, pistachio, and pecans. I used all walnuts. I’m a vegetarian and, because of that, fish are friends, not food, so I have to get those omega-3’s somehow. You can buy your nuts pre-chopped, or you can use chopping them as an excuse to eat some like I do. Either way, mix up 1 pound chopped nuts with 1 1/2 tsps cinnamon and set aside. Have you preheated your oven to 325F yet? Probably not, since I haven’t told you to. Do that now, and while you’re at it get to buttering a 9×13” pan – use some of that butter you’ve got melted.Now it’s time for the part everyone hates: the phyllo. Depending upon who made your phyllo (and I’m going to guess it wasn’t you, because only a masochist would make that stuff themselves) you’ll either have one large roll or two smaller ones. If you have a large one, unroll it and chop it in half to fit your pan.
Now that you have phyllo that fits your pan, cover it with a layer of saran wrap or wax paper and then cover that with a SLIGHTLY damp paper towel. This helps keep the phyllo from drying out while you work – but do not get water directly on the dough. Then you’ll have mush. You do not want mush.
To create the base of your baklava: layer two sheets of phyllo (pick them up together, it’s easier than going one by one) in the bottom of your pan. Use a pastry brush to coat with melted butter. Add another two layers of dough – then butter – and another two layers – then butter. Repeat until you have a total of eight layers of pastry with butter in between every two layers. Good? Good. That wasn’t too painful, right?
Now sprinkle some of your nut mixture on that, about 3 tablespoons. Cover with two more layers of phyllo, then brush with butter. Repeat the phyllo-butter-nuts routine until you have 8 sheets of phyllo left. Use those last 8 sheets to make the top, putting butter between every two layers just like you did to make the base. Brush the top with more butter, then cut your unbaked baklava into triangles with a very sharp knife while it’s still in the pan. Trust me, it’s way easier than trying to do it once it comes out of the oven.Pop the baklava in the oven and your honey sauce in the fridge. Bake the baklava about 50 minutes, or until golden brown on top.
Remove the baklava from the oven, and immediately spoon the honey sauce over the top. Let it cool, then pop it out of the pan to serve up in cupcake wrappers or something equally sticky proof. This stuff is good, but man is it sticky.Toast your success, and vow to buy baklava from the store next time.
Find out more about Megan at her website. Order Steal the Sky at Amazon, Barnes & Noble, or any other bookstore.





![[My wee tiny saucepan]](https://www.bethcato.com/blog/wp-content/uploads/2015/10/baklava-tiny-pot.jpg)
![[That’s a lotta’ nuts]](https://www.bethcato.com/blog/wp-content/uploads/2015/10/baklava-walnuts.jpg)
![[A finer chop than this is easier to work with, but I never learn.]](https://www.bethcato.com/blog/wp-content/uploads/2015/10/baklava-chopped-nuts.jpg)
![[Magical pastry brush. Adds +2 to butter application]](https://www.bethcato.com/blog/wp-content/uploads/2015/10/baklava-pastry-brush.jpg)
![[Should look something like this]](https://www.bethcato.com/blog/wp-content/uploads/2015/10/baklava-layering.jpg)
![[Saucy]](https://www.bethcato.com/blog/wp-content/uploads/2015/10/baklava-honey-sauce.jpg)
![[Flakey goodness.]](https://www.bethcato.com/blog/wp-content/uploads/2015/10/baklava-finished.jpg)

