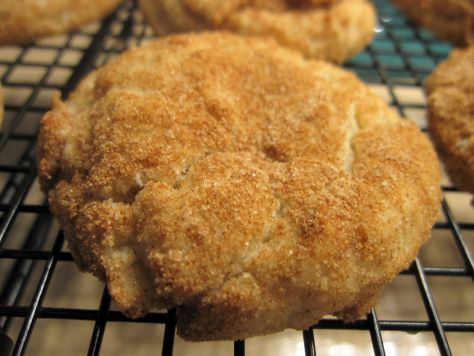
Bready or Not Original: Pumpkin Cake Cookies
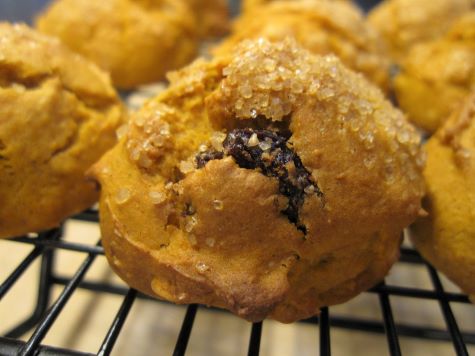
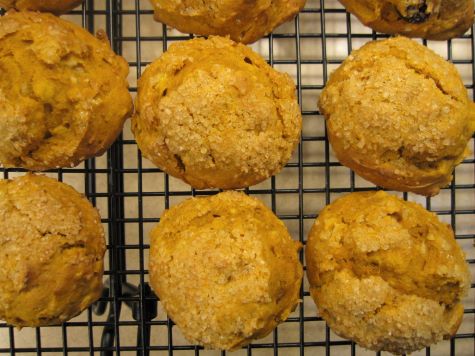
It’s November, and that means it’s pumpkin time! This Pumpkin Cake Cookies recipe is fast and delicious.
Cake mix is a fantastic shortcut ingredient. Don’t snub it. Doctor it, make it your own. I used Aldi’s yellow cake mix here, and it turned out great!
These cookies bake up light and fluffy, the walnuts providing a nice crunch. The pumpkin comes through with flavor and color.
Bready or Nor Original: Pumpkin Cake Cookies
Equipment
- parchment paper
Ingredients
- 15 ounces pumpkin puree can
- 1 large egg room temperature
- 2 Tablespoons vegetable oil
- 1 box yellow cake mix
- 1/2 cup rolled oats also called old fashioned oats
- 2 1/2 teaspoons pumpkin spice mix
- 1 cup walnuts chopped
- 1/2 cup dried cranberries
- turbinado sugar optional
Instructions
- Preheat oven at 350-degrees. Line a baking sheet with parchment.
- In a large bowl, combine the pumpkin, egg, and oil. Mix in the cake mix, pressing out any clumps. Add oats, pumpkin spice, walnuts, and cranberries, mixing until combined. Dough will be sticky. Use a spoon to form balls of dough to space out on baking sheet. If desired, sprinkle some turbinado sugar on each cookie.
- Bake for 10 to 12 minutes, until set. Move to cool on a rack. Store in a sealed container with waxed paper between the stacked layers.
OM NOM NOM!
Bready or Not: French Rolls Mixed in the Bread Machine
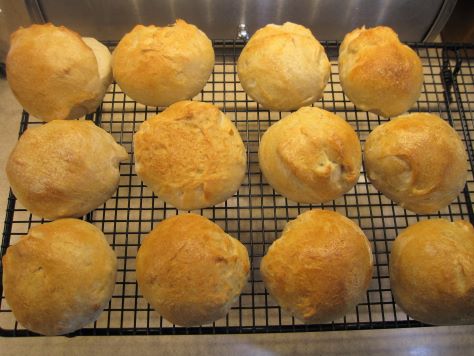
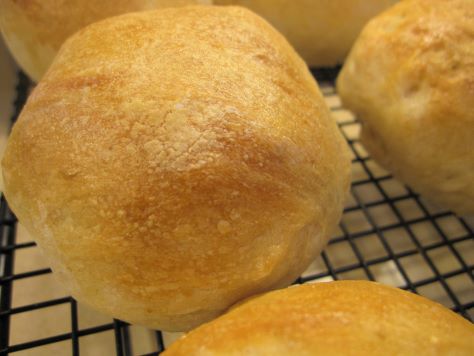
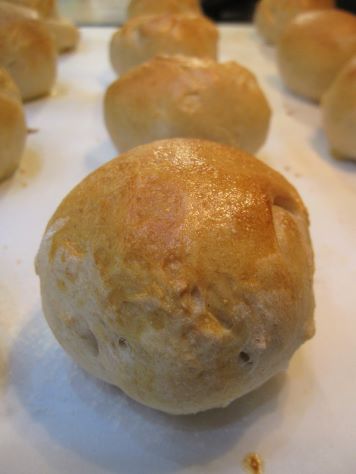
These French Rolls Mixed in the Bread Machine take some planning–including awakening the starter a day ahead of time–but are well worth the effort due to the sheer deliciousness.
This is one of those recipes that isn’t a huge time drain, but does require work in little bursts. Begin the starter. Get the rest of the dough going. Do another rise. Shape the rolls and rise a third time. Bake.
Also, just like the real thing in France, these are intended to be eaten fresh. However, that’s no big problem so long as you have room in your freezer. Freeze extra rolls the day they are made, and they’ll thaw and heat later and still be amazing.
This recipe is modified from Making Artisan Breads in the Bread Machine by Michelle Anderson, which I highly recommend to any bread machine owners. [affiliate link]
Bready or Not: French Rolls Mixed in the Bread Machine
Equipment
- bread machine
- kitchen scale
- plastic wrap
- parchment paper
- basting brush
Ingredients
Starter (make 12 to 18 hours ahead)
- 1 1/4 cups bread flour
- 1/4 cup whole wheat flour
- 3/4 cup lukewarm water 100-110-degrees F
- 1/8 teaspoon active dry yeast
Dough
- 3/4 cup lukewarm water 100-110-degrees F
- 1 3/4 teaspoon sea salt
- 3 cups bread flour plus more for work surface
- 1/2 teaspoon active dry yeast
- nonstick spray or olive oil
Finish
- 1 large egg
- 1 Tablespoon water
Instructions
Make the starter
- In the bucket of a bread machine or in a separate pitcher, stir together all of the starter ingredients until combined. Cover the top with plastic wrap and let set to rise at room temperature for 12 to 18 hours.
Make the dough
- If the starter didn’t rise in the bread machine, place it there now and add the additional water, salt, flour, and yeast. Start the dough cycle.
- Once the full cycle is done, apply nonstick spray or olive oil in a large bowl. Gather the dough into a ball and place it in the bowl, flipping it to completely coat. Cover with plastic wrap and let rise until it doubles, about an hour. Prepare one or two large baking sheets with parchment paper.
- Weigh the dough and then turn it out in a lightly floured work space. Determine the desired size of rolls; for standard dinner-sized ones, twelve is ideal. Divide the dough accordingly, forming into balls by tucking the lumpier bits and seams underneath. Fill a saucer with water to dab fingertips to make smoothing the dough easier. Space rolls out on prepared pan(s). Lightly cover with plastic wrap.
- Let rolls rise about 45 minutes. They should puff up. Preheat oven at 450-degrees.
Make the egg wash
- Whisk together the egg and water. Remove and discard plastic wrap from rolls. Brush egg wash over the rolls.
- Bake until golden brown, about 12 to 15 minutes. Rolls should sound hollow when tapped. They are best eaten hot the day they are made, but if frozen promptly, they will reheat later for same-day eating and still taste delicious!
OM NOM NOM!
Bready or Not: Cocoa Pecan Brownies
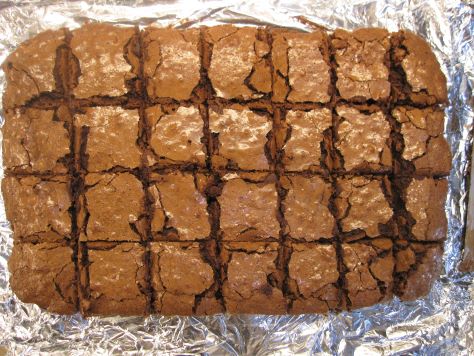
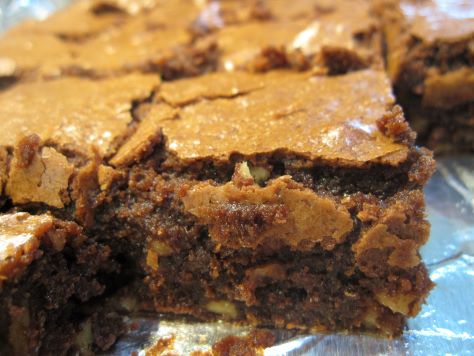
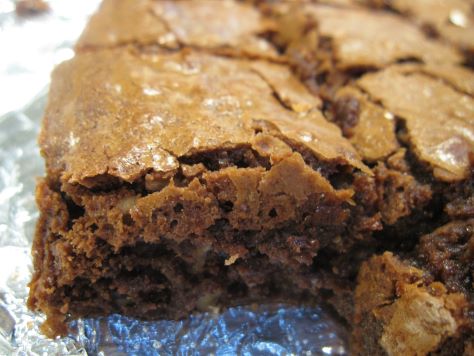
These Cocoa Pecan Brownies are perfect for when you have a chocolate emergency and need brownies, STAT.
(If you don’t know what might constitute a chocolate emergency, my gosh, why are you even here?)
In any case, these brownies are great because they mix up quickly in a big pot, and they are a pretty straightforward bake, too. If you don’t like pecans, okay. Omit the nuts entirely, or use walnuts, a mix of nuts, cocoa nibs, whatever. This recipe can flex!
The one necessity: you need to enjoy these things. Really savor them. Maybe even stash some in the freezer for when that next chocolate emergency strikes.
Bready or Not: Cocoa Pecan Brownies
Equipment
- 13×9 pan
Ingredients
- 1 1/2 cups unsalted butter 3 sticks
- 3 cups white sugar
- 2 teaspoons vanilla extract
- 12 Tablespoons cocoa powder sifted
- 6 eggs
- 1 1/2 cups all-purpose flour
- 1 cup chopped pecans
Instructions
- Preheat oven at 350-degrees. Line a 13×9 pan with foil and apply nonstick spray or butter.
- In a large saucepan, heat the butter and sugar together on medium heat, stirring often, just until the butter is melted. Remove from heat. Stir in vanilla and cocoa powder. Add eggs one at a time, mixing in completely before adding the next. Stir in flour. Fold in the pecans.
- Pour batter into prepared pan. Bake for 30 to 35 minutes, until the very middle passes the toothpick test. Cool at room temperature, speeding the process in fridge if desired. Use foil to lift contents onto a cutting board. Slice up. Store in a sealed container.
OM NOM NOM!
Bready or Not: Browned Butter Lamington Blondies
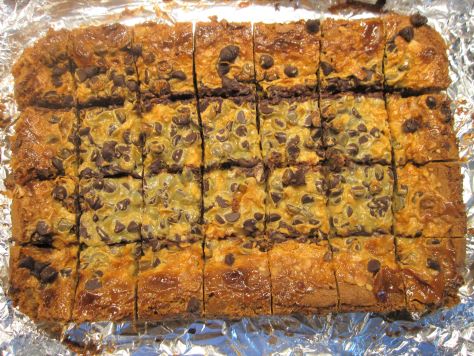
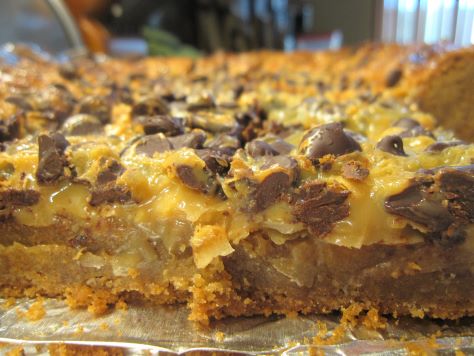
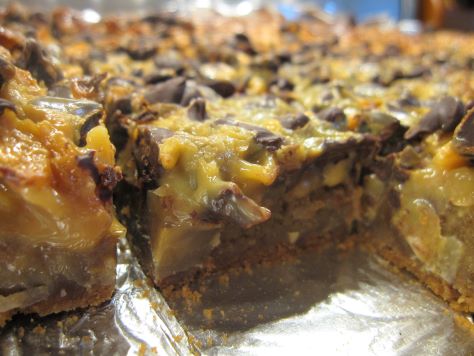
These Browned Butter Lamington Blondies are rich and indulgent, all chewy, chocolaty and good.
A lamington is an Australian dessert wherein pieces of sponge cake are rolled in chocolate and coconut. I haven’t gotten to try the real thing, but I can vouch for the fact that this home-baked version is delicious.
You start out with a blondie base that is rich on its own, with bountiful butter, brown sugar, vanilla, and eggs. Then you go even more ultra by adding an ooey-gooey chocolate and coconut-laden topping.
The original version of the recipe, in the Bake from Scratch May/June 2019 issue, proposed this Lamington version as a modification for a standard Blondie recipe. I rewrote it to streamline the process and change out some ingredients. Like… this doesn’t need sweetened coconut. It’s already sweet enough!
As I live in Arizona and have a warm kitchen, I found it essential to chill these bars so that they could be sliced up. I stored them in the fridge afterward as well, but if you’re in a cooler area, that likely isn’t needed.
Bready or Not: Browned Butter Lamington Blondies
Equipment
- 13×9 pan
- uneven spatula
Ingredients
Blondie Base
- 1 1/2 cups unsalted butter 3 sticks
- 3 cups light brown sugar packed
- 2 teaspoons baking powder
- 1 teaspoon kosher salt
- 4 large eggs room temperature
- 1 Tablespoon vanilla extract
- 3 cups all-purpose flour
Topping
- 1 cup unsweetened flaked coconut
- 1 cup bittersweet chocolate chips
- 14- ounces sweetened condensed milk
Instructions
- In a medium saucepan, melt butter over medium heat, stirring often until butter turns golden-brown with a nutty aroma, about 5 to 10 minutes. Pour into a small bowl to let stand at room temperature while the next steps are prepared.
- Preheat oven at 350-degrees. Line a 13×9 pan with foil and apply nonstick spray or butter.
- In a large bowl, beat together the brown sugar, baking powder, and salt. Beat in the browned butter. Add eggs one at a time, scraping bowl after each addition. Add vanilla extract. Fold in flour until just combined. Pour into prepared pan, evening out with an uneven spatula.
- Bake for 30 minutes. Middle needs to be set or the toppings will sink. Once that is done, no need to cool the base layer–remove the pan from the oven and sprinkle coconut over the top followed by the chocolate chips. Pour the sweetened condensed milk all over both.
- Place pan back in oven to bake for 20 to 25 minutes, until middle is molten. Let cool for a while at room temperature, then place in fridge to completely set and chill.
- Use foil to lift contents onto a cutting board. Slice. Store individually wrapped-up or in a sealed container at room temperature or in the fridge for up to 3 days.
OM NOM NOM!
Bready or Not: Walnut Streusel Coffee Cake in a Bundt Pan
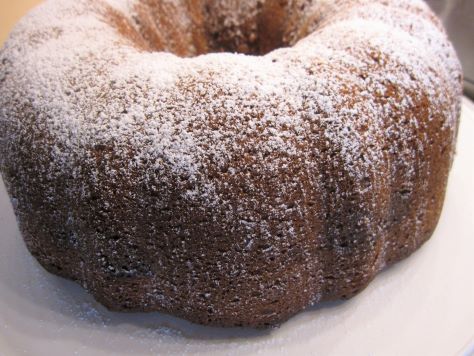
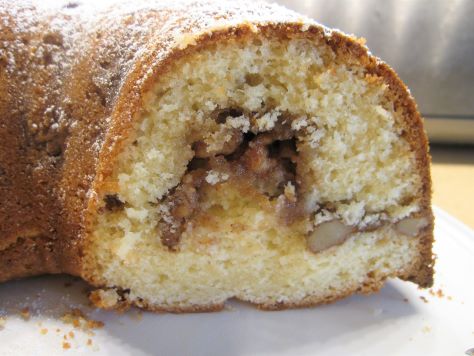
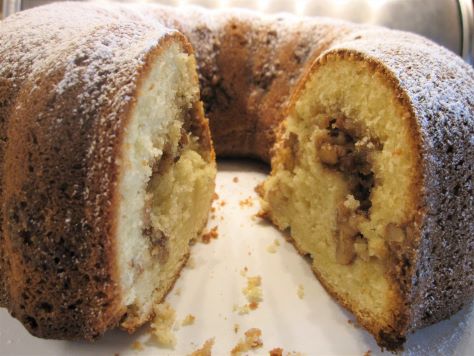
Coffee Cakes can be delicious but so very messy to eat. This bundt cake version turns things inside out by putting the ‘messy bit’ inside the cake, making for easier yet still scrumptious eating.
The most negative thing I can say about this Walnut Streusel Coffee Cake in a Bundt Pan is that it dirties a lot of dishes. So yeah, there is some effort involved, but the result is well worth it!
I individually wrapped slices of this for my husband to take to work. He had a co-worker tell him this cake was “f—–n’ awesome.” I take that as high praise.
This would be a great cake to make a day-ahead for a breakfast or brunch for a lot of people!
Bready or Not: Walnut Streusel Coffee Cake in a Bundt Pan
Equipment
- large bundt pan
- nonstick spray with flour
- mixer
Ingredients
Candied Walnut Filling
- 1 cup walnuts chopped
- 1/2 cup light brown sugar packed
- 2 Tablespoons unsalted butter melted
- 1/2 teaspoon ground cinnamon
Coffee Cake
- 4 large eggs separated
- 1 cup unsalted butter room temperature
- 1 3/4 cups white sugar
- 1 teaspoon vanilla extract
- 3 cups all-purpose flour
- 2 teaspoons baking powder
- 1/2 teaspoon baking soda
- 1/4 teaspoon salt
- 1 cup sour cream or vanilla or plain Greek yogurt
- confectioners' sugar to dust on top, optional
Instructions
- In small bowl, combine the walnuts, brown sugar, butter, and cinnamon, tossing to coat well. Set aside.
- Separate eggs, placing the whites in a large bowl. Let them come to room temperature for about 30 minutes.
- Preheat oven at 350-degrees. Use nonstick spray with flour on a large bundt pan.
- In a big mixing bowl, cream the butter and sugar together, making them light and fluffy. Add egg yolks one at a time. Add vanilla.
- In a separate bowl, combine flour, baking powder, baking soda, and salt. Add the dry ingredients to the butter mix alternatively with the sour cream, scraping the bowl on occasion, until just combined.
- Using clean beaters, beat the egg whites on medium until stiff peaks form. Fold the whites into the batter, making sure not to overmix and deflate.
- Pour half the batter into the bundt pan. Sprinkle the walnut mixture fully around the ring. Pour the rest of the batter on top and smooth out.
- Bake cake for 45 to 55 minutes, plunging a toothpick in the middle of the cake to test for doneness. Cake is done when the toothpick comes out clean. Cool for 20 minutes, then invert onto a rack to completely cool.
- If desired, sprinkle confectioners’ sugar over the top prior to serving. Cake is best eaten within two days, but can also be individually sliced, wrapped, and frozen to enjoy later.
OM NOM NOM!
Bready or Not: Banana Snickerdoodles
Bready or Not is all about different Snickerdoodle recipes, and this one is especially unique: Banana Snickerdoodles!
I found the original version in in the May/June 2019 issue of Bake of Scratch, in a fascinating article on bakeries and baked goods in Bermuda. I had to give it a try, with some tweaks throughout the process.
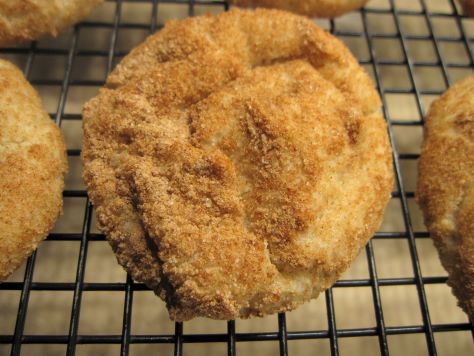
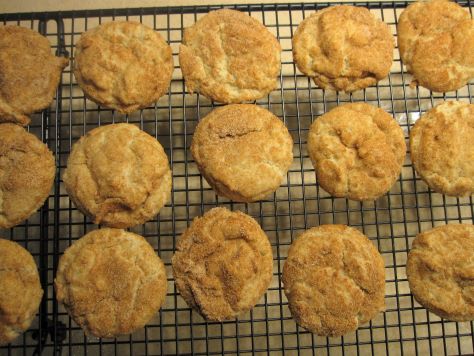
These cookies feature the necessary cream of tartar and cinnamon-sugar coating, plus they look like Snickerdoodles should with a crackled top. The texture is different, though—a bit fluffier, and the banana flavor is light and pleasant.
The dough is also stickier to work with. I didn’t have big issues with that, but if you do, lightly flour your hands to make the dough workable.
Bready or Not: Banana Snickerdoodles
Equipment
- baking sheet
- parchment paper
- tablespoon scoop
Ingredients
Dough
- 1 cup unsalted butter (2 sticks) room temperature
- 1 1/2 cups white sugar
- 1 teaspoon vanilla extract
- 2 large eggs room temperature
- 3/4 cup banana puree 2 medium bananas
- 4 1/2 cups all-purpose flour
- 2 1/2 teaspoons cream of tartar
- 1 1/2 teaspoons baking soda
- 1/4 teaspoon sea salt
- 1/4 teaspoon ground cinnamon
Topping
- 3/4 cup white sugar
- 1 1/2 Tablespoons ground cinnamon
Instructions
- Preheat oven at 350-degrees. Line a baking sheet with parchment paper.
- In a big bowl, beat the butter and sugar until fluffy. Add vanilla, then eggs one at a time. Mix in the banana puree.
- In a separate bowl, stir together flour, cream of tartar, baking soda, salt, and cinnamon. Gradually beat the dry ingredients into the wet. The dough will be somewhat sticky. Mix the two topping ingredients in a small bowl.
- Use a tablespoon scoop or spoon to shape a small ball of dough. Roll it in the cinnamon-sugar then place on baking sheet. Repeat, spacing out coated dough balls.
- Bake for about 10 to 12 minutes, until they are puffed with a crackled top. Let cool on pan for 5 or 10 minutes before moving them to a rack to completely cool. Store in an airtight container at room temperature.


