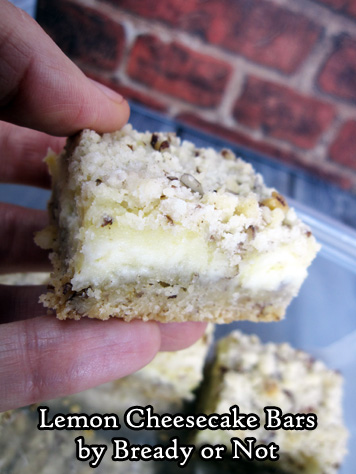
Bready or Not Original: Lemon Cheesecake Bars
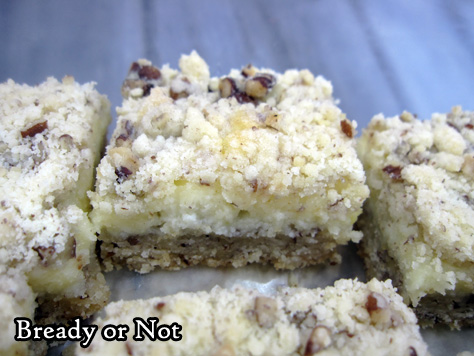
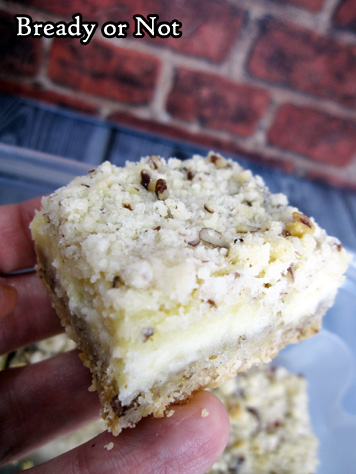
Lemony. Fresh. Perfection. Those words are the best way to describe these incredible bars.
Not only are these delicious, but they are easy to make. A food processor is especially handy as you can chop up the nuts and then add in the rest of the crust ingredients, too.
To soften the cream cheese for the filling, leave it at room temperature for a bit, or do what I usually do: place the cheese on a plate and microwave for like 5 seconds. Then flip it over and zap again, if needed. It just needs to be soft enough to blend, not cooked.
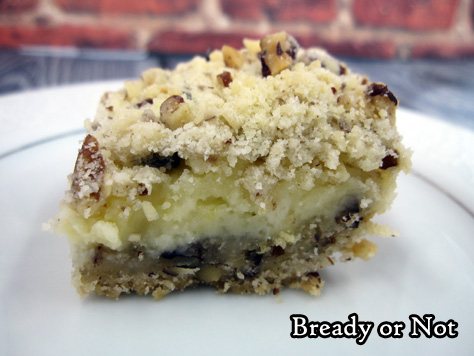
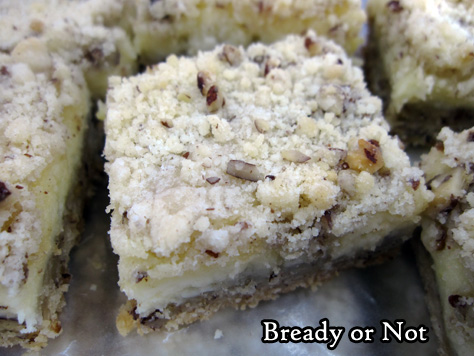
I confess, I sometimes get nervous when I do dessert bars with bottom crusts. Because sometimes, no matter how I compress them into the pan, they fall apart when the bars are cut apart. Not so here! They were surprisingly cohesive. (Here’s hoping you have the same experience.)
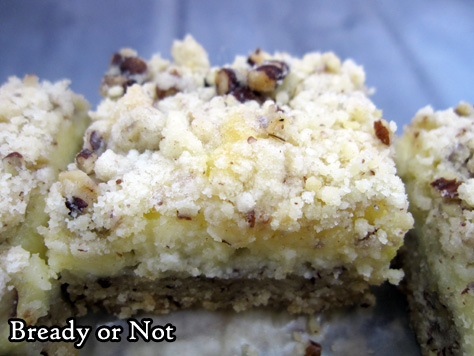
That cohesiveness makes these dangerously easy to eat. These bars have it all going on. Buttery crumb. Nutty crunches here and there. Vivid lemon flavor in the creamy filling.
I’d like to report how long these can last in the fridge, but I don’t know. I make these bars, and they are suddenly GONE. Poof.
Bready or Not Original: Lemon Cheesecake Bars
Ingredients
Crust
- 1 cup pecans
- 2 cups all-purpose flour
- 1 cup confectioners' sugar
- 3/4 cup unsalted butter 1 1/2 sticks , softened
Filling
- 2 cups confectioners' sugar
- 16 oz cream cheese 2 boxes, softened
- 2 lemons zested and juiced
- 1/3 cup fresh lemon juice
- 1 teaspoon lemon extract
- 2 eggs
Instructions
- Prepare a 9x13 pan with aluminum foil and nonstick spray. Preheat oven at 350-degrees.
- Use a food processor (or knife and cutting board) to chop up pecans to small pieces. Add flour, 1 cup confectioners' sugar, and butter to bowl, and blend with pecans until crumbly. Reserve 1 1/2 cups of the mix; press the rest into the prepared pan. Bake for 18 to 20 minutes, until it's just turning golden.
- As the crust bakes, combine all of the filling ingredients until fairly smooth.
- Pull the crust out of the oven. Pour filling over the top and smooth to the edges. Crumble the reserved crust across the top.
- Bake for another 30 to 35 minutes, until the edges are golden and the middle is set.
- Cool on a wire rack for 30 minutes to an hour, then place in the fridge to completely chill.
- Use the foil to lift the bars onto a cutting board for easy slicing. Store in a sealed container in the fridge.
- OM NOM NOM!
Bready or Not Original: Chewy Honey Lemon Cookies
I modified an old favorite recipe with delicious results: Chewy Honey Lemon Cookies!
This recipe is derived from my Chewy Honey Maple and Chewy Honey Snickerdoodles. It uses a combination of two flours to add extra chewiness, and cornstarch for tenderness and longevity.
However, my first attempt at this recipe was a total bust. I tried to rely on lemon juice and zest for flavor… and while the flavor was there, the cookies turned out FLAT.
That would not do. I wanted cookies that were chewy with just the right thickness. Therefore, I removed the lemon, amped up the lemon extract, and added white chocolate chips.
That was the right choice. The lemon flavor was just right (and the taste of that and the honey actually grows stronger after a day), and the white chocolate chips added smoothness and mellow sweetness.
In other words, if you love lemon cookies, you will LOVE these. And like the other recipes in the same family, these cookies keep well for weeks!
Bready or Not Original: Chewy Honey Lemon Cookies
Ingredients
- 3/4 cup unsalted butter 1 1/2 sticks, softened
- 1 cup light brown sugar packed
- 1/4 cup honey
- 1 large egg room temperature
- 1 teaspoon vanilla extract
- 2 teaspoons lemon extract
- 1 cup bread flour or all-purpose flour, but cookies will be less chewy
- 1 cup all-purpose flour
- 2 teaspoons cornstarch
- 1 teaspoon baking soda
- 1/2 teaspoon salt
- 1 cup white chocolate chips
Instructions
- In a large bowl, beat the butter until smooth. Add sugar and honey and beat until creamy and fluffy, about 3 minutes. Scrape down the sides of the bowl and then mix in the egg and both extracts.
- In a separate bowl, combine the dry ingredients: bread flour, all-purpose flour, cornstarch, baking soda, and salt.
- Slowly stir together the wet and dry ingredients until just combined. Mix in the white chocolate chips. Encase the dough in plastic wrap and stash in the fridge for several hours or days.
- When ready to bake, preheat the oven to 350-degrees. Use greased stoneware, parchment paper, or silpat mats. The cookie dough, even straight from the fridge, has a soft Play-Doh-like consistency, so it will spread when it bakes.
- Teaspoon-sized cookies need to bake 9 to 12 minutes; tablespoon-sized take 11 to 13 minutes. Let set on cookie sheets for 10 to 15 minutes before moving to a rack to cool completely.
- Cookies will keep in a sealed container for weeks. The lemon and honey flavors will grow stronger after the first day. They are excellent for travel or shipping.
- OM NOM NOM!
Bready or Not: Lemon Crumb Mini Muffins (potluck-sized)
I found a lemon muffin recipe and thought, hey, I’ll rewrite this to be original and I’ll do mini muffins instead!
Um. Yeah. The original recipe made a couple dozen muffins. My version? 113.
I swear, I felt like I had created a Bowl of Holding. There was so much batter. So very, very much batter.
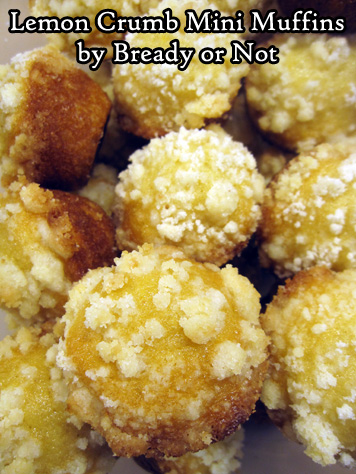
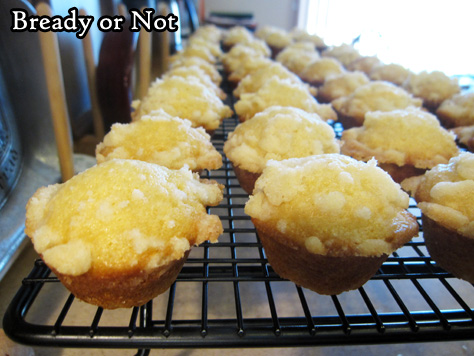
The good news? My efforts were not in vain. The muffins were delicious. They were lemony and light, like puffs of flavor, the perfect remedy to the doldrums of winter.
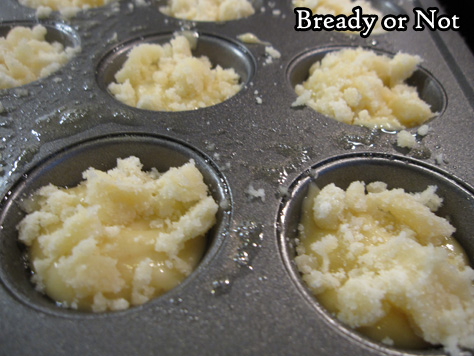
The recipe itself is pretty straightforward. Grease your mini muffin pans well (make SURE you have two pans to bake at once) and don’t overfill them. A touch of crumb topping makes them prettier and extra yummy.
Bready or Not: Lemon Crumb Mini Muffins (potluck-sized)
Ingredients
Crumb topping:
- 1 1/4 cups all-purpose flour
- 1 cup white sugar
- 1/4 teaspoon salt
- 1/2 cup unsalted butter 1 stick, melted
Mini muffins:
- 4 eggs room temperature
- 2 cups white sugar
- 1 cup vegetable oil
- 1 large lemon zested and juiced
- 1 teaspoon lemon extract
- 1 teaspoon vanilla extract
- 2 teaspoons baking soda
- 1 teaspoon salt
- 16 ounce sour cream 2 cups
- 4 cups all-purpose flour
Instructions
- Preheat oven at 375-degrees. Prepare two mini muffin pans with a heavy dose of nonstick spray.
- Combine the topping ingredients with a fork. Set aside.
- In a very large bowl, mix the eggs until they are thick and frothy. Add the sugar and oil, and beat until they become creamy. Add the lemon zest and juice, both extracts, baking soda, and salt.
- At this point, if you are using an electric mixer, you likely need to switch to a big spoon because of the sheer amounts involved. Add the sour cream and flour, pouring in small increments of each to gradually combine everything. Make sure to scrape the bottom of the bowl. The batter might be somewhat lumpy.
- Use a teaspoon scoop to add batter to each muffin cup. Do NOT fill over 3/4 of each cup--these will grow in the oven! Use a spoon to add crumb topping to the tops.
- Bake for 11 to 12 minutes, until muffins in the middle pass the toothpick test. Let them cool about 10 minutes, then use something like a chopstick to pry out each muffin to set on a cooling rack.
- Heavily apply nonstick spray to both pans again, then repeat the process. Using two pans, this will take three batches to bake.
- Store muffins in airtight containers at room temperature. They can also be frozen for weeks.
- OM NOM NOM!
Bready or Not: Soft Lemon-Ginger Cookies
Lemon and ginger join forces in these luscious cookies!
I found the original recipe in a compilation from Taste of Home. I immediately thought, hey, that looks good but it needs more ginger… and more lemon.
Because if it’s a lemon-ginger cookie, it should scream flavor, right?
And these do, all bound up in a soft, chewy form. These taste delightfully fresh. Perfect for summer, really.
… oh, these would be perfect for the holidays, too. They do have ginger, after all. Make them whenever you want. The dough can be made a day or two ahead of time and kept ready in the fridge!
Bready or Not: Soft Lemon-Ginger Cookies
Ingredients
- 1/2 cup unsalted butter softened
- 1 cup brown sugar packed
- 1 egg
- 3 Tablespoons sour cream
- 1 1/2 teaspoons lemon extract
- 1 teaspoon vanilla extract
- 1 3/4 cups all-purpose flour
- 1 teaspoon baking soda
- 1 teaspoon cream of tartar
- 2 teaspoons ground ginger
- 1/4 teaspoon salt
Instructions
- Preheat the oven at 350-degrees.
- In a large mixing bowl, whip together the butter and brown sugar until it gains a fluffy texture. Beat in the egg, sour cream, and extracts.
- In another bowl, sift together the flour, baking soda, cream of tartar, ginger, and salt; make sure to press any lumps out of the cream of tartar and ginger. Slowly mix the dry ingredients into the other bowl.
- Drop by rounded teaspoons onto a baking sheet. Bake for 10 to 12 minutes, until the cookies are lightly browned and no longer jiggly. Watch out--they can overbake quickly. Let them rest on the cookie sheet for just a few minutes, then transfer to a rack to cool.
- OM NOM NOM!
Read More
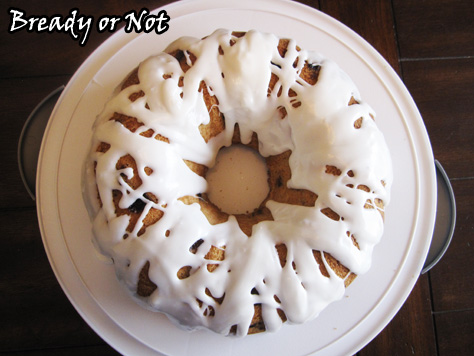
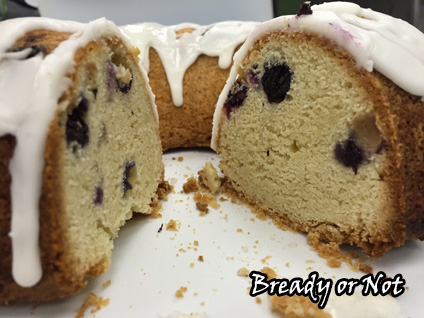
Bready or Not: Blueberry Pound Cake with Lemon Glaze
Blueberries are in season, so let’s get baking!
This cake is sheer perfection. This has the tender texture of a pound cake, with added sweetness from dapples of blueberries.
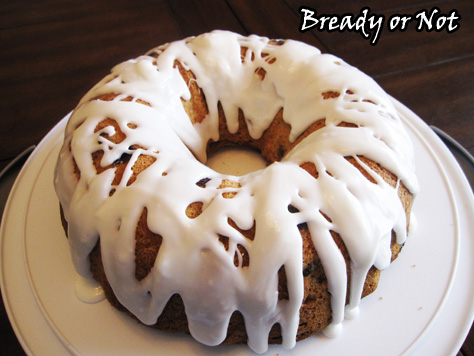
Oh yeah, and then there’s the glaze. When I was meddling with the base recipe, that version felt so… naked.
The lemon glaze adds a bit more sweetness, and a tartness that contrasts perfectly with the blueberries.
The glaze looks gorgeous, too!
This cake is perfect for breakfast, brunch, or dessert. Whenever the heck you want it, really.
Modified from Through Her Looking Glass.
Bready or Not: Blueberry Pound Cake with Lemon Glaze
Ingredients
Cake
- 6 ounces blueberries washed, drained, and patted dry
- 3 cups flour divided
- 1 teaspoon baking powder
- 1/2 teaspoon salt
- 1 cup unsalted butter 2 sticks, room temperature
- 2 cups white sugar
- 4 large eggs room temperature
- 1 1/2 teaspoons vanilla extract
Glaze
- 1 1/2 cups confectioners' sugar sifted
- 1 Tablespoon + milk
- 1/2 teaspoon lemon extract
Instructions
- Preheat oven at 350-degrees. Prepare a 10 or 12-cup bundt pan by applying Pam with Flour or buttering well and dusting with flour.
- In a small bowl, gently stir the blueberries with 1/4 cup flour. This will keep the blueberries from sinking in the batter as it bakes. Set bowl aside.
- In a medium bowl, stir the remaining flour with the baking powder and salt. Set aside.
- In a mixing bowl, cream the butter and sugar together until fluffy. Add the eggs one at a time, followed by the vanilla. Beat it until fluffy again.
- Slowly mix in the dry ingredients until just blended. Follow that by gently folding in the blueberries.
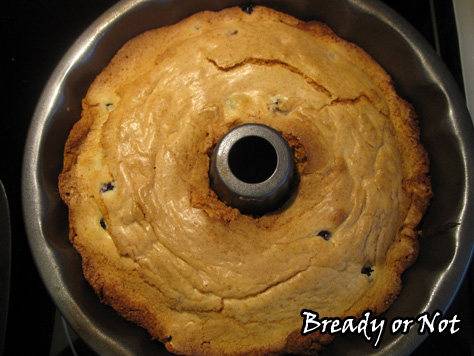
- Use a rubber spatula to pour the batter into the ready pan. Bake for 50 minutes to 1 hour, until it passes the toothpick test.
- Let the cake cool for about 10 minutes, then invert it onto a rack to completely cool. Once the cake is at room temperature, mix the glaze. Add enough milk to give it the desired pourable consistency. Drizzle it over cake.
- Store cake in fridge.
- OM NOM NOM!
Read More
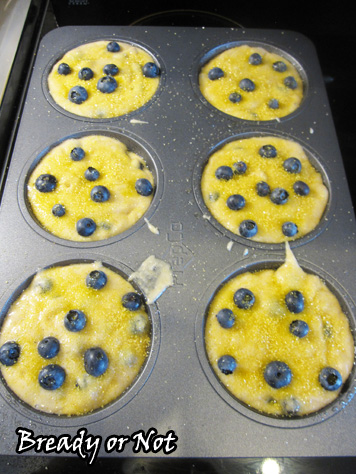
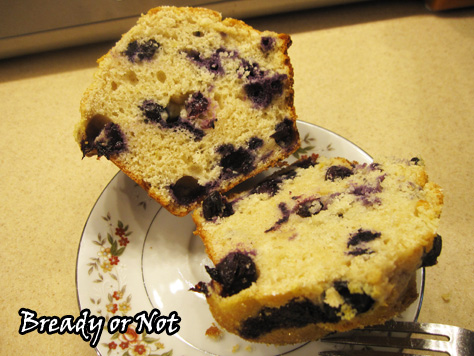
Bready or Not: Jumbo XXL Lemon-Blueberry Muffins
You could made normal, piddly muffins. Or you can make ENORMOUS HONKIN’ MUFFINS like the kind you get in bakeries. These Jumbo XXL Lemon-Blueberry Muffins taste pretty darn good and will fill your belly, too.
These muffins pans are surprisingly cheap. Amazon has a couple different kinds. Search for “jumbo muffin pan” or “Texas muffin pan.” (Because everything is bigger in Texas).
Confession: one reason I like these muffins is because they are pretty. I add a couple blueberries on top to make sure they don’t all sink, and I add some turbinado sugar to make them glisten.
Then there’s the size. Look at the pictures here and you’ll see that silver cup for size contrast. That’s 1 cup. Yeah.
If that’s too much muffin for you to eat, you can easily cut one in half. Or you can do what I do and freeze most of the batch. Wrap’em up in a few layers of plastic wrap and they’ll keep well in the freezer for a few weeks.
That’s a perfect way to make these cakey lemon-blueberry bombs last a little longer!
Modified from Sally’s Baking Addiction. Shared another version of this recipe in 2013 on my LiveJournal.
Bready or Not: Jumbo XXL Lemon-Blueberry Muffins
Ingredients
- 3 cups all-purpose flour
- 4 teaspoons baking powder
- 1 teaspoon salt
- 1 teaspoon ground cinnamon
- 2 eggs room temperature
- 1 lemon zested and juiced
- 1 cup white sugar
- 1 cup milk or almond milk or half & half
- 1/2 cup canola oil
- 1/2 teaspoon vanilla extract
- 6 ounces fresh blueberries washed and patted dry
- sparkling sugar optional, or turbinado sugar for the top
Instructions
- Preheat oven at 425-degrees. Use nonstick spray or butter on the muffin pan.
- In a medium bowl, mix together the flour, baking powder, salt, lemon zest, and cinnamon. Set aside.
- In a large bowl, whisk together the eggs and sugar. Mix in the milk, oil, lemon juice, and vanilla extract. Mixture will be pale and yellow.
- Gradually stir the dry ingredients into the wet ingredients, making sure to scrape the bowl, but don't overmix. The batter will be thick and somewhat lumpy.
- Carefully fold in the blueberries, reserving some to place on top of the muffins.
- Pour the batter into the greased muffin tins, filling just about to the top. Add the reserved blueberries and some turbinado or sparkling sugar, if desired.
- Bake at 425-degrees for 5 minutes, then reduce oven temperature to 375. Continue to bake for about 25 minutes. The tops should be lightly golden, and the muffins should pass the toothpick test. Allow them to cool for 10 minutes in pan, then remove to begin eating or to allow them to cool completely on a rack. (If you leave the muffins in the pan too long, they will steam and get soggy.)
- Muffins are best eaten within a day or two, but they can also be frozen for later enjoyment. Eat at room temperature or zap in the microwave to warm up.
- OM NOM NOM!
Read More


