Bready or Not: Homemade Tortilla Chips
When you make tacos, do you ever use up all of the tortillas? I sure don’t. There always end up being half a pack wallowing in the fridge. They come in handy for quick-fix quesadillas, but here’s another quick-fix for those leftovers: homemade tortilla chips!
I think corn tortillas are the best way to go here, but feel free to try this with flour. I just think they’d get too hard. I like corn because there’s more chewiness. Also, this can totally be gluten-free, if you need that kinda thing.
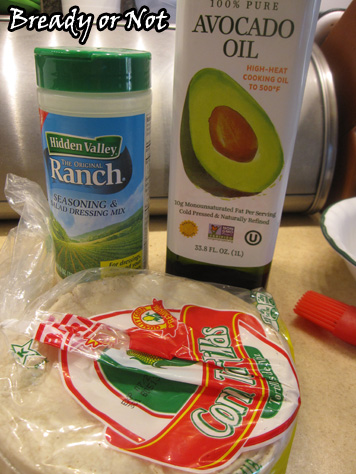
Choose how you wish to equip your chips. I went with ranch mix. If you use a packet, you won’t need that much out of it. You could likewise use taco seasoning, sea salt and pepper, cayenne, whatever. Heck, make this dessert with cinnamon and sugar and dip up some ice cream!
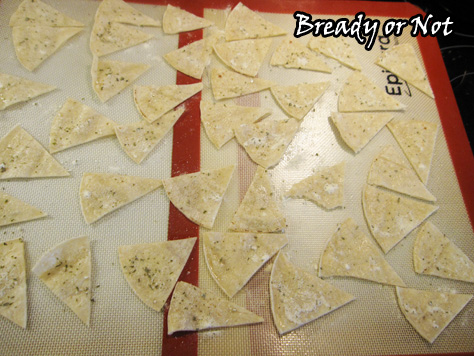
The technique is simple. Slice up your tortillas. A pizza cutter makes this easy. Brush oil on both sides of the wedges. Season. Bake a short time.
Do keep a close eye on the oven so you don’t overbake these! That would be a tragedy.
The batch shown here, I baked for 15 minutes. The resulting chips were crisp yet still somewhat chewy and fresh. Find your sweet spot for the texture you want.
Modified from DIY Ranch Tortilla Chips at Make the Best of Everything. Originally posted at the Holy Taco Church.
Bready or Not: Homemade Tortilla Chips
Ingredients
- corn tortillas
- oil olive oil, avocado oil, canola, etc
- ranch dressing mix or other seasoning like taco mix, Italian, etc
Instructions
- Preheat oven to 350-degrees. Prep a large baking sheet with silicone mats or parchment paper. You can likely only fit 5 or 6 tortilla's worth of chips on a sheet.
- Use a pizza cutter to slice your chips to desired size; they will shrink some as they bake. Brush a small amount of oil onto both sides of the wedges. Season them as much as you want; it's probably not necessary to do both sides. Use your fingers to smooth out any clumps.
- Bake chips for 12 minutes then monitor them closely for desired crispness. Stay close to the oven--these are thin, remember, so they can quickly overcook!
- Eat promptly or store chips in a sealed container.
- OM NOM NOM!
Read More
Bready or Not: Maple Nut Butter
Peanut butter can be bought for cheap. Other nut butters? Not so much. The good news is, with a food processor and about 20 minutes of spare time, you can make your own amazing nut butter!
Me being me, I make MAPLE NUT BUTTER. I have done this two ways: with 1 cup each of almonds and cashews, and also with 2 cups of cashews. Other nut combos should work just fine, too. The end yield will be somewhere about 1 1/2 cups nut butter.
I priced and researched food processors for about a year until I caved in and bought a lovely refurbished Cuisinart model. This baby does the job. I’m pretty darn happy with it.
I combined a few recipes to make my own original version. I will type out the details of each stage in the full recipe below, but let’s illustrate in pictures first.
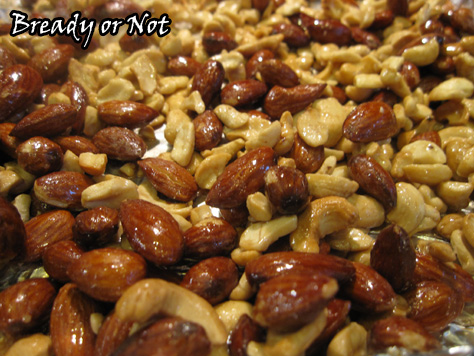
You toss the nuts in maple syrup and toast them in the oven. Let them cool a bit before processing them.
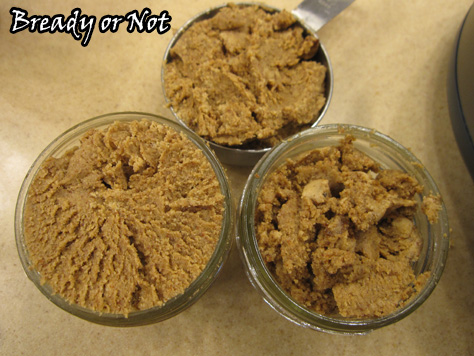
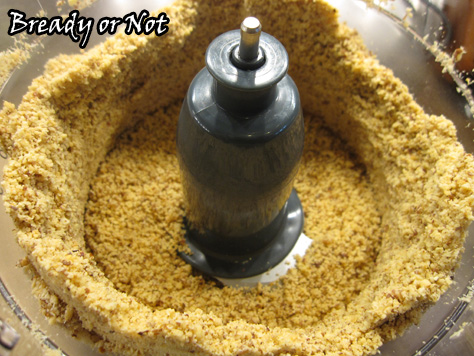
The ground nuts looks like coarse nut flour at first. They will gum up the blades every minute or so. I stop and scrape the sides often.
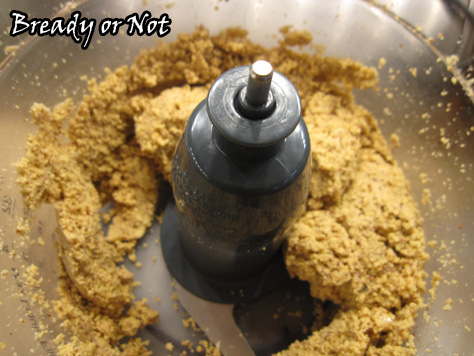
Then things start to get clumpy. Those lumps will migrate around on the blades like a glacier.
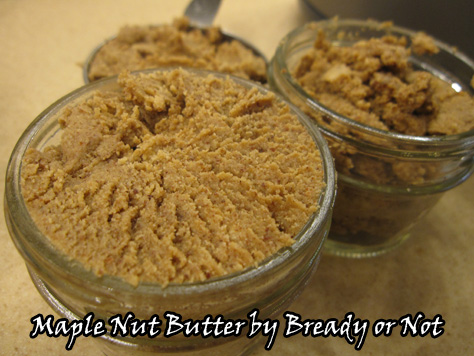
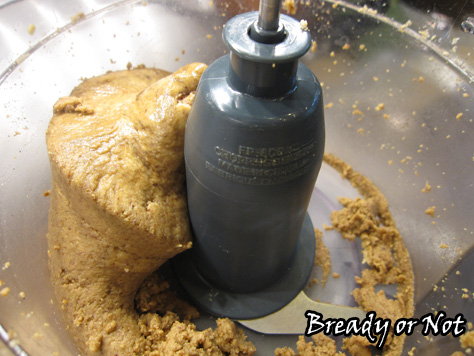
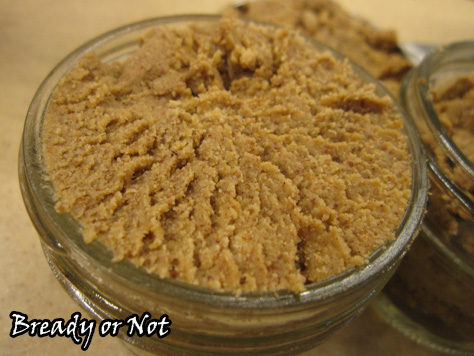
Keep on processing, and after about 15 minutes, you get that. Almost smooth nut butter! After a few more minutes it gets even smoother, and that is when you add spice, flavor, and a bit of oil.
I seal the nut butter in jars and store them in the fridge. Try to use it up within a month. It will be dryer than the standard store stuff, but you can always mix in a little more oil. I like avocado oil because it’s almost tasteless. The nut butter itself is the tastiest nut butter you’ll ever have. It just screams of maple and cinnamon and freshness.
Ready for the recipe? Okay!
Bready or Not: Maple Nut Butter
Ingredients
Toast
- 2 cups nuts 1 cups almonds + 1 cup cashews, or 2 cups cashews, or try other combos
- 1/4 cup pure maple syrup
After processing
- 1 teaspoon vanilla extract
- 1 teaspoon maple flavor optional, but adds oomph
- 1/2 - 1 teaspoon cinnamon
- 1 Tablespoon avocado oil or other oil, more as needed
- sprinkle sea salt
Instructions
- Preheat oven at 325-degrees. Line a rimmed baking pan with sturdy aluminum foil. In the pan, toss the two cups of nuts with maple syrup until they are coated. Toast for about 15 minutes, checking about every 5 minutes to toss the nuts around. Let the nuts cool for 30 minutes or so.
- Add the nuts to a food processor. (Note that you'll need to pry some off the foil.) Put the lid on and start processing. Run for 2 to 3 minutes then scrape down sides. The mix will look coarse and gritty.
- Continue processing, pausing every 1 or 2 minutes to scrape sides of bowl. Mixture will start to clump together.
- Continue grinding. The nuts will release more oil and start to smooth out more. Continue to stop and scrape the sides every 2 minutes or so to give the machine a break. After about 10 total minutes, it will look like nut butter but it won't be done yet!
- Continue processing. It will smooth out and finally evolve to a liquid-like form that snakes across the blades. This will be at about the 15 to 20 minute point. Add the rest of the ingredients and process another minute or so to blend together. Taste test to see if you need to tweak things.
- Transfer the nut butter to mason jars to store in the fridge for up to four weeks. If it seems especially dry, mix in a drizzle of oil.
- OM NOM NOM!
Read More
Bready or Not: Healthy No-Bake Maple Breakfast Cookies
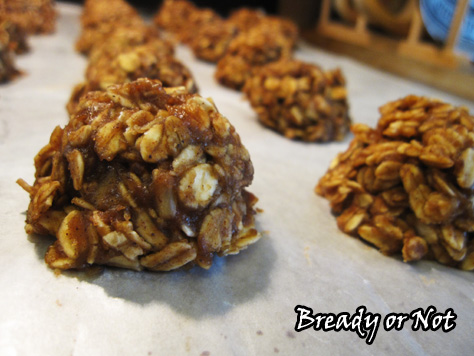
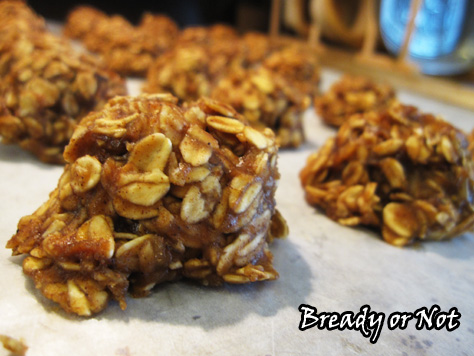
Happy New Year! Let’s make a healthy start. It’s no secret I love maple. This particular recipe has been a huge breakfast favorite of mine for the past six months, along with my other Healthy Breakfast Cookies.
These have another advantage, too… other than stronger maple flavor. They are fast to prepare. Even with my slow stovetop, I can whip these up and have them cooling in about 20 minutes.
Plus, these are fantastic to make and freeze! Since I eat three for breakfast, that means I can have a week’s worth of breakfast stashed away for now or later.
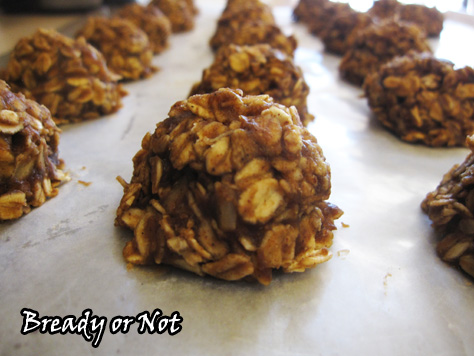
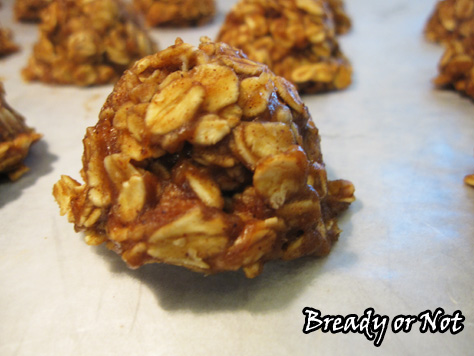
These are similar to the Maple Nut Butter No-Bakes I posted a while back, but this breakfast version is a heck of a lot healthier. No sugar. No butter. I like the taste more, too. It has a great, mild maple and nut butter flavor to it, and the oats soak just enough so that the cookies are perfectly chewy.
Customize these all kinds of ways, too. Use apple butter, pumpkin butter, etc. I’ve made them with cashew butter and almond butter, and combinations thereof. You could certainly use other kinds of milk, too, but I stick with unsweetened vanilla almond milk.
Greatly modified from Cookin’ Canuck.
Bready or Not: Healthy No-Bake Maple Breakfast Cookies
Ingredients
- 2 1/2 cups old-fashioned rolled oats
- 1 tsp vanilla extract
- 1/2 - 1 tsp maple flavor to preference
- 1/2 cup apple butter or other fruit butter
- 1/2 cup + 2 Tb almond milk
- 1/2 cup almond butter or other nut butter
- 1/4 cup + 2 Tb pure maple syrup
- sprinkle salt
- 1/2 cup pepitas or other seeds/nuts, optional
Instructions
- Measure out the oats and the two extracts, keeping them separate, and have ready near the stove. Prepare a large baking sheet with full coverage of wax paper.
- In a medium saucepan, mix together the apple butter, almond milk, maple syrup, and salt. Heat on medium, stirring often.
- After about ten minutes, the mixture will thicken; cook it at that level for another minute or two. If you have a candy thermometer, this thickening starts at about 180-degrees; that few minutes will take it to 200-degrees, and make sure it gets no hotter than that. Remove the pot from heat.
- Stir in the oats followed by the two extracts. Add pepitas or nuts, if desired. Stir until everything is covered.
- Use a tablespoon scoop to dole out cookies onto the prepared wax paper. This will be about 20 cookies or about 29 if seeds/nuts are added. Once they are all scooped, use your fingers to gently press in stray oats.
- Let cool for about 30 minutes. They can be kept sealed at room temperature but taste even better from the fridge; store between layers of wax paper. They can also be frozen.
- OM NOM NOM!
Bready or Not Guest Lawrence M. Schoen with Cold Porridge for Anthropomorphic Elephants
I’m happy to welcome Lawrence M. Schoen as the final Bready or Not guest for 2015! Lawrence is a good friend, a Klingon linguist, and is about ready to burst in joy because his novel is out from Tor this week. Barsk features anthropomorphic elephants in space. How cool is that? Lawrence, quite appropriately, is here today with a recipe that may be enjoyed by such wayfaring pachyderms.
Cold Porridge suitable for Anthropomorphic Elephants
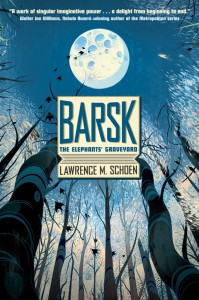 There’s not a lot of cooking going on in my novel, Barsk: The Elephants’ Graveyard. There’s a fair amount of eating, but since the main characters are anthropomorphic elephants living in a rainforest, most of what they eat is in a raw state — leaves, assorted grains and grasses, fresh and dried fruit.
In an earlier draft of the novel, I had a scene where Jorl, my protagonist, is visiting another planet, one inhabited by several different species/races of uplifted animals but which hasn’t seen an elephant in a millennium. In that scene, Jorl’s doing a signing at a bookstore and a helpful clerk brings him a large mug and a tureen of vanilla cocoa he can presumably refill it from. To the horror of everyone around him, Jorl dips his trunk directly in the tureen and empties it in one go. I miss this scene and I’m hoping to find a home for it one day. More importantly for this blog, I thought I had invented the idea of blending vanilla in with hot chocolate (which I had been doing for years by adding vanilla extract). Imagine my surprise when I saw you could buy this as a pre-packaged flavor.
But in terms of an actual recipe from the book, let’s talk about “cold porridge.” The first anthropomorphic elephant we meet in the book is Rüsul, and he’s on a raft on the ocean sailing off to his death. Along with the fruit and grasses included in his provisions, there’s mention of grain for making cold porridge. It’s worth noting that it’s almost always raining on Barsk, which is why a hot meal is complicated (not that making a fire on a raft would be a good idea even if it were easier). There are many variations on this, depending on what fruits you want to use, whether or not you choose to go with yogurt or coconut milk, and so on. Here’s the one I personally like best:
Ingredients:
1/2 cup of rolled oats
1 cup unsweetened coconut milk
1 sliced and chopped banana
1 pinch of salt
2 tablespoons unsweetened dried coconut
1 tablespoon sliced almonds
1/4 teaspoon vanilla extract
Instructions:
Blend everything — except the banana! —together. Ideally, you want to put this into a sealed container and shake it furiously. Add the banana bits and repeat the blending/shaking. Then put the whole thing in the refrigerator overnight. By morning, it will have all set, and you’ll have a delicious cold porridge to start your day or in case any anthropomorphic elephants happen by.
 Lawrence M. Schoen holds a Ph.D. in cognitive psychology, has been nominated for the Campbell, Hugo, and Nebula awards, is a world authority on the Klingon language, operates the small press Paper Golem, and is a practicing hypnotherapist specializing in authors’ issues.
His previous science fiction includes many light and humorous adventures of a space-faring stage hypnotist and his alien animal companion. His most recent book, Barsk, takes a very different tone, exploring issues of prophecy, intolerance, friendship, conspiracy, and loyalty, and redefines the continua between life and death. He lives near Philadelphia, Pennsylvania with his wife and their dog
Read More
Bready or Not Guest: Bishop O’Connell with Beef & Guinness Vegetable Soup
 Today I am happy to welcome Bishop O’Connell as my Bready or Not guest. He’s delivering a perfect winter recipe: Beef & Guinness Vegetable Soup! He’s also about to deliver his third book published through Harper Voyager Impulse. Three Promises comes out on December 8th! That gives you plenty of time to read the first two books in the American Faerie Tale series so you’re ready for the next.
Promises bind, but some promises break…
From the author of The Stolen and The Forgotten comes a collection of stories between the stories, a glimpse of the American Faerie Tale series characters in a whole new light.
For more than fifty years, Elaine has lived the life of an outcast elf, stripped of her rank and title in the fae court. Surrounded by her beloved collection of stolen artwork, we may just learn the secret behind her exile, and the one promise too important to break…It’s the day we’ve all been waiting for – Caitlin and Edward are getting married! But few weddings ever go without a hitch. Old promises were broken, and new vows will be made…
In The Stolen, Brendan vowed to help Caitlin rescue her young daughter from the Dusk Court, even if it meant sacrificing himself. Alone and in torment, he has come to accept his fate. Until an unexpected visitor finds her way into his life…Plus, an exclusive bonus story about the mysterious Legion of Solomon.
Preorder the ebook now for 99-cents; available December 8th:
HarperCollins
Amazon
Barnes & Noble
Google Play
iTunes
Kobo
Beef & Guinness Vegetable Soup
This could very easily make a stew, but I prefer it as a soup. It’s hearty and great to freeze and reheat when you want something tasty on a cold day. You can use a 6 quart soup pot, but it will fill right to the top, so be careful, 8 quart is ideal.
Ingredients:
1 lbs stew beef – cut into small pieces
2 medium sweet white onions – diced
1 lbs new potatoes – cut into quarters (even small ones should be cut in half)
1 lbs baby carrots – cut into small pieces
6 celery stocks (no leaves) – diced
1 lbs bag of frozen peas
1 lbs bag of frozen sweet corn
1 large can (16oz) fire roasted diced tomatoes
16oz beef stock
16oz vegetable stock
Salt
White Pepper
Optional: dill, celery salt, garlic salt, chives.
3 pints of Guinness – at room temperature
 It’s best to use the Guinness that doesn’t have a widget in it (see image). If you can only get the bottles or cans that do have the widget (nitrogen injection device) then open the bottles/cans and let them sit for a while before starting.
Put the soup pot over a medium high heat and add a couple teaspoons of olive oil and cook down the onions. When they start to turn translucent, add the stew beef, stirring regularly. By the time to beef has browned on the outside, the onions should be starting to caramelize. Add the Guinness and let it reduce to 1/3. Yes, 1/3, this will take a while (30 mins or so).
While this is happening two things will happen. First, you’ll see a thick froth develop and it will get large, especially if your pints had the widget. Don’t panic, this is normal and you can reduce it by stirring. The second thing that will happen is you’ll notice a very strong barley smell from the pot. Again, don’t worry, it will taste much better when it’s done than it smells at this stage.
When the Guinness has reduced add all the remaining ingredients, but add the stock last. Elsewise you’ll get a LOT of splashing. Once everything is in there, stir and bring to a slow boil. Reduce the heat and simmer for 2-3 hours, and enjoy the wonderful smell that will fill your kitchen. Add salt and pepper to taste, but keep in mind potatoes absorb salt and there are a lot of them so don’t worry if it seems like you’re adding a lot of salt. You can also, obviously, hold off and season when served to individual tastes. When finished, it freezes for 6-8 months without any concern, probably longer than that but I’ve never gotten it to last longer than that.
Goes great a cold hard cider and some fresh, crusty bread (buttered of course). You can go “full Irish” and have a Magners Cider (Bulmers in Ireland) and some soda bread. I’m actually not a big fan of soda bread (don’t tell!) but the cider compliments the flavor of the soup nicely.
 Bishop O’Connell is the author of the American Faerie Tale series, a consultant, writer, blogger, and lover of kilts and beer, as well as a member of the Science Fiction & Fantasy Writers of America. Born in Naples Italy while his father was stationed in Sardinia, Bishop grew up in San Diego, CA where he fell in love with the ocean and fish tacos. While wandering the country for work and school (absolutely not because he was in hiding from mind controlling bunnies), he experienced autumn in New England. Soon after, he settled in Manchester, NH, where he writes, collects swords, revels in his immortality as a critically acclaimed “visionary” of the urban fantasy genre, and is regularly chastised for making up things for his bio. He can also be found online at A Quiet Pint, where he muses philosophical on life, the universe, and everything, as well as various aspects of writing and the road to getting published.
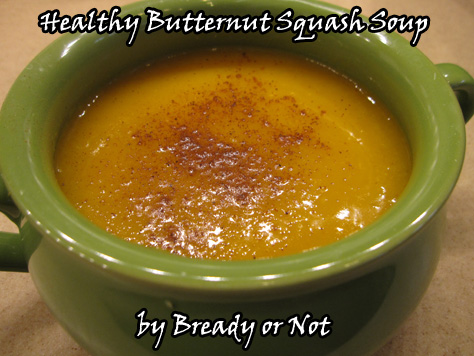
Bready or Not: Healthy Butternut Squash Soup
This wonderful soup has been one of my cool weather dinner staples for several years!
I love, love this soup. It takes a little bit of prep work but then feeds me for a few days. It’s both delicious and healthy. Butternut squash is one of my favorite roast vegetables, and this just blends it into liquid form.
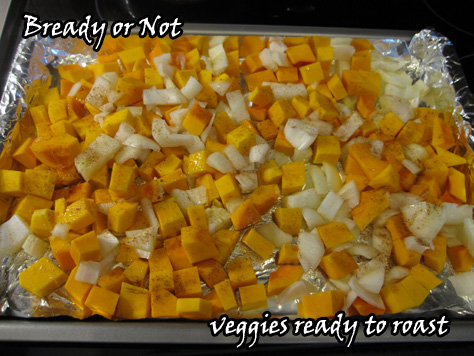
Butternut squash can be intimidating to slice up. I recommend the technique shown at The Kitchn. Basically, you slice off the ends, then take off the rind, de-seed, then dice the orange flesh.
This recipe freezes really well, too. I like to measure it in 2-cup increments and seal it up in quart-size freezer bags; I can freeze them flat so they take up almost no room.
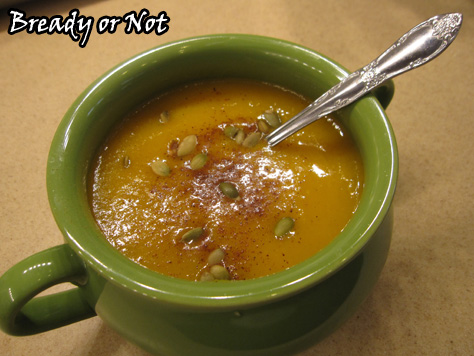
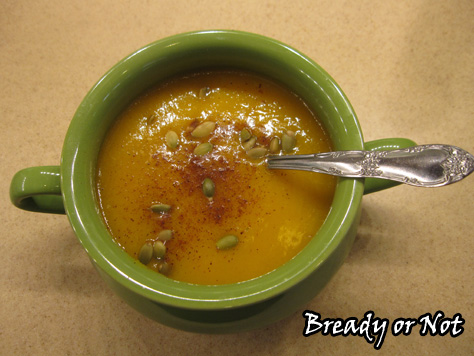
The soup’s flavor improves after being in the fridge for a day, too. The roasted vegetables really come through. I like to add spices like nutmeg, cinnamon, or pumpkin spice mix, and a few pepitas for texture.
It’s a bowl of stomach-warming happiness.
Modified from Lick My Spoon.
Bready or Not: Healthy Butternut Squash Soup
Ingredients
- 2 - 3 pound butternut squash
- 1 yellow onion
- 32 ounce chicken broth or vegetable broth, 1 box or 2 cans
- 2 Tablespoons olive oil
- salt Hawaiian salt recommended
- nutmeg or cinnamon, or pumpkin spice mix, to taste
- pepitas or chopped pecans, optional
Instructions
- Preheat oven to 450-degrees. Prepare a large rimmed baking sheet by lining it with foil.
- Peel, de-seed, and dice the squash into roughly 1-inch cubes. It doesn't need to be neat--they will all be blended in the end. Peel and dice up the onion.
- Place the squash and onion on the baking sheet. Drizzle or spray olive oil over everything. Add salt and other spices like cinnamon or nutmeg and toss to coat.
- Roast in oven for about 25 minutes. Turn over the squash, then cook another 15-25 minutes, until the squash is just browning and is fork-tender.
- If you want to complete the soup later, just stick the squash in the fridge. Or continue...
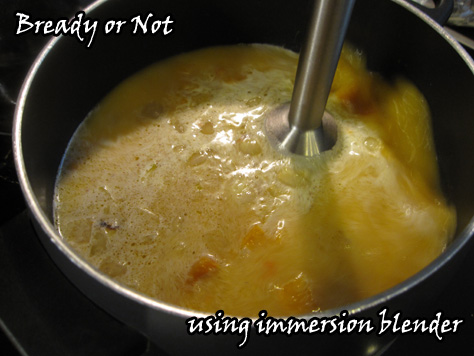
- In a large pot, bring the broth to a simmer. Add the roasted squash and onion. Carefully puree using an immersion blender, or blend in small batches in a blender or food processor. Use caution: you’re working with hot liquid! Process until the soup is smooth, and bring to a simmer again.
- Serve in bowls with an additional sprinkling of spices and perhaps some pepitas or chopped pecans on top! Leftovers keep sealed in fridge upward of a week; the taste actually improves after being in the fridge for a day. It can also be frozen in freezer bags or plastic dishes. Reheats quickly in the microwave or on the stove.
- OM NOM NOM!
Read More


