Bready or Not: Healthy Butternut Squash Soup
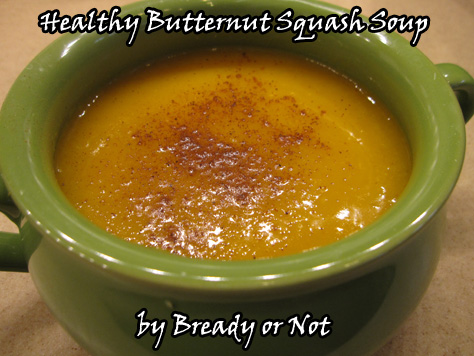
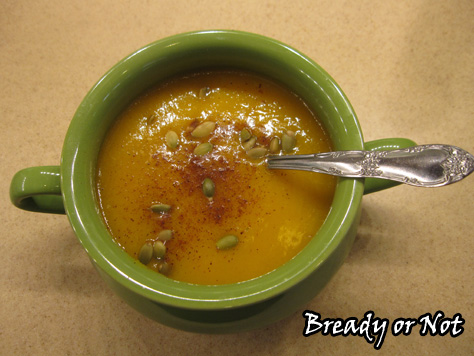
This wonderful soup has been one of my cool weather dinner staples for several years!
I love, love this soup. It takes a little bit of prep work but then feeds me for a few days. It’s both delicious and healthy. Butternut squash is one of my favorite roast vegetables, and this just blends it into liquid form.
Butternut squash can be intimidating to slice up. I recommend the technique shown at The Kitchn. Basically, you slice off the ends, then take off the rind, de-seed, then dice the orange flesh.
This recipe freezes really well, too. I like to measure it in 2-cup increments and seal it up in quart-size freezer bags; I can freeze them flat so they take up almost no room.
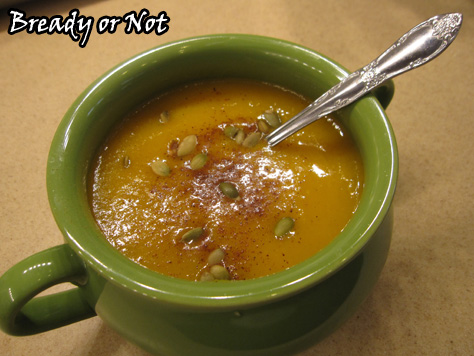
The soup’s flavor improves after being in the fridge for a day, too. The roasted vegetables really come through. I like to add spices like nutmeg, cinnamon, or pumpkin spice mix, and a few pepitas for texture.
It’s a bowl of stomach-warming happiness.
Modified from Lick My Spoon.
Bready or Not: Healthy Butternut Squash Soup
Ingredients
- 2 - 3 pound butternut squash
- 1 yellow onion
- 32 ounce chicken broth or vegetable broth, 1 box or 2 cans
- 2 Tablespoons olive oil
- salt Hawaiian salt recommended
- nutmeg or cinnamon, or pumpkin spice mix, to taste
- pepitas or chopped pecans, optional
Instructions
- Preheat oven to 450-degrees. Prepare a large rimmed baking sheet by lining it with foil.
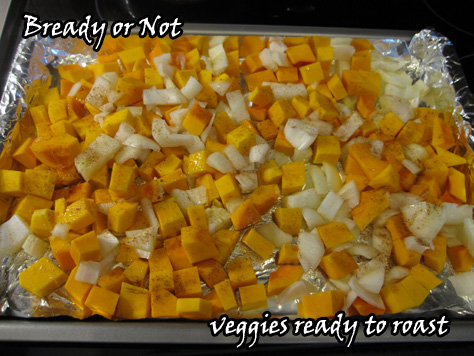
- Peel, de-seed, and dice the squash into roughly 1-inch cubes. It doesn't need to be neat--they will all be blended in the end. Peel and dice up the onion.
- Place the squash and onion on the baking sheet. Drizzle or spray olive oil over everything. Add salt and other spices like cinnamon or nutmeg and toss to coat.
- Roast in oven for about 25 minutes. Turn over the squash, then cook another 15-25 minutes, until the squash is just browning and is fork-tender.
- If you want to complete the soup later, just stick the squash in the fridge. Or continue...
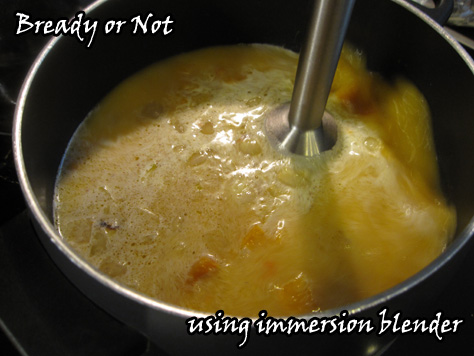
- In a large pot, bring the broth to a simmer. Add the roasted squash and onion. Carefully puree using an immersion blender, or blend in small batches in a blender or food processor. Use caution: you’re working with hot liquid! Process until the soup is smooth, and bring to a simmer again.
- Serve in bowls with an additional sprinkling of spices and perhaps some pepitas or chopped pecans on top! Leftovers keep sealed in fridge upward of a week; the taste actually improves after being in the fridge for a day. It can also be frozen in freezer bags or plastic dishes. Reheats quickly in the microwave or on the stove.
- OM NOM NOM!
Read More
Bready or Not: Chocolate-Coffee Truffles
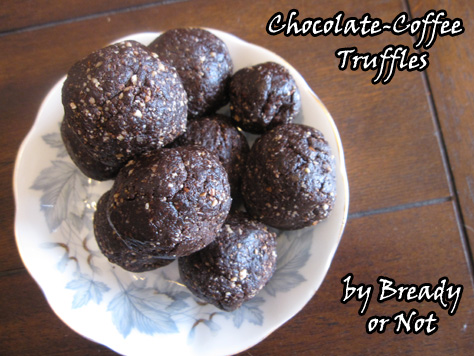
Start the day off right with breakfast truffles packed with coffee and cocoa!
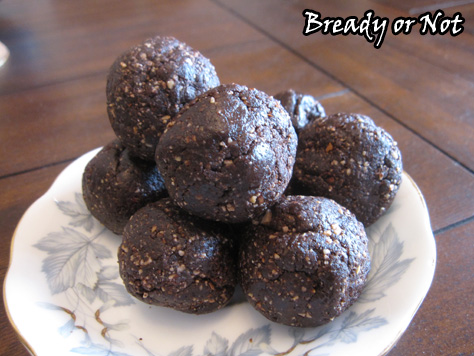
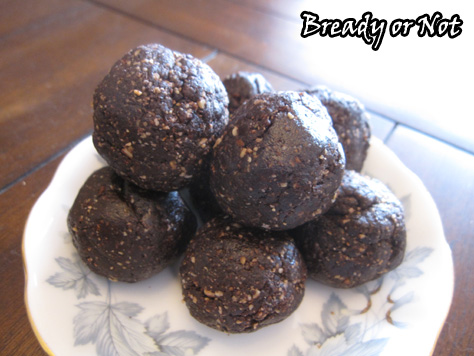
Sure, they might not be the most photogenic of items, but they are delicious and they pack a caffeine wallop. These are also gluten-free with no added sugar.
The dates act as the source of sweetness and as the binding agent. Almonds are loaded with all kinds of healthy goodness. Everything about these screams “HEALTHY!”
Trust me. They might not look pretty, but they’re tasty.
Modified from Relish Magazine.
Bready or Not: Chocolate-Coffee Truffles
Ingredients
- 1 cup chopped Medjool dates about 15 dates
- 1/2 cup almonds raw or roasted
- 1/4 cup unsweetened cocoa powder
- 2 Tablespoons ground coffee
- 1 Tablespoon chia seeds or wheat germ or flax seeds
- pinch salt
Instructions
- Combine all the ingredients in a food processor or high-powered blender. It might need to be blended in batches.
- Pulse until the almonds are in very small pieces. If the mixture isn't cohesive, add a teaspoon of water and blend again. Add more water if needed. The mash should hold together when pressed but not be wet.
- Use a spoon or scoop to form the mix into truffles. Makes about 9 tablespoon-sized.
- OM NOM NOM!
Read More
Bready or Not: Lemon-Basil Vinaigrette with Spaghetti Squash
It’s getting hot (ugh) but that also means it’s time for light, fresh salads and pasta dishes. Today that means two recipes: lemon-basil vinaigrette and an easy technique to make spaghetti squash in the microwave.
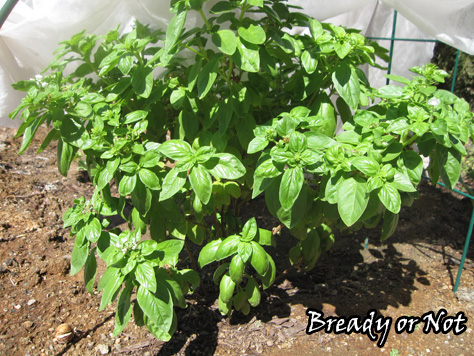
Last summer I planted some basil. The basil apparently really liked the Arizona heat, and it grew huge and I had to keep making pesto and figure out other recipes to utilize it.
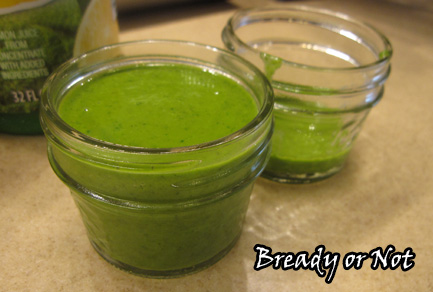
This quick dressing became a favorite because it made a reasonably-sized amount and was great with both spaghetti squash and salads. This would be great tossed with any pasta, too.
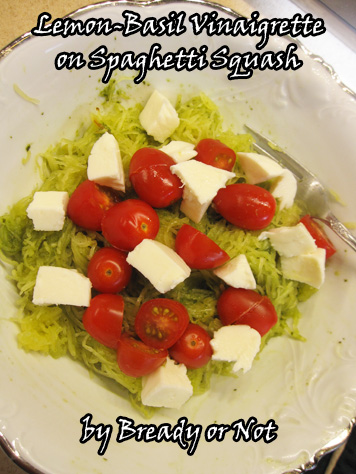
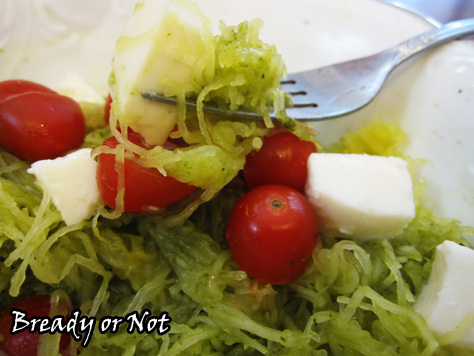
The pictures I have here show that I used it to make a modified caprese salad. I heated up my squash, mixed in the vinaigrette, heated it some more, and then topped it with fresh mozzarella and cherry tomatoes. All kinds of mix-ins would be great with this dressing.
If you don’t have fresh basil handy, I bet this would be great with some jarred pesto, too.
Vinaigrette modified from My Recipes.
Bready or Not: Lemon-Basil Vinaigrette
Ingredients
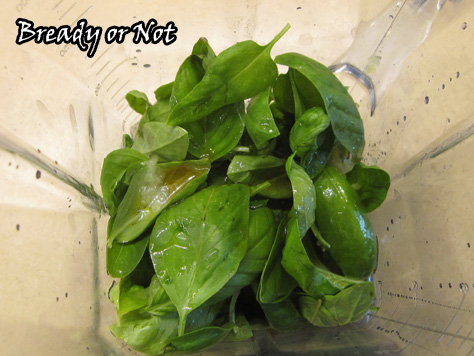
- 1 cup fresh basil leaves firmly packed
- 1/4 cup extra virgin olive oil
- 1 Tablespoon champagne vinegar or white wine vinegar
- 1 Tablespoon lemon juice
- 1 teaspoon honey
- 1 garlic clove minced
Instructions
- Place all ingredients in food processor or blender and pulse a few seconds, until blended. Store in the fridge and use on pasta, spaghetti squash, sandwiches, or salads.
- OM NOM NOM!
Bready or Not: Easy Microwave Spaghetti Squash
Ingredients
- 2 - 3 lb spaghetti squash
Instructions
- Wash and dry the squash. Very carefully stab with a knife to penetrate the surface every few inches.
- Place the squash on a microwave safe plate and cook in microwave on normal heat for 7-9 minutes, depending on size. Remove from microwave--the plate will be hot--and set on counter to cool at least twenty minutes.
- Use a large knife to cut the spaghetti squash lengthwise. Be cautious of escaping steam. Let the opened squash sit out a while more to cool.
- Use a spoon to scoop out the seeds, then use a fork to shred the squash itself. Store in fridge up to five days. Use in various dishes as a pasta substitute and heat up the squash in the oven or microwave.
- OM NOM NOM!
Read More
Bready or Not: Chocolate Chip Cookie Dough Breakfast Bites
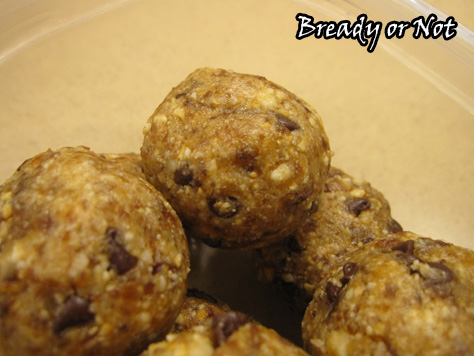
I present to you a healthy, delicious breakfast option that just happens to taste like cookie dough. OH YEAH.
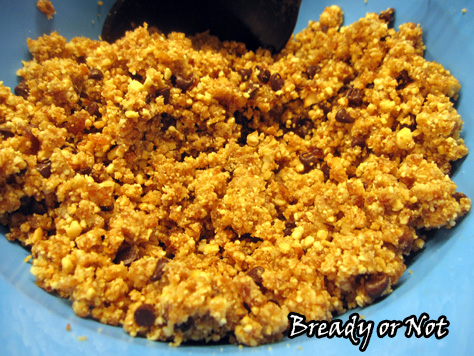
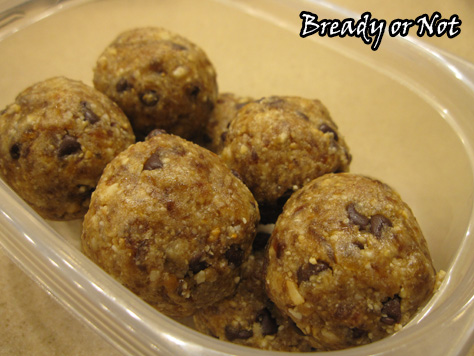
A while back I shared my recipe for Maple Energy Bites. Now it’s time to share the cookie dough version. It’s very simple. Throw ingredients in a high-powered blender. Form into bars or balls. Stash in the fridge. Eat.
You can use any kind of nut here, really, or a combination of nuts, but cashews will be the closest to cookie dough. They have that natural buttery taste. The dates add sweetness and also act as a binding agent. I add cinnamon, but you can sprinkle in whatever flavors you want and make it more like a spice cookie.
I usually eat two or three for breakfast. They are great before a work-out. They also will keep for upward of two weeks in a sealed container in the fridge.
Healthy cookie dough. This is totally a thing.
Bready or Not: Chocolate Chip Cookie Dough Breakfast Bites
Ingredients
- 2/3 cup dates chopped, medjool best
- 1 cup cashews
- big pinch cinnamon
- 1 teaspoon vanilla
- 2 Tablespoons mini chocolate chips
- water if needed
Instructions
- In a bowl, combine all of the ingredients but the chocolate chips and water. Pour 1/3 or 1/2 the mix into a high-powered food processor or blender. Pulse. Stir it with a spoon or spatula--it will be thick and gum up the machine. Pour the blended mix out, then add in more of the nut-date blend until everything is mostly blended. It's okay to have some chunks. Add the mini chocolate chips.
- Squeeze the mash between your fingers. If it doesn't want to stick together, stir in water by 1/2 teaspoon until it's cohesive.
- You can shape them in two ways. Use a tablespoon scoop to form a ball, then compress them with your hands to tighten. Or, make bars. Place a sling of parchment paper in a bread pan. Pour the mash in. Compress as tightly as you can. Remove using the sling and cut to preferred size.
- Keep stored in covered dish or closed baggie in fridge. Makes about 9 tablespoon-sized balls or 7 bars. Will keep for upward of 2 weeks.
OM NOM NOM!
Read More
Bready or Not: Pumpkin Pucks
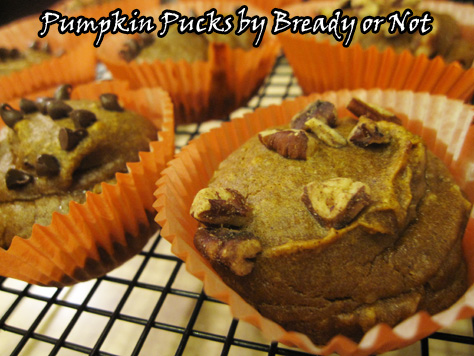
I don’t follow a paleo diet, but I do follow delicious food. In this case, delicious AND healthy.
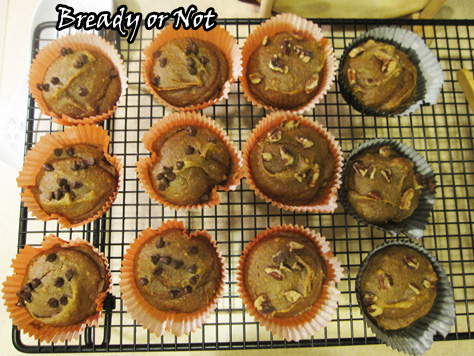
These pumpkin pucks are rather like mini pumpkin pie custards with a slight nutty taste. That nutty taste is stronger if you follow the original paleo version of the recipe and use almond flour, which was my preference, though making them with whole wheat and all-purpose flour works well.
I also used different nut butters. Almond butter tastes the strongest–in a very good way–though cashew butter was fantastic, too. Once, I only had 3/4 cup of pumpkin, so I made up for the difference with applesauce. I found no major difference in taste or texture.
This isn’t one of those dishes I make for my husband to take to work. These are mine. Two of them make for a yummy, nutritious breakfast. Pucks also be an awesome snack, and with their size they are very kid-friendly. They keep very well in the fridge for at least a week.
Modified from Paleo Parents.
Bready or Not: Pumpkin Pucks
Ingredients
- 1 cup pumpkin puree applesauce can be substituted in full or part
- 1 cup almond or other nut butter
- 1/4 cup honey
- 2 Tbsp maple syrup
- 2 eggs room temperature
- 1/3 cup almond flour or wheat or all-purpose flour
- 1 Tbsp cinnamon
- 1 tsp nutmeg
- 1/2 tsp salt
- 1/3 cup mini chocolate chips optional, or chopped nuts or dried fruit
Instructions
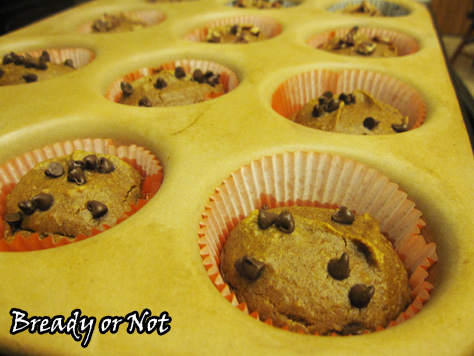
- Prepare a muffin pan with dropping in cup liners, then spray the insides with nonstick spray. Preheat oven at 350-degrees.
- If your almond butter is very stiff, zap it in the microwave for 15 seconds or so to soften it. Mix pumpkin puree and the almond butter together.
- Add honey and syrup and beat in eggs one at a time. Follow with each of the dry ingredients until it's just combined.
- Fill the muffin cups to 3/4 full; a tablespoon scoop makes this easy, as it's almost exactly 2 tablespoons to fill the cups. Top with mini chocolate chips or chopped nuts, if desired.
- Bake at 350-degrees for about 20 minutes. They will not rise much. The tops of some may start to crack. Let them cool for a while and then keep stored in fridge. They'll keep upward of a week, if they last that long!
OM NOM NOM!
Bready or Not: Maple Energy Bars and Bites
Confession: I’m classifying this as a fall recipe because of the maple, but I make these all year long.
I know, I know. If you’ve been following me for any length of time, you know how I love maple. I like to make my own breakfast food, too.
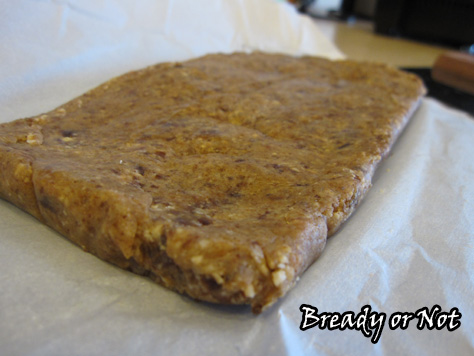
Larabars are found in the energy bar section of retailers. They are delicious but are also awfully expensive–if you’re lucky, you might get a bar for a buck on sale. Me? I’m cheap. I make my own versions. I have a chocolate chip cookie dough recipe that I really need to share at some point, but today is about the maple variety that I created on my own.
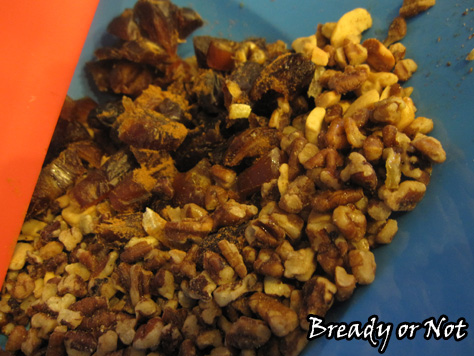
To make any homemade Larabar facsimile, you really need two base ingredients: dates and nuts. You switch out the nuts to your taste or based on sales, then change out seasonings to make things fresh and tasty. With the maple flavor, I like using a combo of cashews and pecans, but I’ve also done all cashews. Feel free to do almonds, peanuts, or whatever else you have handy, or combine them all!
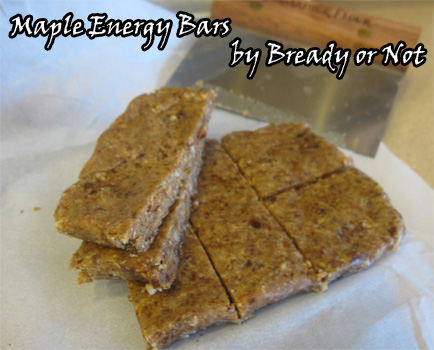
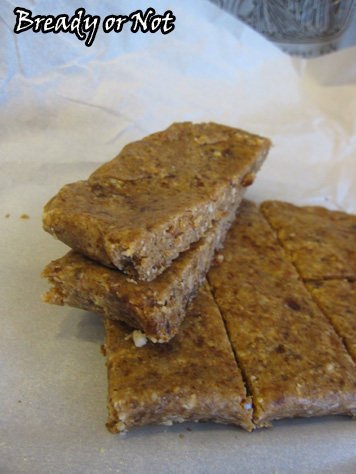
I usually make these into a ball shape using my tablespoon scoop, but this time around I made bars. They are a bit more photogenic, I think. And man, do they taste good.
Bready or Not: Maple Energy Bars and Bites
Ingredients
- 1 cup medjool dates chopped
- 1/2 cup cashews
- 1/2 cup pecans or combine other nuts to equal 1 cup
- 1-2 teaspoons candied ginger diced (optional, but tasty)
- sprinkle cinnamon
- 1/2-3/4 teaspoon maple flavor
- water if needed
Instructions
- In a bowl, combine all of the ingredients but the water. Pour 1/3 or 1/2 the mix into a high-powered food processor or blender. Pulse. Stir it with a spoon or spatula--it will be thick and gum up the machine. Pour the blended mix out, then add in more of the nut-date blend until everything is mostly blended. It's okay to have some chunks.
- Squeeze the mash between your fingers. If it doesn't want to stick together, dribble in water by 1/2 teaspoon until it's cohesive.
- You can shape them in two ways. Use a tablespoon scoop to form a ball, then compress them with your hands to tighten. Or, make bars. Place a sling of parchment paper in a bread pan. Pour the mash in. Compress as tightly as you can. Remove using the sling and cut to preferred size.
- Keep stored in covered dish or closed baggie in fridge. Makes about 9 tablespoon-sized balls or 7 bars. Will keep for upward of 2 weeks.


