


Bready or Not Original: Chocolate-Hazelnut Sables
These Chocolate-Hazelnut Sables are a fancy kind of shortbread, perfect to pair with some coffee or tea!

The chocolate flavor here is pleasant and deep thanks to the pairing of cocoa powder and mini chocolate chips. The hazelnuts provides a welcome sporadic crunch.
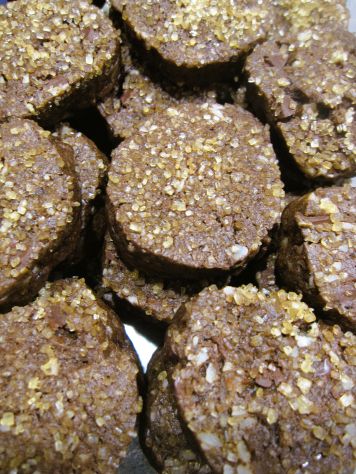
The hazelnuts will need to have their brown papery skin removed for the recipe. Look at the end of the cookie directions for instructions on how to do that! It’s a fiddly, time-consuming thing, but it’s not hard, but do be careful with the fizzing-hot baking soda.
Bready or Not Original: Chocolate-Hazelnut Sables
Equipment
- food processor
- plastic wrap
- food scale
- parchment paper
- knife or bench knife
Ingredients
- 1/2 cup blanched hazelnuts see note for blanching advice
- 3 oz mini semisweet chocolate chips
- 1 1/3 cups all-purpose flour
- 1/3 cup unsweetened cocoa powder sifted
- 1/4 teaspoon baking soda
- 1/4 teaspoon salt
- 1/2 cup unsalted butter (1 stick) room temperature
- 1/4 cup white sugar
- 1/4 cup brown sugar packed
- 1 large egg
- 1/2 teaspoon vanilla extract
- 1/4 cup turbinado sugar for topping
Instructions
- Use the food processor to finely chop the hazelnuts. Transfer them to a bowl with the mini chocolate chips.
- In another bowl, stir together the flour, cocoa, baking soda, and salt. Set aside.
- In a mixing bowl, beat together the butter and white and brown sugars until they are light and fluffy. Add the egg and vanilla. Gradually mix in the dry ingredients, scraping the bottom of the bowl a few times. Fold in the hazelnuts and chocolate.
- Divide the dough between two long sheets of plastic wrap. Form the dough into logs, then encase in plastic, rolling to smooth out. Each should be about 1 inch high and 9 inches long.
- Wrap airtight and chill for at least an hour, or freeze for upwards of a month; thaw later in fridge.
- When it is baking time, preheat the oven at 350. Lay parchment paper on baking pan. Place turbinado sugar in a saucer.
- Use a knife or bench knife to slice logs about 1/4-inch thick. Press the top of each cookie into the turbinado sugar, then set spaced out on parchment.
- Bake for about 14 minutes. Let set for 5 minutes, then move to a cooling rack. Store in a sealed container at room temperature.
OM NOM NOM!
Notes
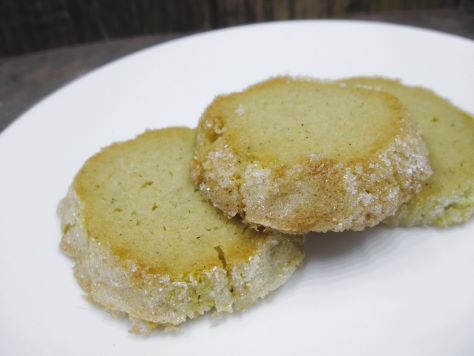
Bready or Not: Vanilla Sablé Cookies
These Vanilla Sablé Cookies are a delicate French take on shortbread. They are not heavily sweet, perfect for people who like their desserts a bit gentler.
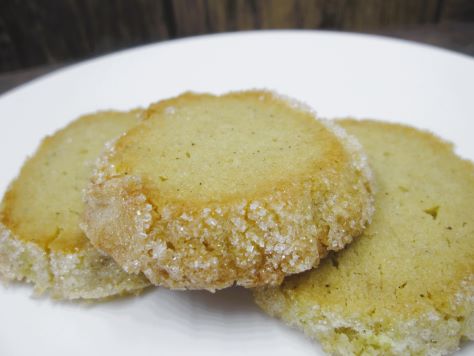
This recipe calls for vanilla bean paste. It will imbue the dough with a deeper vanilla flavor as well as beautiful flecks of vanilla. It makes the end result prettier–which is saying a lot, as they are already pretty courtesy of a sparkling sanding sugar crust.
Note that this dough requires chill time, as it is very soft. You don’t want it warm as it is sliced or baked!
Bready or Not: Vanilla Sablé Cookies
Equipment
- plastic wrap
- pastry brush
Ingredients
- 1 Tablespoon vanilla bean paste
- 1/3 cup white sugar
- 1 cup unsalted butter 2 sticks
- 1/2 teaspoon fine sea salt
- 1/3 cup confectioners’ sugar sifted
- 2 large egg yolks separated
- 2 cups all-purpose flour
- 1/2 cup sanding sugar white or other color
Instructions
- Mix together the vanilla bean paste, white sugar, and butter until smooth and creamy, not light and fluffy. Add the salt and confectioners’ sugar until smooth. Add 1 egg yolk. Mix in the flour until just combined.
- Turn out dough onto counter to lightly knead. Divide in half and shape into long logs about 1-inch tall. Wrap dough in plastic wrap and chill for at least 3 hours, or freeze up to 2 months.
- When it is baking time, preheat oven at 350 degrees. Line a baking sheet with parchment paper.
- Place egg yolk into a small bowl or ramekin. Add a splash of water and whisk it with the yolk. Pour sanding sugar onto a plate.
- Brush the yolk down the length of a cookie log, fully coating it. Roll the log in the sanding sugar. Place on a cutting board and slice into pieces 1/2-inch thick. Place spaced out on cookie sheet. Repeat process with other log. Don’t squeeze the cookies too close, as they will spread.
- Bake for 11 to 13 minutes, until set and just turning a hint of gold. Let them set on sheet for 5 minutes, then transfer to a rack to fully cool.
- Pack cookies in a sealed container at room temperature. They will keep for at least 4 days.
OM NOM NOM!
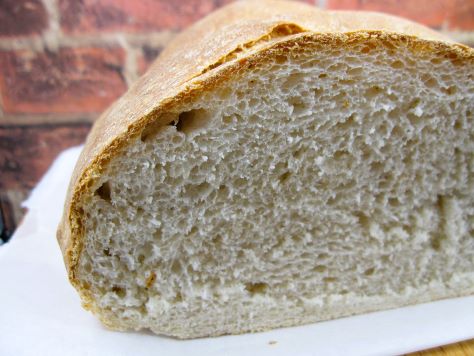
Bready or Not: Sourdough French Bread started in the Bread Machine (2 loaves)
Fresh French Bread is one of the best things on the planet. With your bread machine and a little bit of effort, you can create this wonder at home!
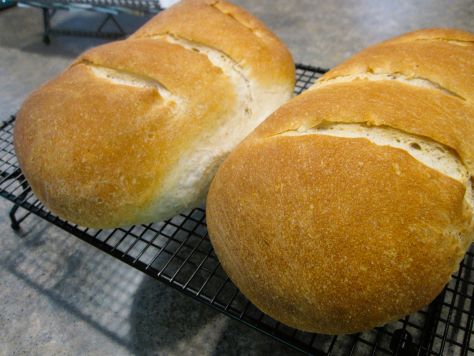
(Of course, you don’t NEED a bread machine to make the dough. You can just use the ingredients and mix by hand. This recipe aims for greater accessibility, though, for those who are crunched for time, have conditions like arthritis, or simply hate kneading.)
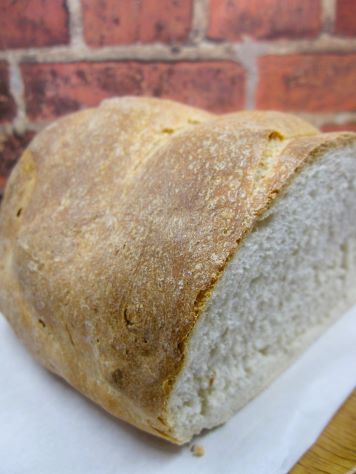
This recipe produces two loaves. A food scale will make for more precise results, both in assembling ingredients and dividing the dough later on.
Greatly modified from Making Artisan Breads in the Bread Machine by Michelle Anderson (a book I highly recommend).
Bready or Not: Sourdough French Bread started in the Bread Machine (2 loaves)
Equipment
- food scale
- bread machine
- food thermometer
- parchment paper
- baking sheet
- cake pan
Ingredients
- 1 1/2 cups active sourdough starter (around 350 grams)
- 3/4 cups lukewarm water (180 ml) about 100-110 degrees
- 2 1/2 Tablespoons white sugar (31 grams)
- 2 teaspoons sea salt
- 4 cups bread flour (480 grams)
- 1 1/2 teaspoons instant dry yeast or bread machine yeast
Instructions
- Most bread machines call for adding liquids to the bucket first. Therefore, place the starter and water inside. Use fingertips to whisk them together. Add sugar and salt, followed by the flour and yeast. Start the machine on dough mixing mode.
- Monitor the dough as it mixes. If it seems especially lumpy, drizzle in some extra water until the texture smooths out.
- Once the dough is done, measure it on a food scale to divide in half. Sprinkle extra flour on a clean work surface. Press dough out to a flat rectangle, about 10 inches long, then fold inward as if folding a sheet to go in an envelope. Pinch the seam together while gently elongating bread. Place seam underneath. Set loaf on parchment paper. Repeat with other half of dough.
- Let rise in a warm spot in the kitchen or in an oven on proof mode for an hour or so, until loaves look doubled. If loaves were in warm oven, remove them so the oven can preheat at 400 degrees. On a lower oven rack, place something like a metal cake pan that is an inch or two in depth so that it can heat as well.
- Once the oven is preheated, use a French lame or knife to slash the top of the loaf so that it can vent while baking. Being VERY careful to not overfill or get scalded by steam, pour water into the hot pan in the oven. Immediately place the risen loaves on the rack above and close the oven (and don’t open it again until the bread looks done!).
- Bake for 20-25 minutes, until loaves are golden and sound hollow when tapped. A check with a food thermometer should find an interior temperature over 190 degrees.
- Let loaves cool at least 30 minutes before slicing in. Bread will keep in a sealed bag at room temperature for up to 3 days. It can also be frozen right after cooling, and will keep well for up to a month there.
OM NOM NOM!
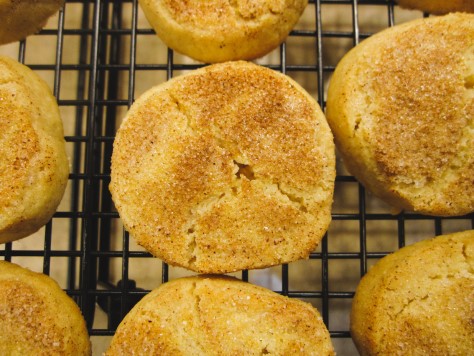
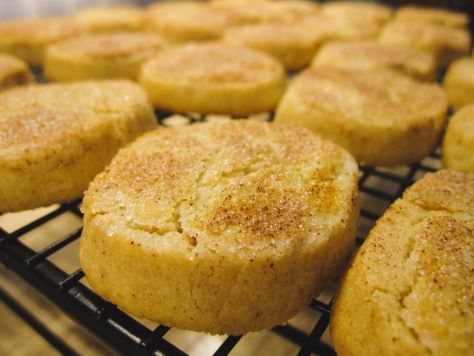
Bready or Not: Snickerdoodle Sables
If you love Snickerdoodles but want a fresh take that feels a bit fancier, try these Snickerdoodle Sables.
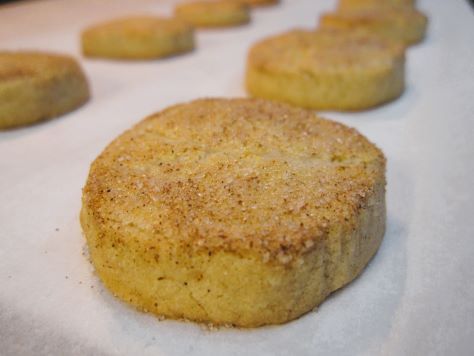
Sables are, essentially, French shortbread cookies. They tend to be lighter in texture than the traditional British and Scottish versions, and also are usually cut from a log and hence are round in shape.
For these cookies, plan on making the dough ahead of time. It needs time to chill (don’t we all?). That ends up making the actual baking process so quickly. Slice, brush on some yolk, dip in cinnamon-sugar, set on pan, repeat.
I modified this from the Bake from Scratch July/August 2018 issue.
Bready or Not: Snickerdoodle Sables
Equipment
- plastic wrap
- pastry brush
Ingredients
- 2/3 cup white sugar
- 2 teaspoons ground cinnamon
- 1 cup unsalted butter (2 sticks) room temperature
- 1/3 cup confectioners’ sugar
- 1/2 teaspoon fine sea salt
- 1 large egg yolk
- 1 teaspoon vanilla extract
- 2 cups all-purpose flour
- 1 large egg yolk for brushing atop the cookies
Instructions
- Mix the white sugar and cinnamon in a small bowl. Set aside.
- In a large mixing bowl, beat butter until creamy. Add 1/3 cup of the cinnamon sugar mix followed by the confectioners’ sugar and salt. Beat to incorporate. Add 1 egg yolk along with the vanilla. Gradually add the flour, pausing to scrape the bottom of the bowl a few times.
- Using hands, knead the dough until it fully comes together. Lay out two long stretches of plastic wrap. Roughly divide the dough in half and form it into tube shapes of the same size on each sheet of plastic wrap. Encase the dough in plastic, rolling it to smooth the edges and compress the dough. Chill the dough in the fridge for least 4 hours or as long as a few days. Save the remaining cinnamon-sugar mix.
- Preheat oven at 350-degrees. Place the remaining egg yolk in a bowl. Line a baking sheet with parchment paper. Use a sharp knife or bench knife to slice the dough into 1/2-inch coins. Brush the top of each round with egg yolk, then dip coated surface into the cinnamon-sugar to coat. Place rounds spaced out on parchment.
- Bake for 16 to 18 minutes, until cookies are set. Let cool on pan a few minutes before moving them to a cooling rack. Store in a sealed container at room temperature.
OM NOM NOM!
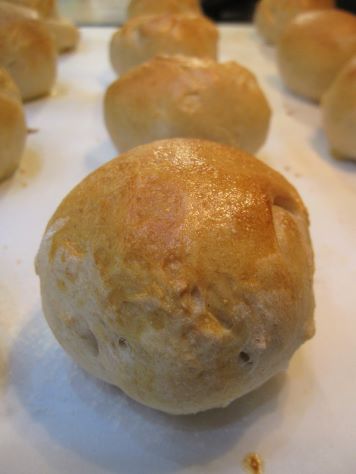
Bready or Not: French Rolls Mixed in the Bread Machine
These French Rolls Mixed in the Bread Machine take some planning–including awakening the starter a day ahead of time–but are well worth the effort due to the sheer deliciousness.
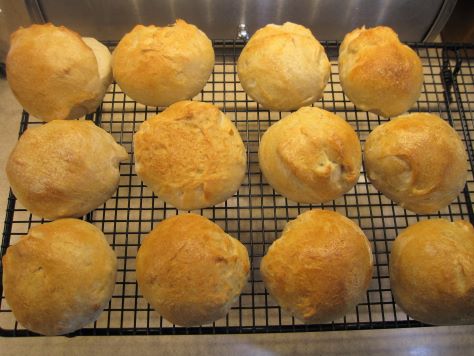
This is one of those recipes that isn’t a huge time drain, but does require work in little bursts. Begin the starter. Get the rest of the dough going. Do another rise. Shape the rolls and rise a third time. Bake.
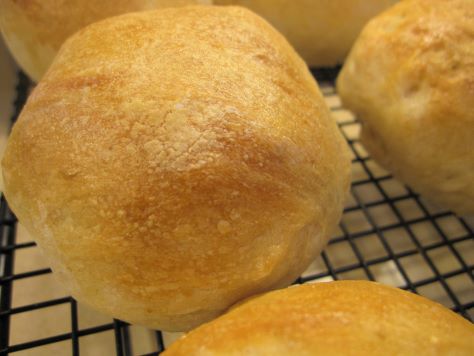
Also, just like the real thing in France, these are intended to be eaten fresh. However, that’s no big problem so long as you have room in your freezer. Freeze extra rolls the day they are made, and they’ll thaw and heat later and still be amazing.
This recipe is modified from Making Artisan Breads in the Bread Machine by Michelle Anderson, which I highly recommend to any bread machine owners. [affiliate link]
Bready or Not: French Rolls Mixed in the Bread Machine
Equipment
- bread machine
- kitchen scale
- plastic wrap
- parchment paper
- basting brush
Ingredients
Starter (make 12 to 18 hours ahead)
- 1 1/4 cups bread flour
- 1/4 cup whole wheat flour
- 3/4 cup lukewarm water 100-110-degrees F
- 1/8 teaspoon active dry yeast
Dough
- 3/4 cup lukewarm water 100-110-degrees F
- 1 3/4 teaspoon sea salt
- 3 cups bread flour plus more for work surface
- 1/2 teaspoon active dry yeast
- nonstick spray or olive oil
Finish
- 1 large egg
- 1 Tablespoon water
Instructions
Make the starter
- In the bucket of a bread machine or in a separate pitcher, stir together all of the starter ingredients until combined. Cover the top with plastic wrap and let set to rise at room temperature for 12 to 18 hours.
Make the dough
- If the starter didn’t rise in the bread machine, place it there now and add the additional water, salt, flour, and yeast. Start the dough cycle.
- Once the full cycle is done, apply nonstick spray or olive oil in a large bowl. Gather the dough into a ball and place it in the bowl, flipping it to completely coat. Cover with plastic wrap and let rise until it doubles, about an hour. Prepare one or two large baking sheets with parchment paper.
- Weigh the dough and then turn it out in a lightly floured work space. Determine the desired size of rolls; for standard dinner-sized ones, twelve is ideal. Divide the dough accordingly, forming into balls by tucking the lumpier bits and seams underneath. Fill a saucer with water to dab fingertips to make smoothing the dough easier. Space rolls out on prepared pan(s). Lightly cover with plastic wrap.
- Let rolls rise about 45 minutes. They should puff up. Preheat oven at 450-degrees.
Make the egg wash
- Whisk together the egg and water. Remove and discard plastic wrap from rolls. Brush egg wash over the rolls.
- Bake until golden brown, about 12 to 15 minutes. Rolls should sound hollow when tapped. They are best eaten hot the day they are made, but if frozen promptly, they will reheat later for same-day eating and still taste delicious!
OM NOM NOM!
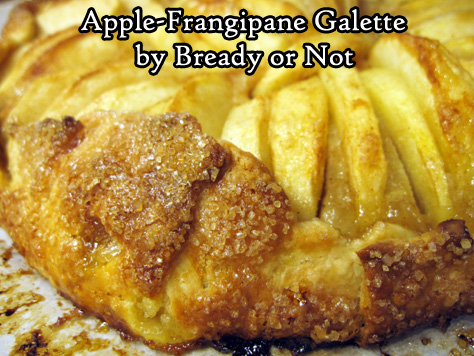
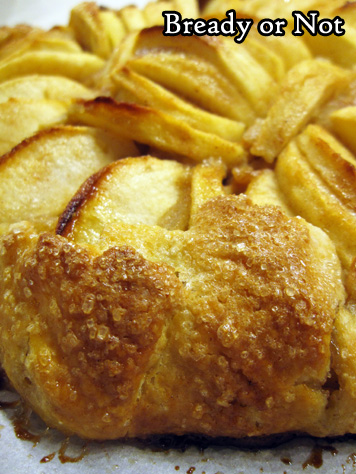
Bready or Not Original: Apple-Frangipane Galette
This Apple-Frangipane Galette is like a leaner apple pie. It’s the way to enjoy a sweet treat without going full overkill.
This recipe has a lot of ingredients and steps, but they can be spread out over a few days, if you want. The actual recipe is pretty straightforward!
I’ve been doing a number of recipes that use frangipane, and I get asked almost every time: “what is frangipane?”
To quote Wikipedia, it’s: “a sweet almond-flavored custard used in a variety of ways including cakes and… pastries. …Today it is normally made of butter, sugar, eggs, and ground almonds.”
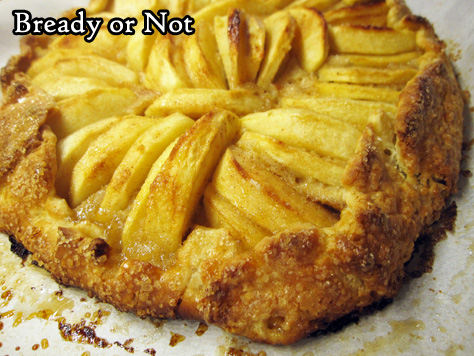
In other words, it’s a spreadable, sweet, nutty layer of goodness. It acts as the perfect complement to apples in this recipe.
Do note that this is best enjoyed the day it is made. It’s fine, though, to freeze slices of it right away. When you thaw them later, enjoy the pieces that same day!
Bready or Not Original: Apple-Frangipane Galette
Equipment
- parchment paper
- food processor
- pastry brush
Ingredients
Crust:
- 1 cup all-purpose flour plus more for dusting
- 4 teaspoons white sugar
- 1/2 teaspoon salt
- 6 Tablespoons cold unsalted butter cut into small pieces
- 1 large egg
Frangipane:
- 2/3 cup almond flour sifted to remove lumps
- 1/4 cup white sugar
- 1 Tablespoon all-purpose flour
- 1 Tablespoon unsalted butter room temperature
- 1 large egg
- 1 Tablespoon apple brandy such as Calvados (optional)
- 1 teaspoon pure vanilla extract
- 1/2 teaspoon apple pie spice
- pinch salt
Apple filling:
- 2 medium apples such as Honeycrisp or Golden Delicious
- 1 Tablespoon brown sugar packed
- 1 Tablespoon white sugar
- 1 teaspoon lemon juice
- 1/4 teaspoon apple pie spice
- 1 large egg beaten
- turbinado or other coarse sugar
Glaze:
- 2 Tablespoons honey
- 2 teaspoons apple brandy such as Calvados
Instructions
Make the crust:
- In a food processor, pulse together the flour, sugar, and salt. Add the butter and chop until it’s pea-sized. Add the egg and pulse until it comes together; if it doesn’t, add tiny drizzles of water until it does–just make sure the dough ends up cohesive, not wet. Turn out the dough onto a big piece of plastic wrap and compress the dough to form a disc. Wrap it up and chill it in fridge for a few hours, minimum, or a few days.
Make the frangipane:
- Use a rubber spatula to combine the almond flour, sugar, flour, butter, egg, apple brandy, vanilla, pie spice and salt, making it smooth. Stash it in the fridge until ready to use.
Assembling the galette:
- Preheat oven at 400-degrees. Prepare a big cookie sheet with a piece of parchment. Bring out the dough to warm for a few minutes, then lightly flour a surface and roll it out to about a 12-inch round. Move it to the parchment paper.
- Spread the frangipane over the dough, leaving a blank 1 1/2-inch border. Set the baking sheet in the fridge while preparing the apples.
Prepare the apples:
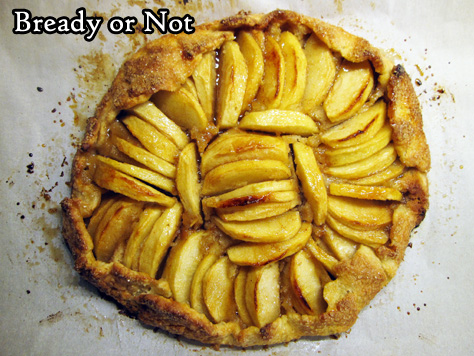
- Peel the apples and slice to 1/4-inch thickness. In another bowl, stir together the brown sugar, sugar, lemon juice, and pie spice. Add this to the apples, and toss them to coat. Bring out the galette dough. Arrange the apples on the frangipane starting from the middle, spiraling them outward while slightly overlapping them. Fold the blank edge over the apples to form a thin, pleated crust. Brush the beaten egg over the crust, then sprinkle it with coarse sugar.
- Bake galette for 35 to 40 minutes. Apples in middle should be fork-tender when done. Cool for about 30 minutes.
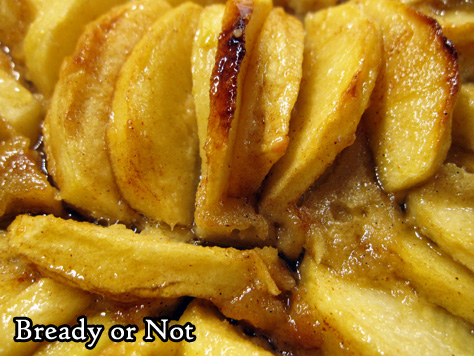
Make the glaze:
- In a small saucepan on the stovetop or in a microwave-safe bowl in the microwave, warm the honey and brandy until it is loose and spreadable. Using a clean pastry brush, brush glaze over the apples.
- Let galette cool another 30 minutes, minimum, before cutting it–a pizza slicer is great for this. The galette is best eaten the day it is made, or promptly frozen in slices to be eaten soon after it thaws.
