Bready or Not: Irish Coffee Blondies
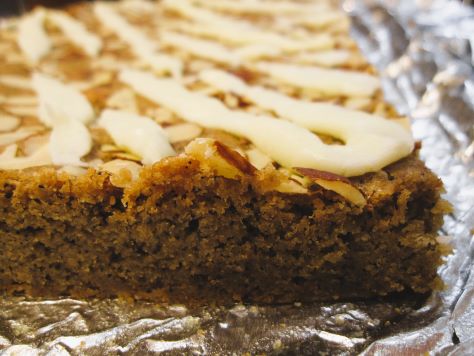
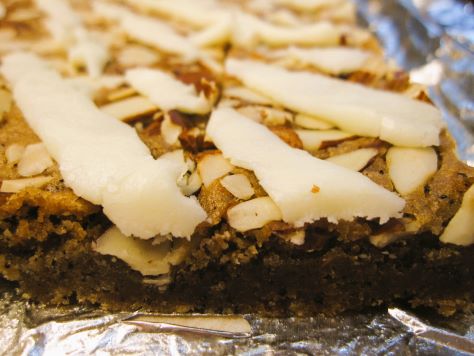
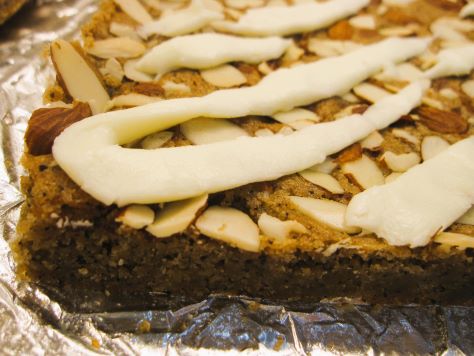
This Irish Coffee Blondies recipe is a long-overdue revamp of a recipe I first shared over a decade ago on the first iteration of Bready or Not on LiveJournal. I made it a few times after that, only for the paper to be buried amid many other recipes.
As I culled my recipe collection prior to moving, I rediscovered the print-out and knew I had to make it again soon because it’d help me use up some ingredients. Namely, sliced almonds and vanilla extract.
My husband now mostly uses k-cups for his coffee, a brewing method we didn’t have available back when I first baked this. I found that the 3 Tablespoons of ground coffee called for in this recipe were the exact contents of a Starbucks k-cup. I love when things work out like this!
This recipe would make a great dessert, but really, with the flavors, it’s even better for a breakfast or brunch. It’ll go great with coffee or tea!
Bready or Not: Irish Coffee Blondies
Equipment
- 9×13 pan
- aluminum foil
- nonstick spray
- uneven spatula
Ingredients
Blondies:
- 2 cups all-purpose flour
- 1 teaspoon baking powder
- 1/4 teaspoon baking soda
- 1 cup unsalted butter (2 sticks) melted
- 2 cups brown sugar packed
- 3 Tablespoons ground coffee equals 1 K-cup
- 1 teaspoon salt
- 2 large eggs room temperature
- 2 teaspoon pure vanilla extract
- 1/2 cup sliced almonds
Glaze:
- 1 Tablespoon unsalted butter melted
- 1 teaspoon almond extract or vanilla extract
- 1 teaspoon water plus more if needed
- 3/4 cup confectioners' sugar
Instructions
Make the blondies
- Preheat oven to 350 degrees. Line a 9-by-13-inch baking pan with foil and apply nonstick spray.
- In a big bowl, whisk together flour, baking powder, and baking soda. Set aside.
- Place the melted butter into a mixing bowl. Add the brown sugar, ground coffee, and salt. Stir to combine.
- Add eggs one at a time followed by the vanilla extract. Stir in flour mixture until just combined. Pour batter into pan and level out; an uneven spatula makes that easy. Sprinkle with almonds.
- Bake 27 to 30 minutes, until the middle passes the toothpick test. Let cool completely.
To complete with glaze
- Mix together the melted tablespoon butter and extract. Gradually whisk in confectioners’ sugar. Add teaspoons of water, as needed, until the glaze is thick but can be drizzled. Place it in either a pastry bag fitted with a plain round tip or a sandwich bag of which a corner will be snipped off. Drizzle glaze over blondies in a rough crosshatch pattern. Let glaze set for 1 hour before cutting blondies into squares. Store in a sealed container at room temperature. If making these in a warm place, put waxed paper between the stacked layers of blondies.
OM NOM NOM!
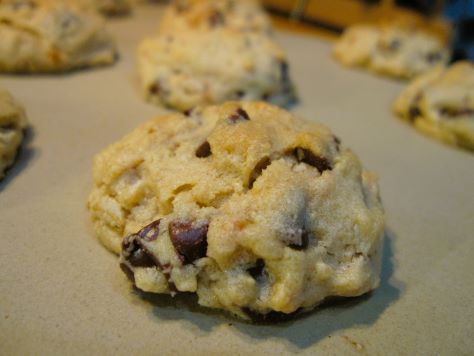
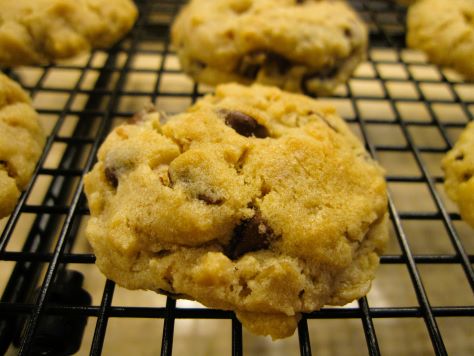
Bready or Not: Chocolate Chip Peanut Butter Cookies
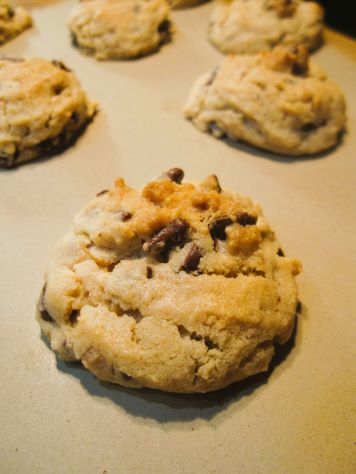
You cannot get a more classic American pairing than chocolate and peanut butter. These Chocolate Chip Peanut Butter Cookies are a dose of delicious nostalgia.
These cookies contain some rolled oats, but I wouldn’t term them oatmeal cookies. They don’t have that much density. Rather, these cookies are light and chewy.
The dough doesn’t need any chill time in the fridge. Mix it and bake it right away.
Bready or Not: Chocolate Chip Peanut Butter Cookies
Equipment
- teaspoon scoop or spoon
- baking sheet
- parchment paper
Ingredients
- 1/2 cup unsalted butter (1 stick) room temperature
- 1/2 cup white sugar
- 1/3 cup brown sugar packed
- 1/2 cup peanut butter chunky or creamy
- 1 large egg room temperature
- 1 teaspoon vanilla extract
- 1 cup all-purpose flour
- 1/2 cup old-fashioned oats also called rolled oats
- 1 teaspoon baking soda
- 1/4 teaspoon salt
- 1 cup semisweet chocolate chips
Instructions
- Preheat oven at 350-degrees. Line a baking sheet with parchment paper.
- In a large bowl, cream together the butter and sugars. Add the peanut butter, egg, and vanilla.
- In another bowl, stir together the flour, oats, baking soda, and salt. Gradually combine the contents of both bowls. Fold in the chocolate chips.
- Use a teaspoon scoop or spoon to place rounded balls of dough spaced-out on the cookie sheet. Flatten them slightly. Bake for 10 to 12 minutes, until set and golden. Cool on cookie sheet for 10 minutes before transitioning cookies to rack. Store cookies in a sealed container at room temperature.
OM NOM NOM!
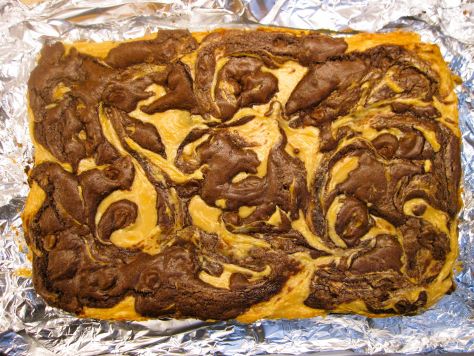
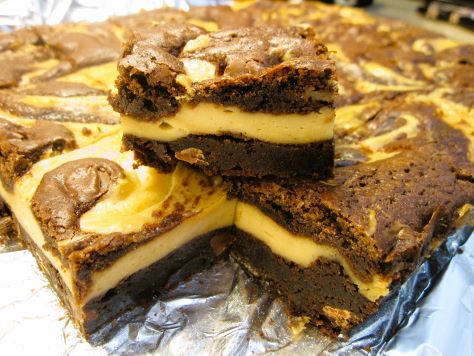
Bready or Not Original: Swirled Cookie Butter Brownie Bars
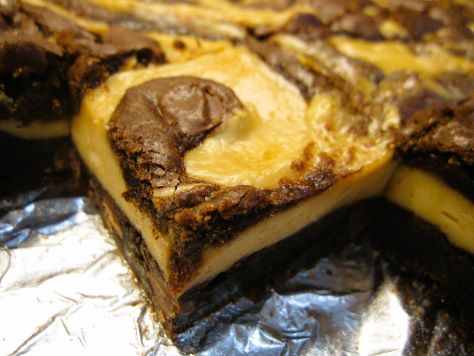
These Swirled Cookie Butter Brownie Bars are thick and luscious with just the right balance of chocolate and cookie dough flavors.
If you’re one of those people who had just to discover the joys of cookie butter–you’re in for a treat! Think cookies blended with oil to create a spreadable mass just like peanut butter. There is nothing healthy about it, but it tastes like cookie dough. You can find it at Trader Joe’s as Speculoos and at other stores as Biscoff or as a generic.
Cookie butter can pretty much replace peanut butter in any recipe, or even on something as simple as a sandwich. Here, it’s great swirled in with brownie batter. Chocolate and cookie dough, ever the perfect combination.
Since the swirl-in includes cream cheese, be sure to refrigerate these after they’ve baked and cooled. They are divine straight from the fridge!
Bready or Not Original: Swirled Cookie Butter Brownie Bars
Equipment
- 13×9 pan
- aluminum foil
- nonstick spray
- uneven spatula
- cutting board
Ingredients
Brownie base
- 3 large eggs room temperature
- 1 cup unsalted butter (2 sticks) melted
- 2 teaspoons vanilla extract
- 2 cups white sugar
- 1 1/4 cups all-purpose flour
- 3/4 cup baking cocoa sifted
- 1/2 teaspoon baking powder
- 1/4 teaspoon salt
- 1 cup milk chocolate chips
Cookie butter swirl-in
- 2 boxes cream cheese (8 ounces each) softened
- 1/2 cup creamy cookie butter
- 1/4 cup white sugar
- 1 large egg room temperature
- 2 Tablespoons milk
Instructions
- Preheat oven at 350-degrees. Line a 13×9 pan with foil and apply nonstick spray.
- In a big bowl, beat together eggs, butter, and vanilla. In another bowl, combine the brownie dry ingredients and gradually add them to the egg mix. Fold in the chocolate chips. Set aside 1 cup of the brownie batter for the topping. Scoop the rest into the prepared pan and use an uneven spatula to even it out.
- In another bowl, beat together the cream cheese blocks, cookie butter, and sugar. Once that is blended, add the egg and milk. Use an uneven spatula to spread the mixture in a thin layer across the top of the brownie batter in the pan. Dollop the reserved brownie batter on top. Use the tip of the uneven spatula or a butter knife to create swirls.
- Bake pan for 35 to 40 minutes, until the very middle passes the toothpick test. Cool on a wire rack for an hour, then place in fridge to completely chill. Use the foil to lift the contents onto a cutting board. Slice up and store in a sealed container in the fridge. Keeps for at least 3 days.
OM NOM NOM!
Bready or Not Original: Pumpkin Spice Sugar Cookies
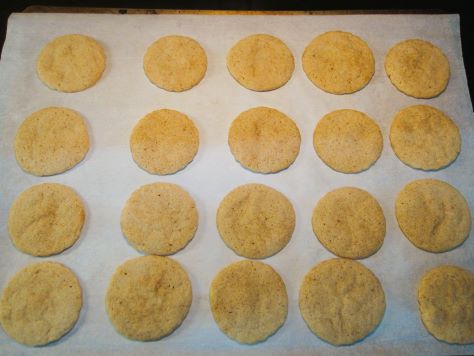
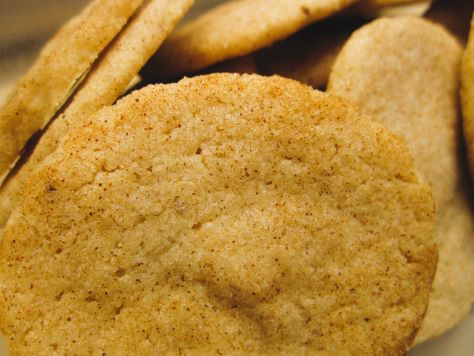
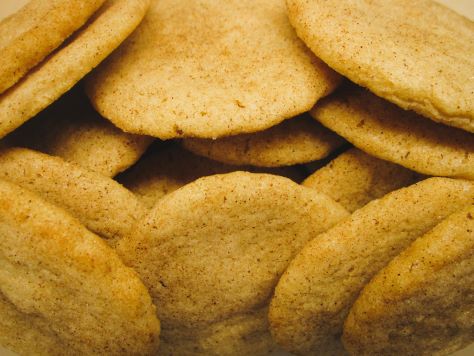
Pumpkin Spice Sugar Cookies! These are simple, delicious classic cookies, with warm spices inside and out.
These were among the last cookies I made in Arizona as I was frantically trying to use up my remaining butter and eggs. I thought I had everything figured out, and then I realized (after I made the dough) that I’d already packed up all of my rolling pins. Whoops. Therefore, I used good ol’ arm muscle to flatten the dough, and I ended up satisfied with how they turned out!
That said, don’t be like me. Make your life easier and use a rolling pin! You’ll get more consistent cookies, for sure.
Bready or Not Original: Pumpkin Spice Sugar Cookies
Equipment
- plastic wrap
- parchment paper
- Rolling Pin
- 2 1/2-inch round cookie cutter
- cooling rack
Ingredients
Cookie dough
- 1 cup unsalted butter (2 sticks) room temperature
- 2 cups white sugar
- 2 large eggs room temperature
- 2 3/4 cups all-purpose flour
- 2 Tablespoons pumpkin pie spice
Topping
- 1/2 cup white sugar
- 1/2 Tablespoon ground cinnamon
Instructions
- In a large bowl, cream together butter and sugar until they are light and fluffy. Add the eggs. Gradually mix in the flour and pie spice. Roughly divide the dough in half, flattening each portion into a disc, and wrap in plastic wrap. Tuck into the fridge overnight.
- Let dough sit out about 20 minutes to warm up enough to roll out. Preheat oven at 350-degrees. Prepare a large cookie sheet with parchment paper. Place the topping ingredients in a bowl and stir to combine.
- On a lightly floured flat surface, roll out one disc of cookie dough to 1/4-inch thickness. Portion out using the cookie cutter. Press the top of each round into the topping mix and then set, spaced out, on prepared cookie sheet.
- Bake for 10 to 12 minutes, until cookies ae set. Let sit on sheet for a few minutes, then transfer to a cooling rack. Repeat process with remaining dough, reassembling scraps to create more cookies. Store cookies in a sealed container at room temperature.
OM NOM NOM!
Bready or Not Original: Chewy Apple-Cranberry Oatmeal Cookies
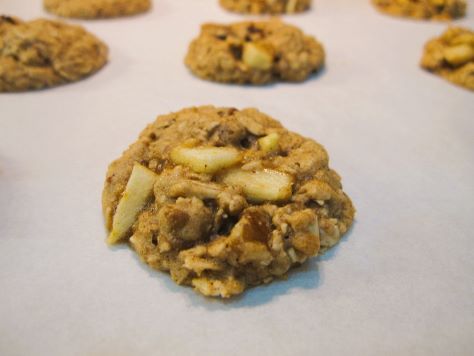
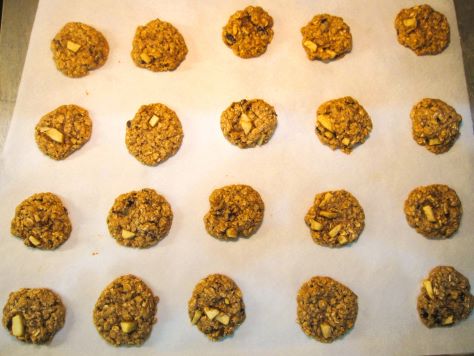
Ready for fall, even if only psychologically? These Chewy Apple-Cranberry Oatmeal Cookies are loaded with apple, cranberry, and walnut. They are autumn in a single bite!
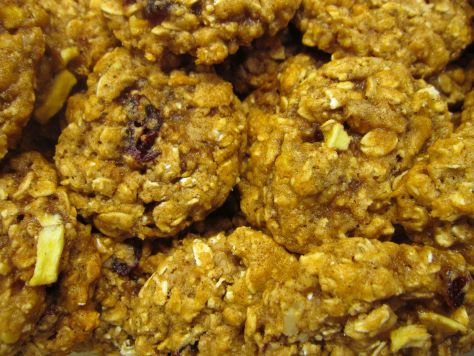
I will always prefer chewy cookies over crisp ones, and these are especially chewy thanks to the apple pieces, dried cranberries, and walnut bits along with the oats. They are such a great combination!
I love using apple butter in this recipe because of the deeper flavor, but by all means, you can substitute applesauce. It’s certainly cheaper and easier to find. (Just to note, I have a great Crock Pot Apple Butter recipe on the old Live Journal if you want to make your own.)
Bready or Not Original: Chewy Apple-Cranberry Oatmeal Cookies
Equipment
- cookie sheet
- parchment paper
- teaspoon scoop or spoon
Ingredients
- 1 baking apple such Granny Smith or Gala
- 2 cups old-fashioned oats also called rolled oats
- 1 cup all-purpose flour
- 1 teaspoon ground cinnamon
- 1/2 teaspoon baking soda
- 1/2 teaspoon kosher salt
- 1/4 teaspoon ground nutmeg
- 1 cup brown sugar packed
- 1/4 cup unsalted butter melted and cooled
- 1/4 cup apple butter or applesauce
- 1 large egg room temperature
- 1/2 cup dried cranberries
- 1/2 cup walnuts or pecans, chopped
Instructions
- Preheat oven at 35-degrees. Line cookie sheet with parchment paper. Peel apple and finely chop enough to fill 1/2 cup. This likely will not be an entire apple; eat and enjoy the rest.
- Mix together oats, flour, cinnamon, baking soda, salt, and nutmeg. In a separate bowl, combine the brown sugar, butter, apple butter, and egg. Gradually incorporate the contents of bowls. Fold in the chopped apple, cranberries, and walnuts.
- Use a teaspoon scoop or spoon to place dough, spaced on, on prepared cookie sheet. Bake for 10 to 12 minutes, until set but still soft. Let sit on cookie sheet on stove for a few minutes before transferring to a cooling rack. Continue to bake rest of dough.
- Store in a sealed container at room temperature.
OM NOM NOM!
Bready or Not Original: Finnish Almond Cookies
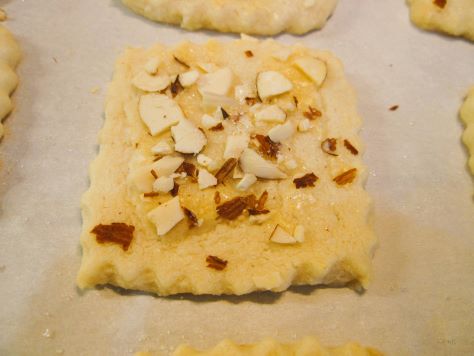
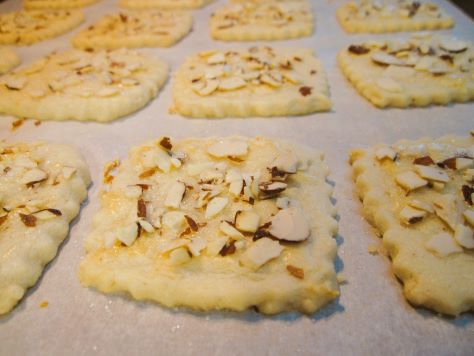
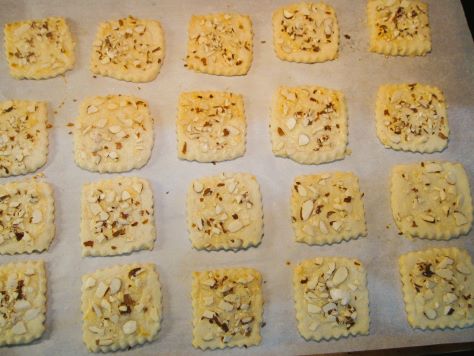
These Finnish Almond Cookies are a lot like a classic sugar cookie, but include a topping of brushed egg, almonds, and decorator sugar to make them a little more fancy.
You can shape these using a regular old knife or cookie cutters, but I used this recipe as an opportunity to use a rolling pastry cutter set I’ve had for years and never tried before. I loaded the rolling cutter, rolled it, and lo and behold, it worked great!
These cookies are soft and chewy. The butter and vanilla really come through. The almond pieces on top add a fantastic crunch in contrast. I imagine these would be great with chopped walnuts or pecans, too–I need to try that sometime!
Bready or Not Original: Finnish Almond Cookies
Equipment
- parchment paper
- Rolling Pin
- rolling pastry cutter or cookie cutter
- pastry brush
Ingredients
- 1 cup unsalted butter (2 sticks) room temperature
- 1/2 cup white sugar
- 2 cups all-purpose flour plus extra for surface
- 1/2 teaspoon vanilla extract or vanilla bean paste
- 1 large egg room temperature
- 1/2 cup finely chopped almonds or sliced almonds
- colored decorator sugar optional
Instructions
- In a large bowl, cream together the butter and sugar until they become light and fluffy. Beat in flour and vanilla, mixing well. Cover and refrigerate for at least an hour. If the dough chills overnight, let it sit at room temperature for a bit before rolling out, as it can get quite firm.
- Preheat oven at 350-degrees. Line a large baking sheet with parchment paper.
- On a well-floured surface, roll out the dough to 1/4-inch thick. Use a rolling pastry cutter or cookie cutters, shape cookies and move to parchment, granting each slight space to expand. Reform dough leftovers to shape more cookies.
- In a small bowl, beat the egg to break it up. Use a pastry brush to wash the top of each cookie with egg. Sprinkle almonds pieces atop each, followed by a dusting of decorator sugar, if using.
- Bake for 12 to 14 minutes, until the edges turn a touch brown. Let sit on sheet a few minutes before transferring to a cooling rack. Store in a sealed container at room temperature.


