Bready or Not: Sugar-Dipped Butter Cookies
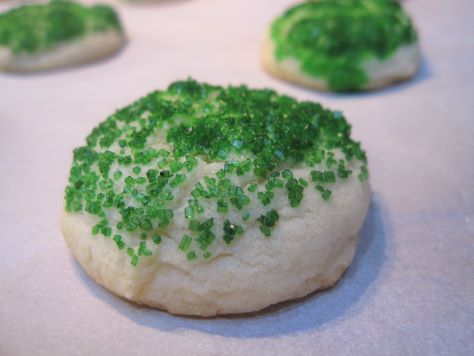
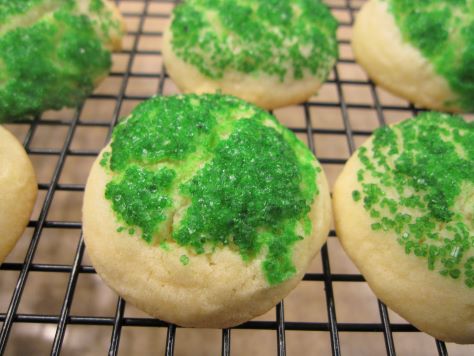
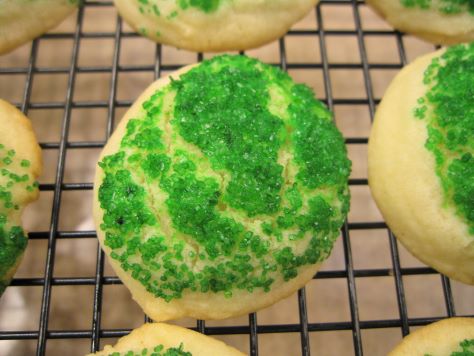
These Sugar-Dipped Butter Cookies are an absolute classic. Easy to make. Nothing fancy. Great to make with kids.
As simple as these cookies are, this recipe suggests a fantastic technique that will be great to apply to other recipes: shape the dough ball, then dip it into water, then dip it in the colored sugar. This gets the sugar to adhere beautifully.
One thing I love about these cookies is that you can mix up the sugar dependent on the season. Making them for Christmas? Go red and green. Make them for a sports gathering? Use team colors. Make them for a birthday? Use favorite colors.
Really, this is a recipe that has fun dough, and is a fun one to make all the way through. Plus, the cookies are tasty, especially with some milk, coffee, or tea.
Bready or Not: Sugar-Dipped Butter Cookies
Equipment
- teaspoon scoop
- baking sheet
- parchment paper
Ingredients
- 1 cup white sugar
- 3/4 cup unsalted butter (1 1/2 cubes) room temperature
- 1 large egg room temperature
- 2 cups all-purpose flour
- 1 teaspoon baking powder
- 1/4 teaspoon salt
- 1/3 cup colored sugar
- water
Instructions
- Preheat oven at 375-degrees. Line baking sheet with parchment paper.
- Beat together white sugar and butter until creamy. Add egg. Mix in flour, baking powder, and salt.
- Place colored sugar in a bowl. Put a small amount of water in a saucer.
- Shape dough into 1-inch balls. Dip top of ball in water, then in sugar. Place colorful side-up on baking sheet, spaced out.
- Bake for 10 to 12 minutes, until set with golden edges. Let cool on a rack, then pack into a sealed container.
OM NOM NOM!
Bready or Not: Chocolate Gingerbread Cookies
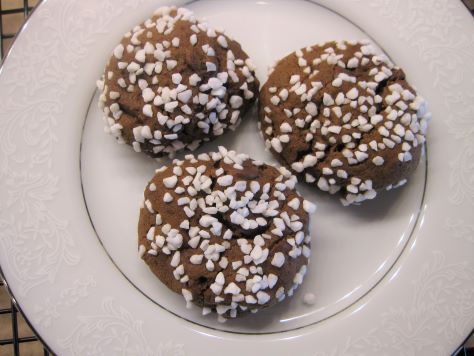
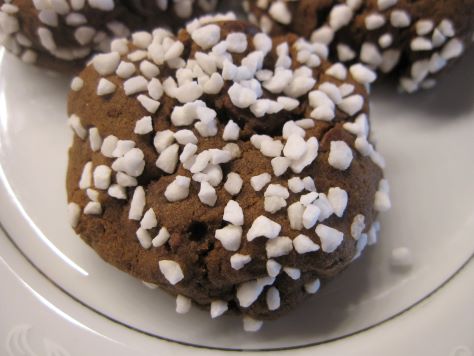
These Chocolate Gingerbread Cookies are a fantastic holiday treat. They truly do taste like gingerbread and chocolate together, a great combo if ever there was one.
These are made even better by the crunchy outer coating of Swedish pearl sugar, too. If you haven’t baked with it before, you’re in for a treat, This stuff is great on cookies and also pastries. You can find it on Amazon. [affiliate link]
The end result is a cookie that is firm to hold, but soft and chewy to bite into, with the sugar crunching pleasantly between the teeth.
Need other recipes with Swedish pearl sugar? I can help!
Swedish Cinnamon Rolls in the Bread Machine
Bready or Not: Chocolate Gingerbread Cookies
Equipment
- baking sheet
- parchment paper
- teaspoon scoop
Ingredients
- 1 3/4 cups all-purpose flour
- 1 teaspoon baking soda
- 2 teaspoons ground ginger
- 1 teaspoon ground cinnamon
- 1/4 teaspoon cloves
- 1/4 teaspoon nutmeg
- 1/2 teaspoon salt
- 1 Tablespoon baking cocoa or Dutch-process cocoa, sifted
- 1/2 cup unsalted butter (1 cube) room temperature
- 1/2 cup brown sugar packed
- 1/2 cup molasses
- 1 cup semisweet chocolate chips
- 7 Tablespoons Swedish pearl sugar
Instructions
- Preheat oven at 325-degrees. Line baking sheet with parchment paper.
- Stir together flour, baking soda, ginger, cinnamon, cloves, nutmeg, salt, and cocoa. Set aside.
- In a mixing bowl, beat the butter and brown sugar until they are light and creamy. Add molasses. Gradually mix in the dry ingredients. Fold in the chocolate chips.
- Measure the pearl sugar into a bowl. Use a scoop or spoon to create balls of dough. Roll them in the pearl sugar and then set spaced out on pan.
- Bake for 7 to 10 minutes. Let sit on pan for 10 minutes, then transfer to a cooling rack.
- Store in a sealed container at room temperature.
OM NOM NOM!
Bready or Not: Peppermint Truffle Bars
These Peppermint Truffle Bars are loaded with peppermint flavor, perfect for the holiday season or year-round!
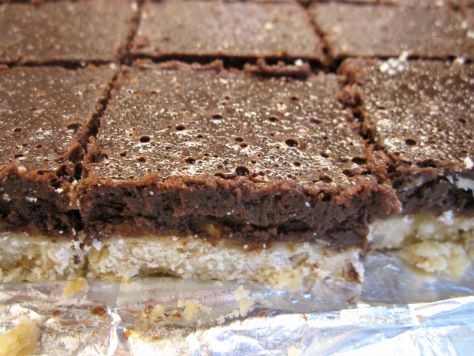
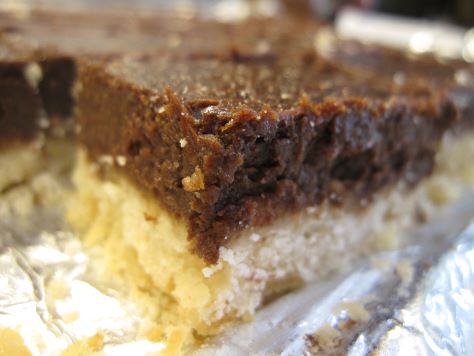
If you like chocolate peppermint (or know someone who does), this is the recipe for you. A shortbread base is topped with a dense layer of soft chocolaty goodness infused with peppermint extract.
As with many chocolate recipes, this one has a deeper flavor if you make it a day ahead. Build that info your baking plans.
To make for neat bars, I cut off the edges. These are not to be wasted, of course–set them aside for select people to enjoy, and present the neatly-edged bars to a more discriminating audience.
Modified from Best Holiday Recipes from Taste of Home 2011.
Bready or Not: Peppermint Truffle Bars
Equipment
- 9×13 pan
- nonstick spray
- wax paper
- heavy glass
Ingredients
Bottom crust
- 3/4 cup unsalted butter cold and cubed (1 1/2 sticks butter)
- 1 1/2 cups all-purpose flour
- 3/4 cup confectioners’ sugar
- 1/4 teaspoon salt
- 1/2 teaspoon vanilla extract
Chocolate layer
- 16 ounces semisweet chocolate chips or chopped chocolate
- 3/4 cup milk or half & half
- 1/2 cup unsalted butter cubed
- 4 large eggs room temperature
- 2/3 cup white sugar
- 1 teaspoon peppermint extract
Instructions
- Line a 13×9 baking pan with foil and apply nonstick spray. Preheat oven at 325-degrees.
- In a large bowl, combine the flour, confectioners’ sugar, and salt. Add vanilla. Dice in the butter. Mix ingredients until the butter resembles fine crumbs. Distribute into prepared pan. Use a piece of waxed paper and a heavy glass to compress the dough into a firm layer.
- Bake for 20 to 25 minutes, until the edges are lightly brown. In the meantime, start mixing the top layer.
- In a large pot, combine the semisweet chocolate, milk, and butter and cook on low heat until the mixture is smooth. Remove from heat and let cool for a bit.
- In a large bowl, beat eggs and white sugar until it is smooth and thick. Add the peppermint extract and the chocolate mixture. Beat until incorporated and smooth. Pour over the bottom crust.
- Bake for 30 to 35 minutes until the middle is set and passes the toothpick test. Cool in pan on a rack, then place in fridge to set for several hours or overnight.
- Use foil to lift contents onto a cutting board. Slice into bars. Store in sealed container or individually wrapped in the fridge.
OM NOM NOM!
Bready or Not: Maple-Walnut Cookies
It’s been too long since I featured a maple recipe. Let’s finish off November with Maple-Walnut Cookies!
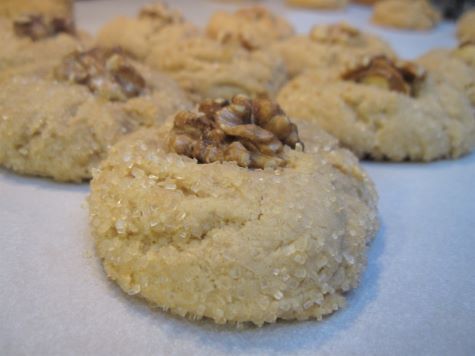
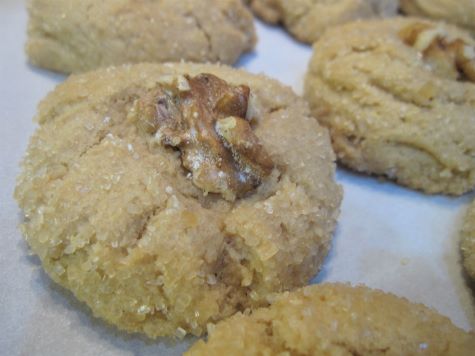
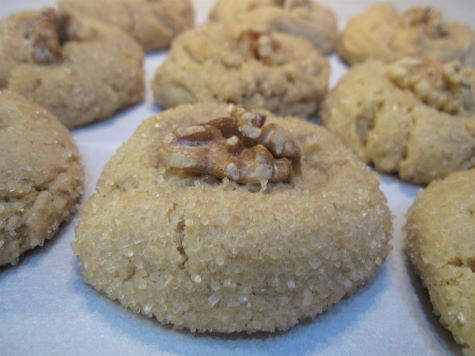
The texture of these cookies is pillowy and light. Overall, they are soft and chewy, though the bottom is crisp thanks to the pan, while the turbinado sugar creates a crust on top.
Walnut and maple are such a great combination. Here, the walnut half crowns each cookie and not only adds great flavor and texture, but they just plain look lovely.
Bready or Not: Maple-Walnut Cookies
Equipment
- parchment paper
- tablespoon scoop
Ingredients
- 2 1/2 cups all-purpose flour
- 1/2 teaspoon baking soda
- 1/2 teaspoon salt
- 1/2 cup unsalted butter (1 stick) room temperature
- 2/3 cup brown sugar packed
- 1/2 cup pure maple syrup
- 1 large egg
- 1 teaspoon vanilla extract
- 1/2 teaspoon maple flavor
- 1/2 cup turbinado sugar
- 3/4 cup walnut halves
Instructions
- Combine the flour, baking soda, and salt in a small bowl. Set aside.
- In a large bowl, beat butter and brown sugar on medium-high until light and fluffy, about 3 minutes. Mix in maple syrup, egg, vanilla, and maple flavor. The ingredients may look curdled.
- Gradually add in the dry ingredients, scraping the bottom of the large bowl a few times. Chill bowl in fridge for about 30 minutes to reduce stickiness.
- Preheat oven at 350-degrees. Line a baking sheet with parchment paper. Measure out the turbinado sugar in a small bowl.
- Roll tablespoon-sized balls of dough in the turbinado sugar. Set spaced out on baking sheet. Press a walnut half into the top of each round.
- Bake for 12 to 14 minutes. Cookies should be set but still soft. Let rest on sheet for 10 minutes before transitioning to a cooling rack.
- Store in a sealed container at room temperature.
OM NOM NOM!
Bready or Not Original: Gingerbread Brownies
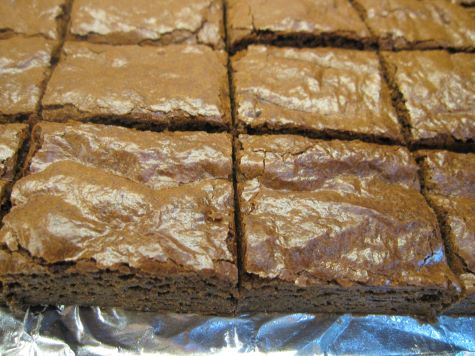
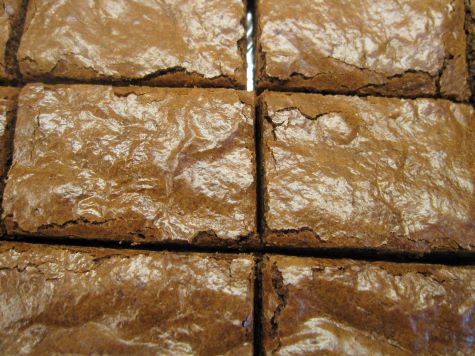
These Gingerbread Brownies are the perfect holiday season treat–or make them year-round, because they are just that good.
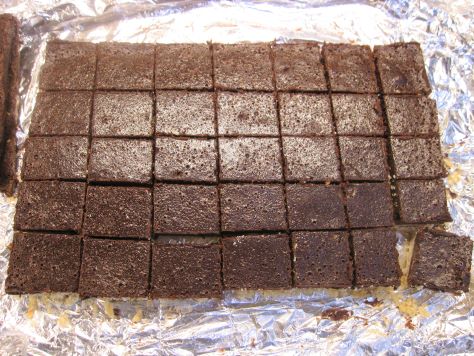
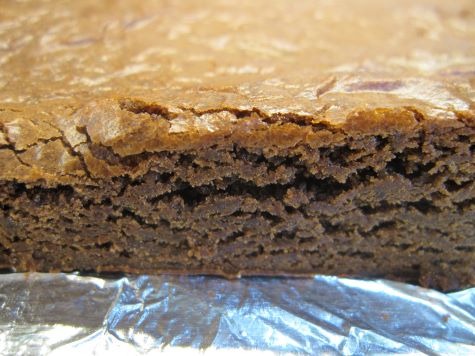
These are soft, moist, and dense in texture. The chocolate flavor hits the tongue first, followed by the pleasant warmth of ginger. The combination is fantastic.
If you want to aim for an especially nice presentation, cut off the very edge of the brownies all the way around, then slice the interior into nice squares or rectangles.
Unfortunately, someone has to eat those leftover edge pieces. Oh, darn.
Bready or Not Original: Gingerbread Brownies
Equipment
- 9×13 pan
- aluminum foil
Ingredients
- 1 1/2 cups all-purpose flour
- 1/4 cup Dutch-processed cocoa powder sifted
- 1/2 teaspoon salt
- 1/2 teaspoon baking powder
- 1/4 teaspoon baking soda
- 4 ounces semisweet chocolate chopped or in chips
- 8 Tablespoons unsalted butter 1 stick
- 1 Tablespoon ground ginger
- 1 cup brown sugar packed
- 2 large eggs room temperature
- 1/3 cup unsulphured molasses
Instructions
- Preheat oven at 325-degrees. Line 9×13 pan with foil and apply nonstick spray or butter to grease bottom and sides.
- In a medium bowl, stir together flour, cocoa, salt, baking powder, and baking soda. Set aside.
- In a microwave-safe bowl in the microwave or on the stovetop in a pot, melt together the chocolate and the butter. Stir in the ginger. Let set to cool for ten minutes, then stir again.
- In a large mixing bowl, beat together brown sugar, eggs, and molasses. Mix in the chocolate. Stir in the dry ingredients until just combined. Pour batter into the prepared pan and even out.
- Bake for 24 to 28 minutes. The middle should pass the toothpick test.
- Let bars cool for several hours, speeding the process in the fridge if desired. Use the foil to lift the contents onto a cutting board for easy slicing. Store in a sealed container.
OM NOM NOM!
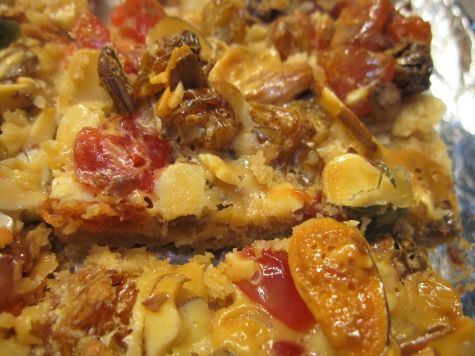
Bready or Not Original: Cherry Almond Bars
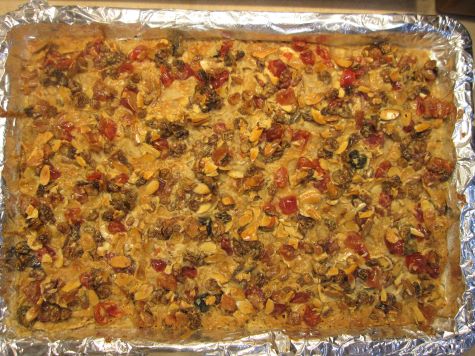
These Cherry Almond Bars are fast to make and are a delicious, seasonally-colorful treat.
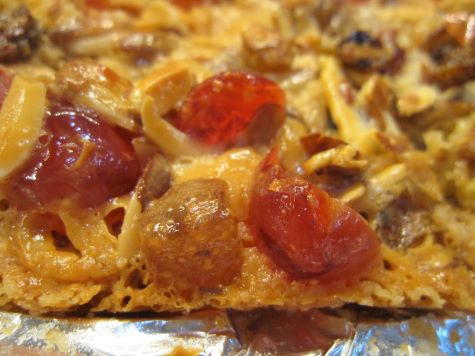
This recipe is a great way to use up fruit cake mix in a way that does NOT involve fruit cake. Here, I used a combination of red and green cherries with pineapple bits, but you could use all kinds of mixes.
The crust here is both chewy and crisp. The top is sheer candy, really, which goes so well with the pastry base.
This is a great treat for a cookie exchange or to set out on a holiday display!
Bready or Not Original: Cherry Almond Bars
Equipment
- jelly roll pan (15x10x1-inches)
- aluminum foil
Ingredients
- 2 cups all-purpose flour
- 1/2 cup brown sugar packed
- 1 cup unsalted butter cold
- 1 cup golden raisins
- 8 ounces fruit cake mix chopped
- 1 cup sliced almonds
- 14 ounces sweetened condensed milk
Instructions
- Preheat oven at 325-degres. Line jelly roll pan with a wide strip of aluminum foil. Add nonstick spray all over.
- In a large bowl, combine flour and brown sugar. Cut in the butter and mash until it is crumbly. Press the mix into the prepared pan. Bake for about 18 minutes, until browned.
- In the same bowl, place the raisins, fruit cake filling, almonds, and sweetened condensed milk. Stir to coat everything. Dollop the mix all over the crust; it’s too thick to spread, so distribute as evenly as possible. Bake for 25 to 30 minutes, until golden brown.
- Let cool at least an hour. Slice into bars. Store in a sealed container.


