Bready or Not: Gougeres (French Cheese Puffs)
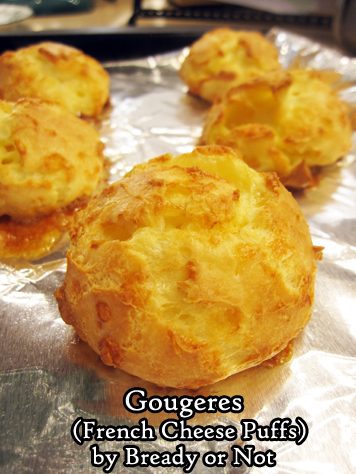
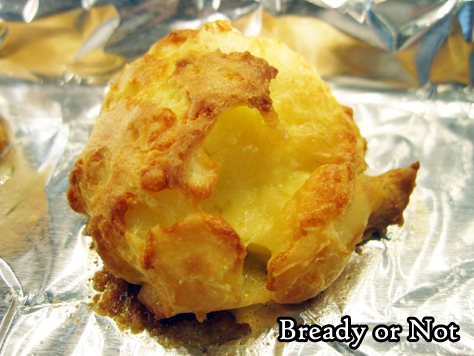
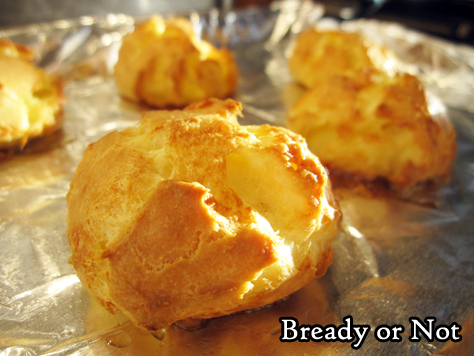
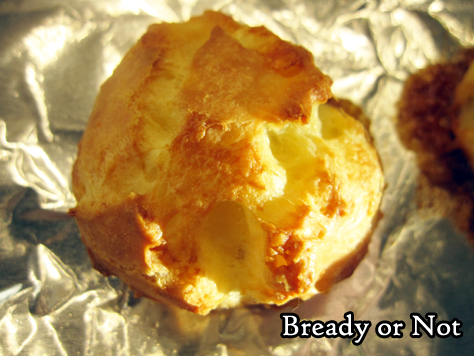
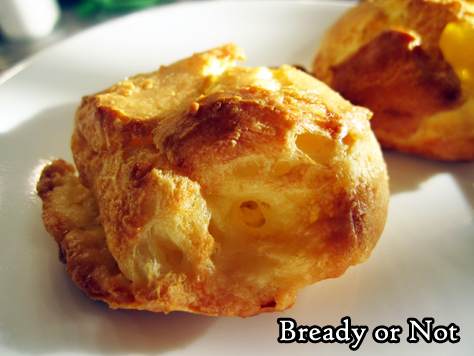
Eat your cheese in delicious, airy form in Gougeres, aka French cheese puffs!
This is a savory version of pate a choux, the dough used for cream puffs and eclairs. In this case, though, you fold in a generous amount of grated cheese.
What kind of cheese? Go for ones that grate and melt. Traditional choices would include Gruyere or Comte, or be a rebel like me and use English cheddar. (Scandalous, I know.)
I modified this recipe from Dorie Greenspan’s version in her lovely tome Around My French Table. I felt like I learned something new every time I baked up a serving of these puffs, and I wanted to include all that info to prevent people from repeating my mistakes.
Such as, see the aluminum foil in these pictures? Don’t use that. Do parchment instead. I didn’t take pictures of how I mangled these gougeres, which were hopelessly stuck to the foil despite a spray of Pam.
The recipe results in about 30 puffs. These things keep well, unbaked and frozen, but only for about a month. After that, the puff declines and an eggy taste is more pronounced.
Bready or Not: Gougeres (French Cheese Puffs)
Equipment
- baking sheets
- parchment paper
- tablespoon scoop
- mixer
Ingredients
- 1/2 cup whole milk or half & half
- 1/2 cup water
- 8 Tablespoons unsalted butter (1 stick) cut into 4 pieces
- 1/2 teaspoon salt
- 1 cup all-purpose four
- 5 large eggs room temperature
- 1 1/2 cups coarsely-grated cheese (6 ounces) such as Gruyere, Comte, Emmenthal, or cheddar
Instructions
- If baking now, position racks in oven to be at the top and bottom. Preheat oven at 425-degrees. Line two large baking sheets with baking mats or parchment paper; do not use aluminum foil.
- If preparing the gougeres now, with plans to freeze and bake later, line a pan with waxed paper and clear some space in the freezer so the puffs can set.
- Place milk, water, butter, and salt in a medium saucepan. Bring to a fast boil. Add flour all at once, then lower heat. Promptly start stirring batter with a wooden spoon or sturdy whisk. The dough will come together, but keep stirring with vigor for another couple minutes until the dough is very smooth and looks dryer.
- Drop the dough into the big bowl of a stand-mixer or a bowl where a hand mixer can be used. (Or, if mixing by hand, be ready for an arm work-out.) Let the dough set for a couple minutes, then add the eggs one by one. Beat, beat, beat that batter, fully incorporating each egg before adding the next. If it separates, that's okay--keep beating it! It needs to reach a stage where it is thick and shiny. Beat in the grated cheese.
- The batter must be immediately doled out onto pans to either bake or freeze. Use a tablespoon or tablespoon-sized scoop to measure out the batter; if baking, space out about two inches apart.
- Slide baking sheets into oven. Immediately lower temperature to 375-degrees. Bake for 12 minutes, then rotate pans from front to back, top to bottom. Continue baking another 12 to 15 minutes, until gougeres are golden and firm. Note that they will not puff until the end of the bake. Serve promptly.
- If freezing some or all of the gougeres, freeze on waxed paper, then place in a freezer bag or lidded container. Bake straight from the freezer--do not thaw them! Place on parchment or a greased surface to cook, with gougeres in a central location in the oven. Eat frozen gougeres within a month, as they will otherwise taste increasingly eggy and have less rise.
OM NOM NOM!
Bready or Not Original: Scottish Oatcakes
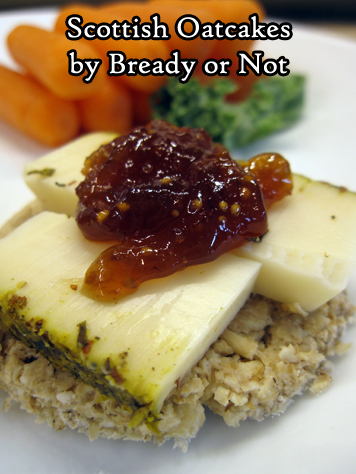
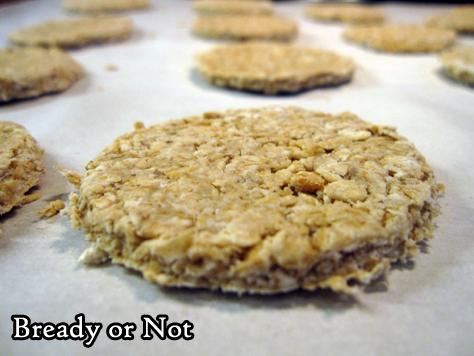
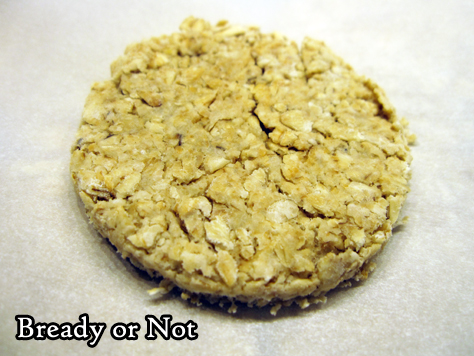
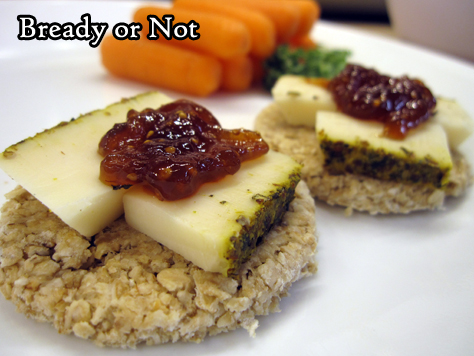
These Scottish Oatcakes are like a thick, wholesome, chewy cracker, and they are the perfect platform for cheese and charcuterie.
When I was on my UK trip last year, I made a pilgrimage to the Victoria Street location of I.J. Mellis Cheesemongers. Oh, bliss! I bought stuff for a personal picnic: cheeses I could never find in America, plus port chutney and Scottish oatcakes.
I loved everything. The oatcakes, basic as they were, really impressed me. They were oaty and fresh with a tiny hint of salt, and were ideal platforms for the cheese and chutney.
Upon getting home, I found no acceptable imported options for oatcakes, so I resolved to make them myself. I didn’t want to use processed flour or sugar. In the end, I ended up finagling my own recipe.
These oatcakes are basic and wholesome, and delicious in their simplicity. Get the consistency right, and these oatcakes are durable enough to handle smears of a soft-ripened cheese or cream cheese, and won’t crumble when you bite in.
Store these oatcakes for days at room temperature, or freeze them for ages. By ages, I mean as long as six months. That’s right, I forget I had some tucked in my freezer, and lo and behold they were fine half a year later.
Pair oatcakes with cheese, sausage, and mayhap a nip of scotch.
Bready or Not Original: Scottish Oatcakes
Equipment
- food processor
- large cookie sheet
- cookie cutter
Ingredients
- 2 1/2 cups old fashioned oats
- 2 Tablespoons unsalted butter
- 1 teaspoon sea salt
- 1/2 cup hot water
Instructions
- Preheat oven at 375-degrees. Line a large baking sheet with parchment paper.
- Place oats in a food processor and chop on HIGH for about 15 seconds, long enough to make them slightly less coarse.
- Melt butter in a large bowl. Pour oats into the bowl. Stir to coat. Sprinkle salt over the top, then pour in water. Stir again to form a stiff dough that is just cohesive. If the mix won't come together, add more water in small increments.
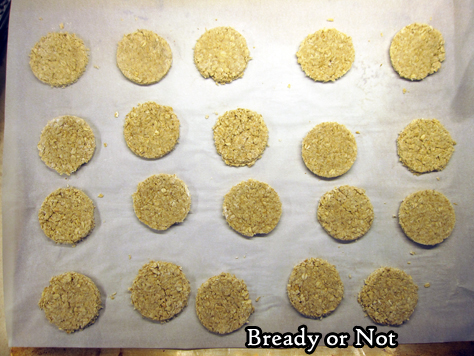
- Sprinkle flour (gluten-free flour, if necessary) on an even stretch of counter. Use palms of hands or a rolling pins to press oats into a flat, cohesive layer. Note that the oatcakes will not expand or grow when baking. Use a round cookie cutter to slice into discs.
- Bake for 10 minutes. Use a spatula to gently flip them over. Bake for another 7 to 10 minutes. Let cool, then pack into sealed container.
- Store at room temperature. Oatcakes can also be frozen, with wax paper or parchment between the layers, for as long as six months, and thaw quickly.
OM NOM NOM!
Bready or Not Original: Cream Cheese-Stuffed Lemon Bundt Cake [cake mix]
This is a simple-yet-fancy recipe that uses 1) cake mix, 2) a bundt pan, and 3) ends up tasting like a giant lemon Twinkie. YUM.
This is one of those cakes that looks like it requires tons of works, but it really doesn’t. Because of the addition of fresh lemon and lemon curd, the chemical taste of cake mix is completely masked, too.
The filling is an easy step, too. I hate piping, but it was not prob here. I used a gallon Ziploc, snipped off the corner, ta-da!
This cake would be great for breakfast, brunch, snack, or dessert. Whenever, really.
Make this when you have numerous people to share with. It’s just so, so tempting and delicious. Like Twinkies. BUT BETTER.
This recipe is over halfway through my April of lemon recipes!
Lemon Sour Cream Bundt Cake
Glazed Lemon Ginger Bars
Cranberry Lemon Biscotti
Cream Cheese Stuffed Lemon Bundt Cake [today]
Lemon Frangipane
Bready or Not Original: Cream Cheese-Stuffed Lemon Bundt Cake
Equipment
- large bundt pan
Ingredients
Filling
- 8 ounce cream cheese 1 box, softened
- 1/4 cup white sugar
- 1 large lemon zested and juiced
Cake
- 1/4 cup unsalted butter softened
- 3 eggs room temperature
- 1 box yellow cake mix
- 3/4 cup lemon curd
Glaze
- 1 cup confectioners' sugar
- 1 Tablespoon lemon juice
- 1 Tablespoon lemon curd
Instructions
Make the filling
- In a small bowl, mash together the cream cheese, white sugar, lemon zest and 1 Tablespoon of lemon juice; reserve the remaining juice for the glaze. Once the filling is combined, spoon it into a piping bag with large tip or a gallon Ziploc bag with the corner cut off.
Make the cake
- Preheat oven at 350-degrees. Apply nonstick spray to a large bundt pan.
- In a big bowl, cream together the butter and eggs. Add the cake mix, scraping bottom of bowl as needed. Add the lemon curd, beating until mix turns fluffy.
- Spoon about half the cake mix into the prepared pan. Pipe the filling in a circle around the top of the batter. Try to keep the filling from touching the sides. Add the rest of the batter on top and smooth it out.
- Bake for 40 to 45 minutes, until the middle passes the toothpick test.
- Cool on a wire rack about 20 minutes, then invert the cake onto a wire rack to completely cool.
Make the glaze
- Whisk together the confectioners' sugar, 1 Tablespoon lemon juice, and 1 Tablespoon lemon curd to form a thick yet oozy glaze. If necessary, add more juice or water to thin, or more confectioners' sugar to thicken. Drizzle atop cake.
- Store under a cake dome or plastic wrap in fridge.
OM NOM NOM!
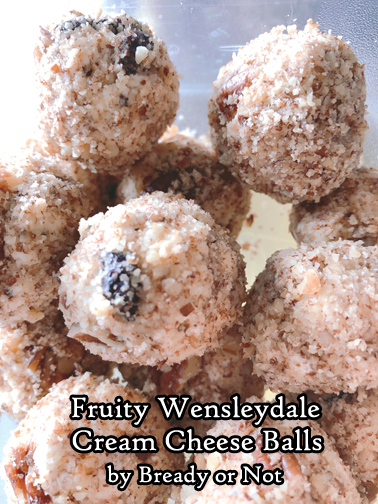
Giftmas 2019: Fruity Wensleydale Cream Cheese Balls & a Fundraiser for the Edmonton Food Bank
If people know only a few things about me, it’s that I bake, I share lots of cute cat gifs, I write some stuff, and that I love, love, LOVE cheese. As part of the Giftmas Fundraiser, I’m sharing a recipe I just made for the first time during my American Thanksgiving last month–and I’m hoping you’ll share some money and goodwill to help the Edmonton Food Bank, too. Your donation (in Canadian dollars) will help a lot of folks in need this season. One dollar equals three meals.
Please give to the Edmonton Food Bank for Giftmas!
Scroll down past the recipe to enter an incredible Rafflecopter giveaway that includes loads of stuff, including a signed Chicken Soup for the Soul Christmas book featuring one of my stories. You needn’t donate to enter the giveaway–in fact, even spreading the news about Giftmas is a big help. Use #Giftmas2019 on social media to do that.
As part of Giftmas, there’s also a Snowman drawing contest. The whole family can take part in this one! Find out the details from Rhonda Parrish.
2019 has been a cruel year, and 2020 could go straight-out apocalyptic. Let’s help each other stay warm and fed.
Let’s start that effort with some delicious cheese.
This recipe is inspired by a glorious cheesecake I experience at the Wensleydale Creamery during my dream-come-true trip to the UK in June. I immediately began mulling ways that my cheese-loving mom could enjoy a facsimile of the cheesecake, but with a lot less carbs.
The result is this recipe for Fruity Wensleydale Cream Cheese Balls. This is gluten-free, keto-friendly, low-carb, and probably other buzz words with dashes, too. More importantly, it’s DELICIOUS.
Please support the Edmonton Food Bank for Giftmas!
Bready or Not Original: Fruity Wensleydale Cream Cheese Balls
Ingredients
- 4 oz Wensleydale cheese with fruit such as blueberry or cranberry
- 4 oz cream cheese half block
- 2 Tablespoons dried fruit that matches cheese
- 1/2 cup ground pecans
Instructions
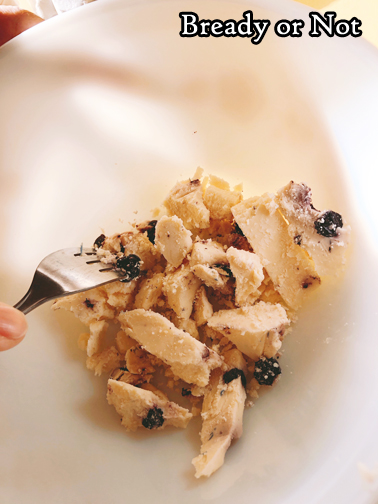
- Use a fork to chop cheese into chunks of various sizes. Add dollops of cream cheese and extra dried fruit and stir together, taking care distribute the Wensleydale without breaking it apart too much.
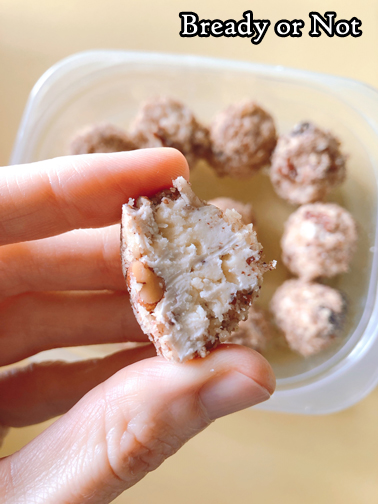
- Place ground pecan pieces in a small bowl. Use a tablespoon and hands to form small balls. Roll in pecan bits to coat. Store in a sealed dish in fridge. Flavor improves after a day as the pecan flavor infuses the cheese balls more. Keeps for at least four days.
OM NOM NOM!
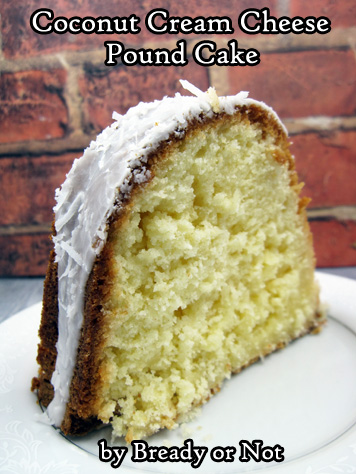
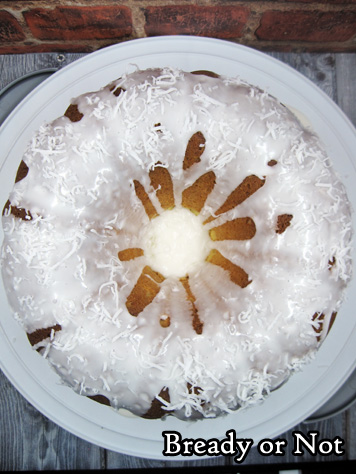
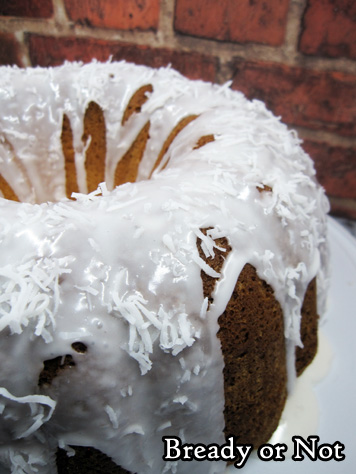
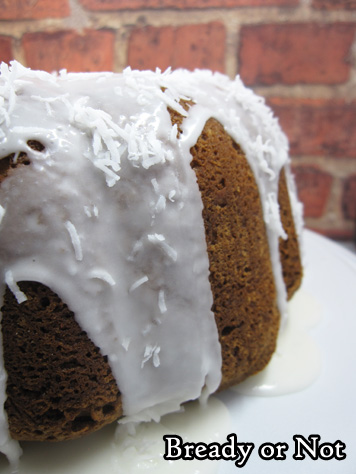
Bready or Not: Coconut Cream Cheese Pound Cake
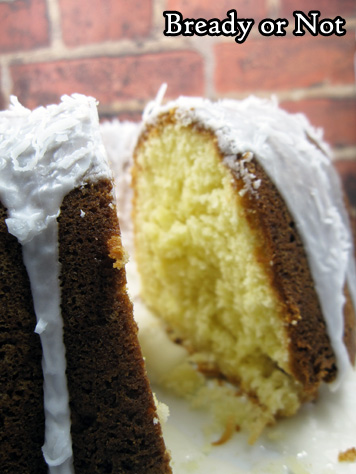
This stunning Coconut Cream Cheese Pound Cake is gorgeous and delicious, and will win over even people like me that are not big coconut fans.
This cake works for me because the cream cheese creates a rich, tender crumb, and the coconut adds a lovely chewiness to it all.
The cake ends up being chewy, but not too chewy; sweet, but not cloyingly. Really, that makes this great as a breakfast, brunch, or dessert cake.
I highly recommend reserving some coconut to sprinkle on top, too. It adds a certain oomph.
Serve this as cake alone, or like with any pound cake, it would be lovely alongside fresh fruit.
Modified from Cookies and Cups.
Bready or Not: Coconut Cream Cheese Pound Cake
Ingredients
Cake
- 1 cup unsalted butter 2 sticks, room temperature
- 8 ounces cream cheese 1 box, room temperature
- 3 cups white sugar
- 6 large eggs room temperature
- 2 teaspoons vanilla extract
- 1 teaspoon kosher salt
- 1 teaspoon baking powder
- 3 cups all-purpose flour
- 2 cups shredded coconut
Glaze
- 2 cups confectioners' sugar
- 2-3 Tablespoons milk
- extra shredded coconut
Instructions
- Preheat oven at 325-degrees. Coat a 10-cup bundt pan with nonstick spray or butter.
- In a large bowl, beat butter and cream cheese together until smooth. Add sugar and mix until light and fluffy.
- Add eggs one at a time, followed by the vanilla extract, salt, and baking powder. Gradually mix in the flour until just combined, then fold in the coconut.
- Pour batter into pan and distribute evenly. Bake for 75 to 80 minutes, until it passes the toothpick test.
- Cool pan for 20 minutes, then invert the cake onto a wire rack to completely cool. Move to a plate or cake platter.
- To make the glaze, stir together the confectioners' sugar and milk to form a smooth yet thick consistency. Pour or spoon glaze over the top, then sprinkle with additional coconut.
OM NOM NOM!
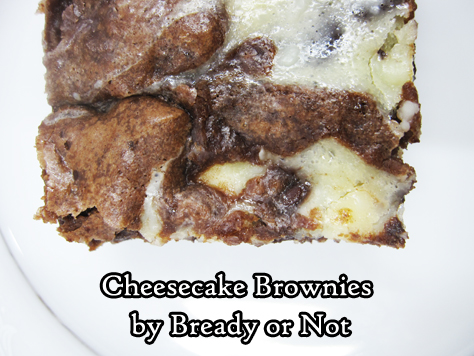
Bready or Not: Cheesecake Brownies
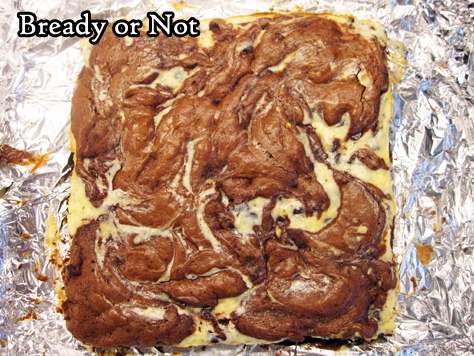
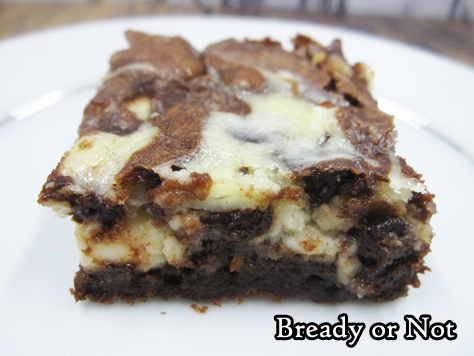
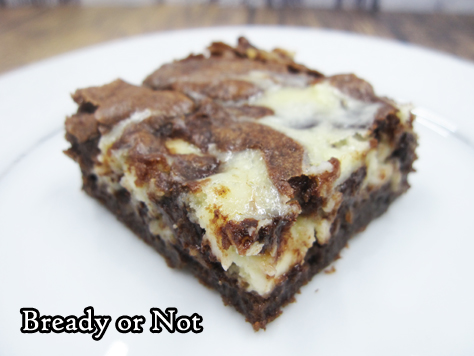
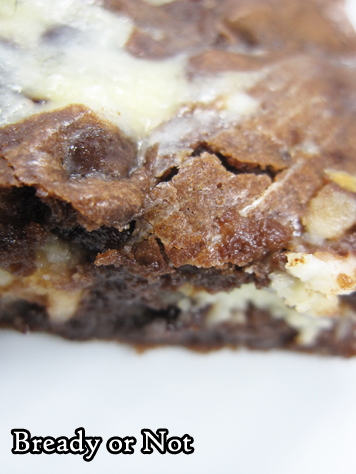
Cheesecake Brownies. Beautiful to behold. Delicious to eat.
I’m not a cheesecake person. But the pairing of chocolate and cheesecake? That makes it work.
This recipe is all about that balance of different kinds of sweetness. The addition of semisweet chocolate chips complements both and adds a different texture, too.
I have to say, I love the swirl effect on the top of these brownies. There’s something especially pleasing about food that looks as amazing as it tastes.
If you want a similar, stronger (and more expensive) pairing, my Swirled Goat Cheese Brownies will also interest you.
Modified from All Recipes Magazines, November 2017.
Bready or Not: Cheesecake Brownies
Ingredients
- 8 oz cream cheese softened
- 3/4 cup white sugar divided
- 3 eggs
- 2 cups semisweet chocolate chips divided
- 1/4 cup unsalted butter
- 2/3 cup all-purpose flour
- 1/2 teaspoon baking powder
- 1/4 teaspoon salt
Instructions
- Preheat oven at 350-degrees. Line an 8x8 or 9x9 pan with heavy foil and apply butter or nonstick spray.
- Beat together cream cheese, 1/4 cup sugar, and 1 egg until fairly smooth; some small chunks are fine. Stir in 1 cup chocolate chips.
- In a microwave safe bowl, heat the butter and remaining 1 cup chocolate chips in brief bursts until fully melted and smooth; watch it carefully and stir well between each burst. Stir in the remaining 1/2 cup sugar, followed by the 2 eggs, flour, baking powder, and salt.
- Pour half the chocolate batter into the ready pan and spread into an even layer. Gently spread the cream cheese batter on top. Drop dollops of the rest of the chocolate batter on top. Use a butter knife or narrow spatula to swirl the layers together for a marbled effect.
- Bake until the top is crinkled and edges are pulling away from the sides of the pan, about 25 to 30 minutes. Let cool at room temperature for an hour, then stash in the fridge for another few hours to completely cool.
- Use the foil to lift the contents onto a cutting board to slice into bars. Store in a sealed container in fridge, waxed paper between stacked layers to prevent stocking, for up to three days, or freeze for later enjoyment.
- OM NOM NOM!


![Bready or Not Original: Cream Cheese-Stuffed Lemon Bundt Cake [cake mix]](https://www.bethcato.com/blog/wp-content/uploads/2020/01/Cream-Cheese-Stuffed-Lemon-Bundt-Cake13_sm.jpg)
![Bready or Not Original: Cream Cheese-Stuffed Lemon Bundt Cake [cake mix]](https://www.bethcato.com/blog/wp-content/uploads/2020/01/Cream-Cheese-Stuffed-Lemon-Bundt-Cake8_sm.jpg)
![Bready or Not Original: Cream Cheese-Stuffed Lemon Bundt Cake [cake mix]](https://www.bethcato.com/blog/wp-content/uploads/2020/01/Cream-Cheese-Stuffed-Lemon-Bundt-Cake16_sm.jpg)
![Bready or Not Original: Cream Cheese-Stuffed Lemon Bundt Cake [cake mix]](https://www.bethcato.com/blog/wp-content/uploads/2020/01/Cream-Cheese-Stuffed-Lemon-Bundt-Cake14_sm.jpg)
![Bready or Not Original: Cream Cheese-Stuffed Lemon Bundt Cake [cake mix]](https://www.bethcato.com/blog/wp-content/uploads/2020/01/Cream-Cheese-Stuffed-Lemon-Bundt-Cake12_sm.jpg)
![Bready or Not Original: Cream Cheese-Stuffed Lemon Bundt Cake [cake mix]](https://www.bethcato.com/blog/wp-content/uploads/2020/01/Cream-Cheese-Stuffed-Lemon-Bundt-Cake10_sm.jpg)

