Bready or Not: Tunnel of Fudge Cake (redux)
The Clockwork Crown is out! YAAAAAY! Now here’s the cake to celebrate. THE cake. The infamous Tunnel of Fudge Cake.
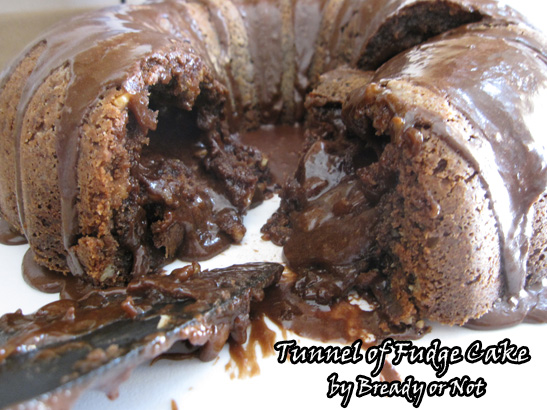
I originally posted this back in May 2012. I figured that for this splendiferous occasion, it deserved a repost. This is one of the most amazing cakes I have ever encountered. I mean, LOOK AT IT.
You just gained five pounds by looking at that picture. I’m sorry.
To quote my original post:
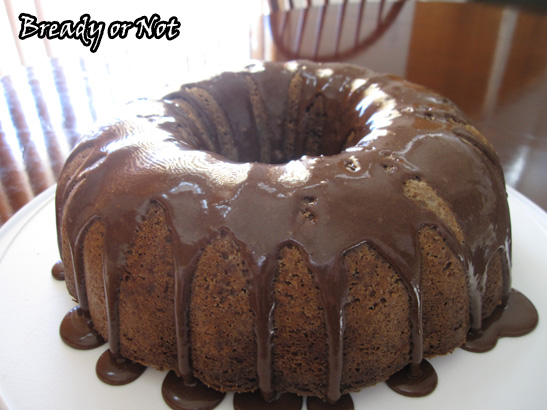
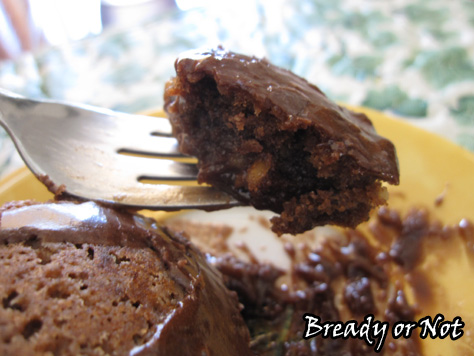
As you can see, it’s a bundt cake. It cooks up and creates its own middle layer of fudge inside. When the cake is fresh, it oozes out in an amazing way. After it has been in the fridge, honestly, it tastes even better. The middle solidifies so it’s like there are two layers of fudgy frosting, one on the inside and one on the outside. You also have this whole mingling of textures thing going on: cakey chocolate, fudgy chocolate, chocolate glaze, walnuts, chocolate, chocolate, chhhhhhocolate.
If you don’t like nuts or have allergies–sorry, this cake really does need them. I think they provide some scaffolding for the massive quantities of chocolate.
I can add some experience from making this a few times, too. The leftovers are easy to handle. Line a small pan with wax paper. Slice the cake however you want and place the pieces on the pan. Freeze them. Bag them. When you want to serve a slice, remove from freezer and zap it in the microwave until it’s as thawed or hot as you want.
Recipe is adapted from Relish Magazine, and originally in Bundt Cake Bliss by Susanna Short.
Bready or Not: Tunnel of Fudge Cake
Ingredients
Cake:
- 2 1/4 cups all-purpose flour
- 3/4 cup cocoa powder sifted
- 1 3/4 cups white sugar
- 1 3/4 cups unsalted butter room temperature
- 6 eggs room temperature
- 2 cups confectioners' sugar sifted
- 2 cups walnuts or pecans, chopped
Glaze:
- 3/4 cup confectioners' sugar sifted
- 1/4 cup cocoa powder sifted
- 2 - 3 tablespoons milk or half and half
Instructions
- Preheat oven to 350-degrees. Grease a 12-cup Bundt pan. One option is to melt 1tablespoon butter, mix 1 tablespoon of cocoa powder into it, then brush the sides of the bundt pan. Or use nonstick spray or butter and sprinkle flour or cocoa powder into the pan.
- In a small mixing bowl, combine flour and cocoa powder and set aside.
- In a large bowl, cream sugar and butter until light and fluffy. Add the eggs, one at a time, beating well after each addition. Gradually add confectioners' sugar and mix thoroughly. Stir in flour mixture by hand until well blended. Gently stir in nuts. Batter will be thick and rather mud-like. Spoon all of the batter into the prepared bundt pan.
- Bake 45 to 50 minutes or until the top is set and the edges begin to pull away from sides of pan. Do NOT use the toothpick test. You don't want the center to solidify with this cake.
- Cool cake upright in the pan on a wire rack for 1 1/2 hours to allow fudge to set. Invert onto a plate to cool thoroughly. Make sure the cake is completely cool before you add the glaze.
- To prepare glaze, combine sifted confectioners' sugar and cocoa. Add 2 tablespoons milk. Mix thoroughly, and add more milk if needed to create a smooth but pourable glaze. Spoon glaze over top of cake, allowing some to run down sides.
- This can be eaten fresh but is even better after being in the fridge overnight. The chocolate flavor deepens. It can also be frozen in slices and thawed/warmed in microwave.
- OM NOM NOM and take an insulin injection.
Bready or Not: Mint Chocolate Chip Bars
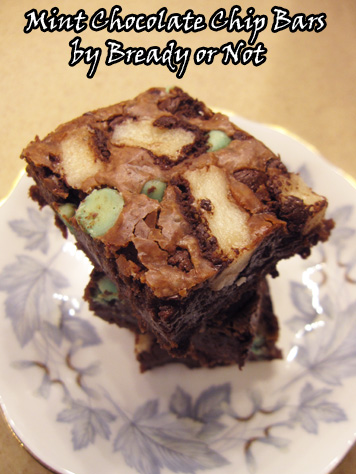
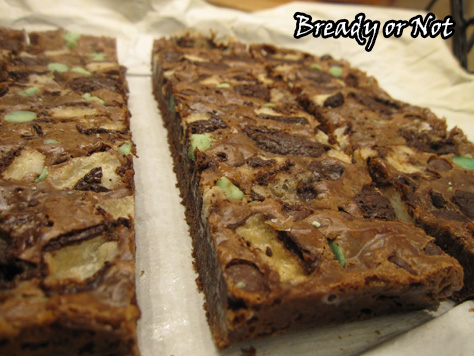
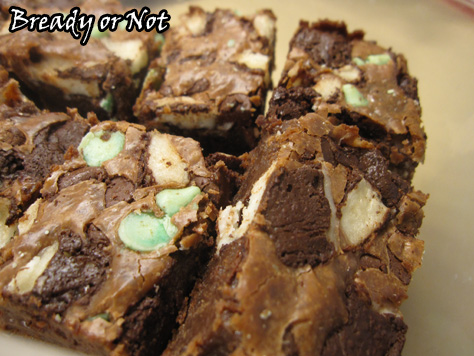
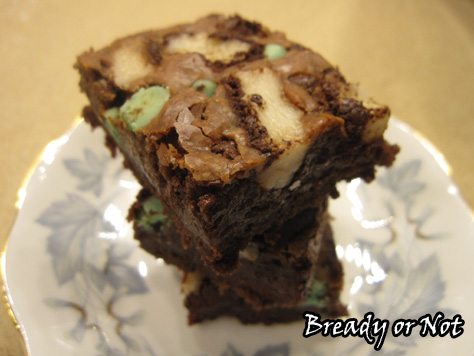
These super-easy bars are packed with chocolate and minty goodness.
My husband’s favorite flavors include snickerdoodle, lemon, and chocolate mint. I figured I was overdue to revisit that last flavor.
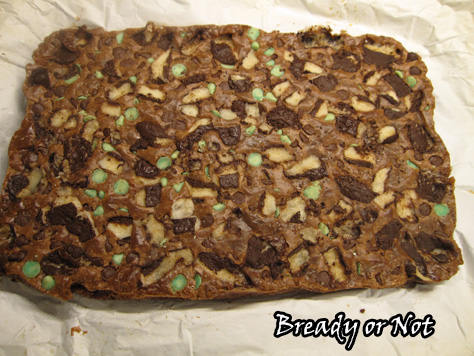
I had a bag of dark chocolate and mint chips I picked up on holiday clearance. Therefore, I used that whole bag to account for the 1 cup of dark chocolate and 1 cup of mint chips. You could easily do this with chocolate from separate bags or even use more York Patties to substitute for the mint chips.
The basic fact is, you want a variety of dark chocolate and mint chocolate, and there are a lot of paths to achieve that. I do like the mix I used here–it’s pretty!
Not only is it photogenic, but it’s pretty darn tasty, too.
Modified from Chocolate Chips Bars at Roxana’s Home Baking.
Bready or Not: Mint Chocolate Chip Bars
Ingredients
Chocolate Layer:
- 2 cups chocolate chips semi-sweet or milk or mixed
- 14 ounce sweetened condensed milk
- 1 teaspoon peppermint extract
Cookie Dough:
- 1 cup unsalted butter room temperature
- 1 cup light brown sugar packed
- 1/2 cup white sugar
- 2 large eggs
- 1 Tablespoon vanilla extract
- 2 cups all-purpose flour
- 1 cup quick-cooking or old-fashioned rolled oats
- 1 teaspoon baking powder
- 1 teaspoon baking soda
- 1 teaspoon kosher salt
- 2 cups mint chocolate chips
Instructions
- Prepare the mint chocolate filling first: Place semi-sweet and/or milk chocolate chips and condensed milk in a small saucepan. Heat on low, stirring often, until everything has melted and the mix has thickened. Remove it from the burner and pour in the peppermint extract and stir. Let the pot cool until it's about room temperature.
- Preheat oven to 350 degrees. Prep a 9x13-inch pan with parchment paper (the combination aluminum foil/parchment paper works well here) and lightly butter or use nonstick spray. Have paper overhang the sides for easy lifting later.
- Prepare the cookie dough: Place the butter and sugars in a large bowl. Mix until smooth and creamy. Add the eggs and vanilla.
- In a separate bowl, whisk together the dry ingredients: flour, oats, baking powder, baking soda and salt. Mix with the butter mixture. Add mint chocolate chips last.
- Place about half the cookie dough in the prepared pan. It will be sticky, but drop it in dollops and smooth it to the edge as best you can. With a solid layer on the bottom, now dollop the cooled chocolate from the saucepan. Use an offset spatula to smooth it to the edges. Plop the rest of the cookie dough on top and don't worry if some chocolate shows through. The dough will ooze out and even as it bakes.
- Bake until lightly browned, about 20 to 25 minutes. Set aside to cool for a few hours, then place in fridge to completely set. Cut into bars. Store in sealed container in fridge or on counter.
OM NOM NOM!
Bready or Not: Mocha Shortbread
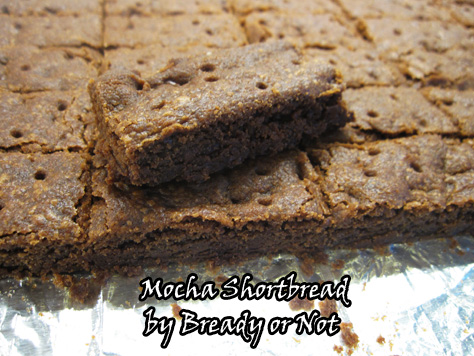
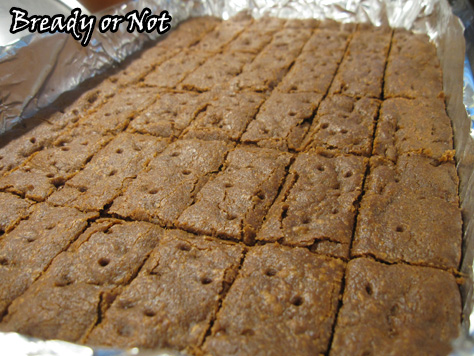
Combine the awesomeness of shortbread and chocolate in a single pan!
I loved shortbread from the time I was a kid and we’d buy those precious boxes of Walker’s Shortbread at the Fresno Highland Games. Now you can buy Walker’s everywhere, but in the late ’80s and 1990s? It was a real treat.
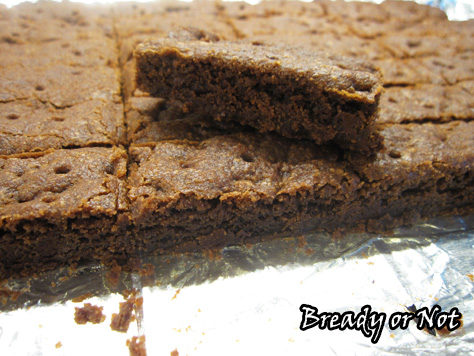
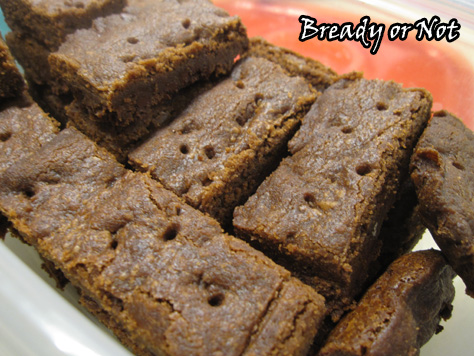
This chocolate shortbread is a real treat, too. It creates tender yet firm bars that combine all the best of buttery shortbread, mocha, and espresso.
I first made this by mixing in mini chocolate chips (replacing the cocoa nibs in the original recipe). When I wanted a good cookie recipe to mail during an Arizona summer, I thought of shortbread because it ships and keeps so well, but chocolate chips would melt. Therefore, I made the recipe again with melted chocolate in the dough. The versions tasted the same and the new version shipped cross-country without any issues.
I think the biggest issue here is that it tastes so good–especially with coffee or tea–that there’s a tendency to gobble down shortbread bars as if they are potato chips.
Bet you can’t eat just one!
Modified from Mocha Shortbread as printed in Martha Stewart Living.
Bready or Not: Mocha Shortbread
Ingredients
- 2 cups all-purpose flour
- 1/4 cup unsweetened cocoa powder sifted
- 1/2 teaspoon coarse salt
- 1 cup unsalted butter 2 sticks, room temperature
- 1 cup white sugar
- 2 teaspoons pure vanilla extract
- 1 Tablespoon instant espresso powder
- 1/2 cup mini chocolate chips either kept whole, or melted in microwave to blend into dough; the latter ships well, even in summer heat
Instructions
- Prepare a 9x13 baking pan with foil or parchment, and apply nonstick spray. In a small bowl, whisk together the flour, cocoa powder, and salt; set aside.
- In a large bowl, beat softened butter with a mixer on medium speed until fluffy and pale, about 5 minutes. Gradually add sugar, beating until mixture is very light, about 2 minutes, then stir in the vanilla extract and espresso powder. Mix about one more minute until it's smooth.
- Slowly pour in the flour mixture and mix until it just comes together. Add in the chocolate (either in chips or melted). Press dough evenly into the prepared pan. Press plastic wrap over the top and use that to smooth the dough with your hands or a spatula. Refrigerate until the dough is firm, at least an hour and up to a day.
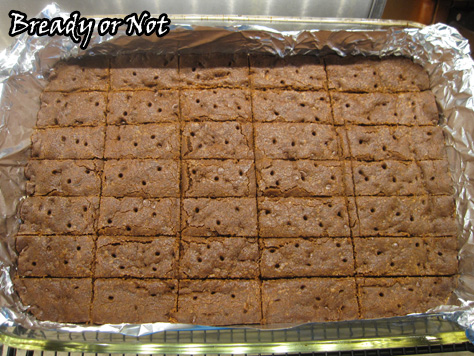
- Preheat oven to 350-degrees. Leaving the dough in the pan, use a knife to slash the dough into small rectangles and then use a fork or chopstick to poke holes in top of each bar.
- Bake until set, 30 to 35 minutes. Let cool in pan on a wire rack 15 minutes, then re-cut bars. Let it cool completely then use the foil or parchment to lift out the shortbread and separate bars. Store covered up to one week.
- OM NOM NOM!
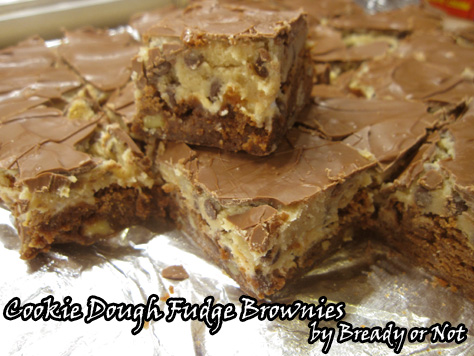
Bready or Not: Cookie Dough Fudge Brownies
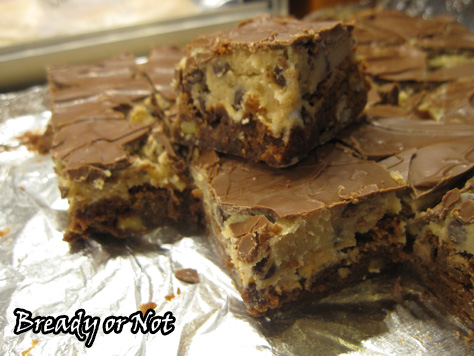
If you can’t make up your mind about whether you want fudge or brownies, I have the perfect recipe for you.
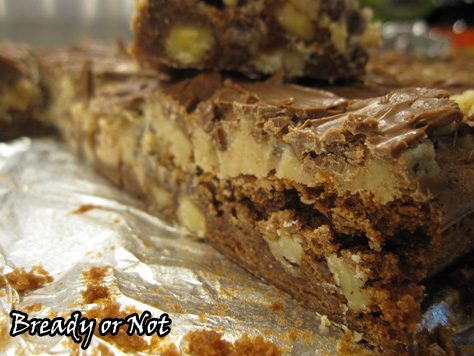
Eat these straight out of the fridge, and you have brownies with a sweet cookie dough taste. Let them warm up to room temperature, and you have chocolately cookie dough fudge.
I found the original recipe in an old Taste of Home magazine. When I visited my hometown last Thanksgiving, my mom handed me a stack of magazines to go through when I unshackled myself from the computer. See, I was zooming through the rough draft of “The Deepest Poison,” and food magazines provided me with a happy, no-effort brain break.
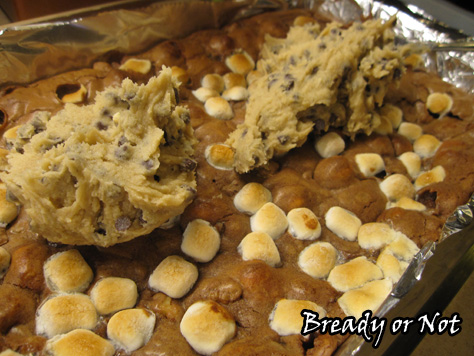
I mixed up the recipe to make it my own. I added marshmallows. I tweaked amounts. Don’t let all the steps in the directions intimidate you. You can make this in layers over a day or so. The leftovers will keep well in a sealed container in the fridge, too.
Do keep in mind that this makes a 9×13 pan. That’s a lot of sweet cookie dough brownie-fudge love, people.
Greatly modified from Two-Tone Fudge Brownies from Taste of Home June/July 2001
Bready or Not: Cookie Dough Fudge Brownies
Ingredients
Brownie layer:
- 1 cup semi-sweet chocolate chips or milk chocolate chips
- 1/2 cup unsalted butter 1 stick, softened
- 1 cup white sugar
- 3 eggs room temperature
- 1 1/2 teaspoons vanilla extract
- 1 1/4 cups all-purpose flour
- 1/4 teaspoon baking soda
- 3/4 cup walnuts chopped
- 2 cups mini marshmallows about half a 10 ounce bag
Cookie dough layer:
- 1/2 cup unsalted butter 1 stick, softened
- 1/2 cup brown sugar packed
- 1/4 cup white sugar
- 3 Tablespoons milk or almond milk
- 1 teaspoon vanilla extract
- 1 cup all-purpose flour
- 1/2 cup chocolate chips mini chips work well
Ganache:
- 1 cup semi-sweet chocolate chips or milk chocolate chips
Instructions
Brownie layer
- Line a 9x13 pan with aluminum foil and apply nonstick spray. In a microwave-safe bowl, melt the chocolate chips. Let them cool slightly.
- Preheat oven at 350-degrees. In a mixing bowl, cream together butter and sugar. Add eggs and vanilla. Stir in the melted chocolate. Combine flour and baking soda, and slowly mix into the wet ingredients. Stir in the walnuts and half of the marshmallows.
- Glop it into the ready pan and spread the dough out evenly. Top it with the remaining marshmallows. Bake it for 18-22 minutes, until it passes the toothpick test. Allow to completely cool.
Cookie dough layer
- Cream the butter and two sugars, then add the milk and vanilla extract. Gradually add the flour. Add the chocolate chips last.
- Dollop the dough on top of the brownies and use an offset spatula to form a thin layer across the top. Set it in the fridge to chill for an hour or so.
Ganache
- Set chocolate in a microwave-safe bowl and microwave until you can stir it smoothly. Use an offset spatula to smooth it over the cookie dough layer. Set it at room temperature or chill in fridge to set.
- Use the aluminum foil to lift the brownies out for easy cutting. I found it cut smoothest with the brownies flipped over, chocolate on the bottom. Note that the chocolate will still likely shatter some as you cut it.
- Brownies are best chilled and stored in the fridge. If kept at room temperature for a while, they soften a lot and become very fudge-like, but firm up again when chilled. It's awesome either way.
OM NOM NOM!
Read More
Bready or Not: Biscoff Brownies
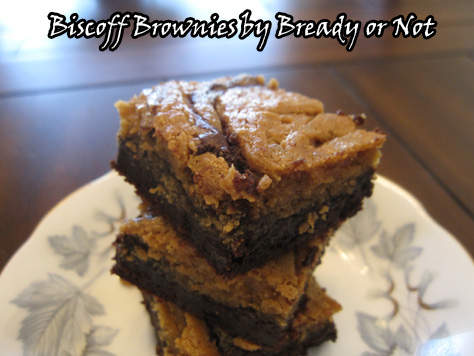
How about some beautiful brownies for Valentine’s Day?
Sometimes you want a brownie that punches you in the face with its chocolate flavor. Other times you want a gentle slap. This brownie is the latter.
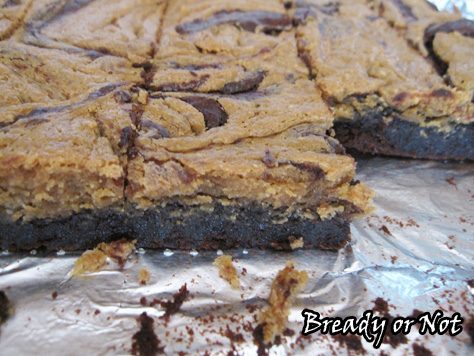
These mild brownies blend the magic of Biscoff spread/Speculoos spread with chocolately brownies. Neither flavor is strong, but together they create something delicious, tender, and good.
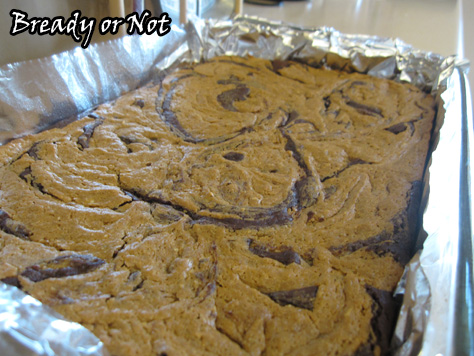
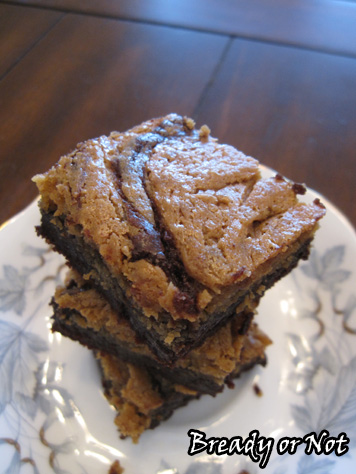
Also, they are PRETTY. Look at that swirl!
These are photogenic brownies.
They also keep really well for several days in a sealed container at room temperature. If you can restrain yourself to make them last that long.
Slightly modified from Biscoff Brownies at Bake at 350.
Bready or Not: Biscoff Brownies
Ingredients
For the Biscoff swirl:
- 1/2 cup smooth Biscoff or cookie butter spread
- 4 ounces cream cheese softened
- 2 Tbsp sugar
- 1 egg room temperature
For the brownies:
- 1 cup Dutch-process cocoa sifted
- 1 tsp kosher salt
- 1/2 tsp baking powder
- 12 Tb unsalted butter 1 1/2 sticks
- 2 cups white sugar
- 1 Tbsp vanilla extract
- 3 eggs room temperature
- 1 cup all-purpose flour
Instructions
- Preheat oven to 325-degrees. Line a 9x13 pan with aluminum foil and grease surface.
- For the Biscoff swirl: In a small bowl, combine the cookie butter spread, cream cheese, sugar, and egg, until smooth. Set aside.
- For the brownies: Sift together the cocoa, salt and baking powder and set aside.
- In a medium saucepan, melt the butter over low heat. Remove from heat and add the sugar. Once they are mixed, return to the burner and keep stirring as it heats through. You don't want it to bubble.
- Remove the pan from heat and stir in the cocoa mixture. Let it cool a few minutes. Whisk in the eggs and vanilla extract until smooth. Stir in the flour. Pour into the prepared pan and smooth it out.
- Dollop the Biscoff mixture here and there on top of the brownie batter. Use a table knife to gently swirl the mixture every which way across the surface.
- Bake for 30-35 minutes, until the swirl looks set and it passes the toothpick test. Cool on a wire rack before cutting.


