


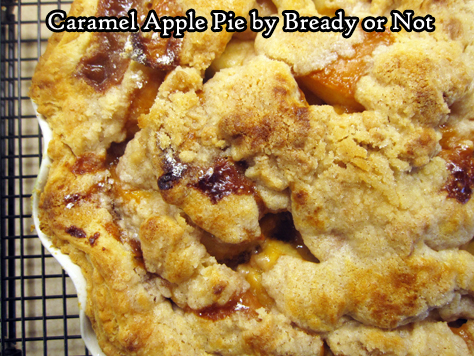
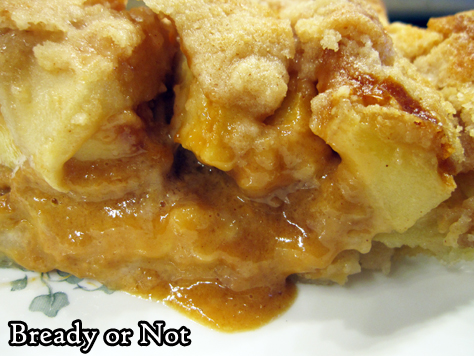
Bready or Not Original: Caramel Apple Pie
Bready or Not has featured many kinds of apple pie and cake over the years, but this is the recipe that I have made most often across my twenty years of marriage: Caramel Apple Pie.
I was shocked to realize I hadn’t featured it on Bready or Not since I started it on my domain site in 2014. I posted an earlier version on my LiveJournal, back in the day.
The base recipe came from Mr. Food. Who else remembers the Mr. Food spots on TV? He used to be on Channel 30’s midday news in Fresno. I was newly engaged when I saw him demonstrate this on his five-minute TV spot, and I mailed to the TV station with a SASE to get a print copy of the recipe.
The air date on the sheet is October 8th, 1999. I would have been watching the news from my dorm room at Fresno Pacific University!
I’m pretty sure I made this recipe for my fiancé when he came to visit me that Christmas (and we hoped that the Y2K Disaster would happen so he didn’t have to fly back to the Navy on January 1st).
It seems only right to feature this recipe at holiday time all these years later. I wouldn’t be surprised if I’m asked to make this again in just a few weeks!
Greatly modified from Caramel Crunch Apple Pie from Mr. Food (rest in peace, good chef).
Bready or Not Original: Caramel Apple Pie
Ingredients
Pie filling:
- 1 deep-dish pie shell homemade dough or store-bought
- 5 medium apples mix of varieties best, including Granny Smith, Honeycrisp, Pink Lady, etc
- 2 Tablespoons all-purpose flour
Topping:
- 2/3 cup all-purpose flour
- 1/2 cup white sugar
- 1/2 teaspoon ground cinnamon
- 1/2 cup unsalted butter 1 stick, cold
- 1 jar caramel drizzle as much as desired; most of the jar will be unused
Instructions
- Preheat oven at 375-degrees; set a baking sheet in the oven to heat up as well (this will reduce the likelihood of a pie with a soggy bottom). Press the pie dough into a deep dish pie pan, if not already formed. Stash it in the fridge while the filling is being prepared.
- Peel and core apples and slice into thin wedges. Toss them with the 2 Tablespoons flour to coat. Set aside.
- In a mixing bowl, sift together the flour, sugar, and cinnamon. Dice up the butter and toss it in the mix. Use a pastry cutter or a fork to mash up the butter to make pea-sized and smaller pieces of various shapes. Set bowl in fridge briefly, and bring out the pie shell.
- Pour the apple slices into the pie shell and distribute them to make a nice mound. Drizzle jarred caramel over the top, to personal preference. Use a spoon to distribute crumb topping to cover apples, using butter lumps and powder to fill the nooks and crannies.
- Set pie on hot baking sheet. Bake for 40 to 45 minutes, until apples are tender when pierced by fork. Cool for at least 30 minutes before cutting in.
- Store pie covered by foil in fridge. Will keep for as long as a week. Great eaten cold or warmed up!
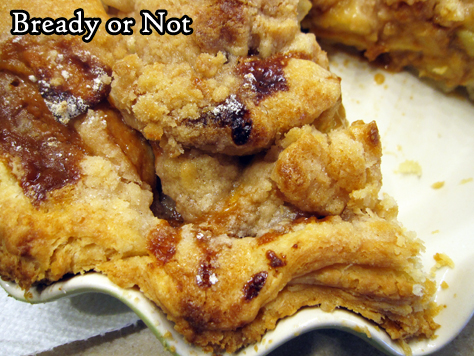
OM NOM NOM!
Bready or Not Original: Sugar-Crusted Pumpkin Cake
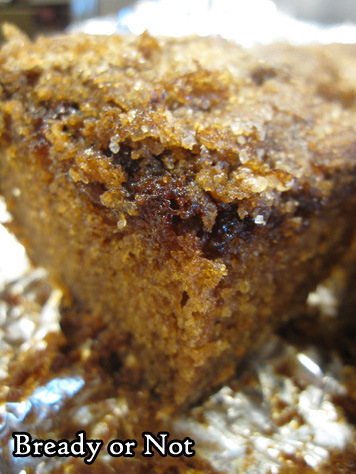
This Sugar-Crusted Pumpkin Cake is moist, delicious, and packed with autumnal flavors!

There is a definite pumpkin pie-like vibe to this thing. The white chocolate chips melted along the bottom (hence the direction to grease the foil well) and formed a sort of scrumptious crust, too.
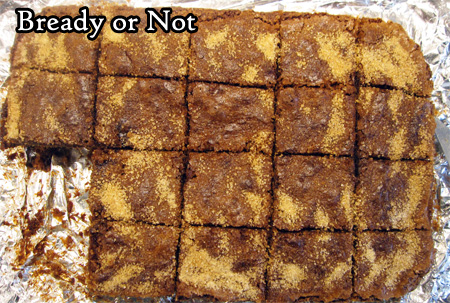
This thing is even pretty. I like using turbinado sugar as a top crust because it’s pretty, texturally delightful, and tastes darn good!

This cake will keep for at least 3 days, covered and chilled, and maybe longer. It also freezes like a champ.
Since this makes a 13×9 pan, it’s probably a good thing it can be portioned out over days and weeks!
Bready or Not Original: Sugar-Crusted Pumpkin Cake
Equipment
- 13×9 pan
Ingredients
Cake
- 4 large eggs room temperature
- 2 cups white sugar
- 1 cup vegetable oil
- 1/2 cup applesauce
- 2 cups cake flour
- 2 teaspoons baking soda
- 2 teaspoons pumpkin spice
- 1 teaspoon salt
- 1 teaspoon vanilla extract
- 1/2 cup pumpkin puree
- 1 cup white chocolate chips
Topping
- 1/2 cup turbinado or other coarse sugar
- 1/2 teaspoon pumpkin spice
Instructions
- Line a 13×9 pan with foil and apply generous nonstick spray or butter. Preheat oven at 350-degrees.
- Mix together the eggs, white sugar, vegetable oil, and applesauce. Add the cake flour, baking soda, pumpkin spice, and salt. Follow up with the vanilla extract and pumpkin puree. Fold in the white chocolate chips.
- Pour batter into the pan and level out. Mix together the two topping ingredients and sprinkle over the cake.
- Bake for 1 hour, or until the middle passes the toothpick test. Let cool at room temperature, then store in fridge. Cake will keep for at least 3 days in the fridge, but can also be sliced and frozen for later enjoyment.
OM NOM NOM!
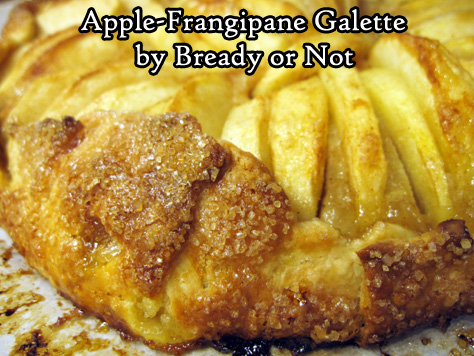
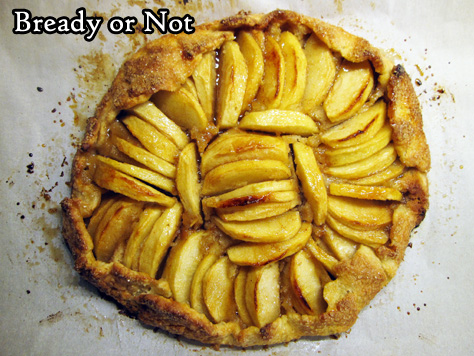
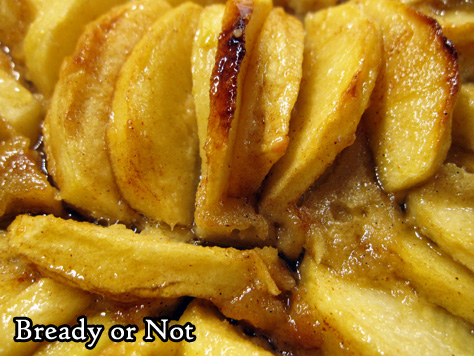
Bready or Not Original: Apple-Frangipane Galette
This Apple-Frangipane Galette is like a leaner apple pie. It’s the way to enjoy a sweet treat without going full overkill.
This recipe has a lot of ingredients and steps, but they can be spread out over a few days, if you want. The actual recipe is pretty straightforward!
I’ve been doing a number of recipes that use frangipane, and I get asked almost every time: “what is frangipane?”
To quote Wikipedia, it’s: “a sweet almond-flavored custard used in a variety of ways including cakes and… pastries. …Today it is normally made of butter, sugar, eggs, and ground almonds.”
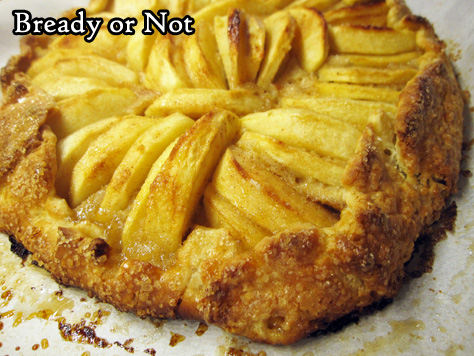
In other words, it’s a spreadable, sweet, nutty layer of goodness. It acts as the perfect complement to apples in this recipe.
Do note that this is best enjoyed the day it is made. It’s fine, though, to freeze slices of it right away. When you thaw them later, enjoy the pieces that same day!
Bready or Not Original: Apple-Frangipane Galette
Equipment
- parchment paper
- food processor
- pastry brush
Ingredients
Crust:
- 1 cup all-purpose flour plus more for dusting
- 4 teaspoons white sugar
- 1/2 teaspoon salt
- 6 Tablespoons cold unsalted butter cut into small pieces
- 1 large egg
Frangipane:
- 2/3 cup almond flour sifted to remove lumps
- 1/4 cup white sugar
- 1 Tablespoon all-purpose flour
- 1 Tablespoon unsalted butter room temperature
- 1 large egg
- 1 Tablespoon apple brandy such as Calvados (optional)
- 1 teaspoon pure vanilla extract
- 1/2 teaspoon apple pie spice
- pinch salt
Apple filling:
- 2 medium apples such as Honeycrisp or Golden Delicious
- 1 Tablespoon brown sugar packed
- 1 Tablespoon white sugar
- 1 teaspoon lemon juice
- 1/4 teaspoon apple pie spice
- 1 large egg beaten
- turbinado or other coarse sugar
Glaze:
- 2 Tablespoons honey
- 2 teaspoons apple brandy such as Calvados
Instructions
Make the crust:
- In a food processor, pulse together the flour, sugar, and salt. Add the butter and chop until it’s pea-sized. Add the egg and pulse until it comes together; if it doesn’t, add tiny drizzles of water until it does–just make sure the dough ends up cohesive, not wet. Turn out the dough onto a big piece of plastic wrap and compress the dough to form a disc. Wrap it up and chill it in fridge for a few hours, minimum, or a few days.
Make the frangipane:
- Use a rubber spatula to combine the almond flour, sugar, flour, butter, egg, apple brandy, vanilla, pie spice and salt, making it smooth. Stash it in the fridge until ready to use.
Assembling the galette:
- Preheat oven at 400-degrees. Prepare a big cookie sheet with a piece of parchment. Bring out the dough to warm for a few minutes, then lightly flour a surface and roll it out to about a 12-inch round. Move it to the parchment paper.
- Spread the frangipane over the dough, leaving a blank 1 1/2-inch border. Set the baking sheet in the fridge while preparing the apples.
Prepare the apples:
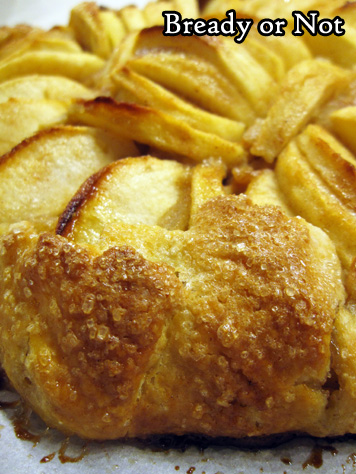
- Peel the apples and slice to 1/4-inch thickness. In another bowl, stir together the brown sugar, sugar, lemon juice, and pie spice. Add this to the apples, and toss them to coat. Bring out the galette dough. Arrange the apples on the frangipane starting from the middle, spiraling them outward while slightly overlapping them. Fold the blank edge over the apples to form a thin, pleated crust. Brush the beaten egg over the crust, then sprinkle it with coarse sugar.
- Bake galette for 35 to 40 minutes. Apples in middle should be fork-tender when done. Cool for about 30 minutes.
Make the glaze:
- In a small saucepan on the stovetop or in a microwave-safe bowl in the microwave, warm the honey and brandy until it is loose and spreadable. Using a clean pastry brush, brush glaze over the apples.
- Let galette cool another 30 minutes, minimum, before cutting it–a pizza slicer is great for this. The galette is best eaten the day it is made, or promptly frozen in slices to be eaten soon after it thaws.
OM NOM NOM!
Bready or Not: French Apple Cake in a Springform Pan
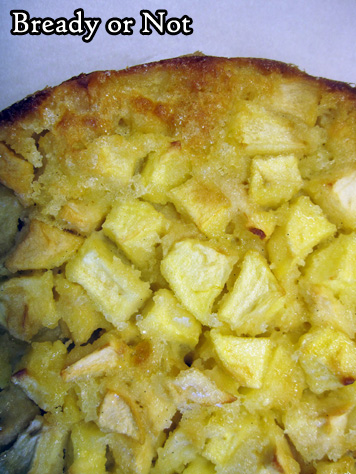
This French Apple Cake is thick with apples, not cake. There’s actually just enough batter to adhere everything together.
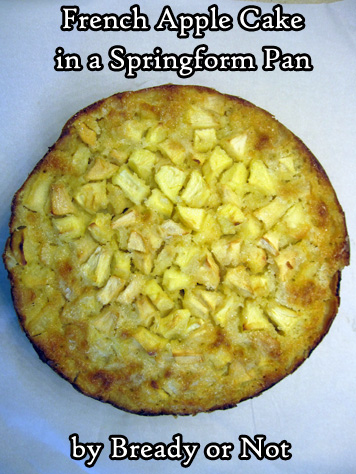
The apples are the star, so get good ones. I recommend doing about half Honeycrisp and Pink Ladies, but go for a combo of two good kinds of baking apples. (Not sure which ones are best for baking? Google has lots of recs!)
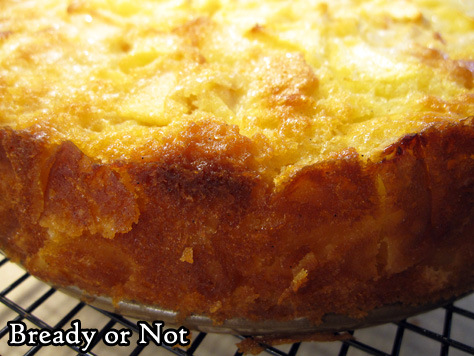
I’ve had a springform pan for years, but I’ve never used it like I did in 2020. That particular pan makes this cake extra good, too, because it creates a high cake with nicely browned edges.
One thing I’ve noticed about French and Irish apple cakes is that they really emphasize the fruit. American cakes and pies add a lot more spice. As much as I love loading on the cinnamon, it’s refreshing to do a take like this sometimes.

Let the fruit taste… well, fruity. Here, the addition of Calvados or another apple brandy brings that out even more. You don’t end up with an alcohol taste in the final result, but it does draw out more of the apple flavor.
This cake is a great one to slice up and freeze for later, too. Make the goodness last even longer!
Modified from Bake from Scratch September/October 2020 issue.
Bready or Not: French Apple Cake in a Springform Pan
Equipment
- 9-inch springform pan
- uneven spatula
- parchment paper
Ingredients
- 8 large baking apples totaling about 800 grams mix of Honeycrisp and Pink Lady recommended
- 2 teaspoons lemon juice
- 3 large eggs room temperature
- 3/4 cup white sugar
- 3 Tablespoons apple brandy use Calvados to make it especially French
- 1 teaspoon vanilla bean paste or substitute vanilla extract
- 1 cup all-purpose flour
- 1 1/2 teaspoons baking powder
- 1 teaspoon kosher salt
- 2/3 cup unsalted butter melted and cooled
- 1 Tablespoon sparkling sugar
- Confectioners' sugar for serving
Instructions
- Preheat oven at 350-degrees. Prepare a 9-inch springform pan by cutting a piece of parchment to fit the base. Apple nonstick spray to the pan, then add the parchment, and spray it as well. In addition, tear a piece of aluminum foil to cup the bottom of the pan to catch any drips.
- Peel the apples and chop into 1-inch pieces. Toss with lemon juice. Set aside.
- In a big bowl, beat eggs until they are pale and foamy. Add the white sugar, apple brandy, and vanilla.
- In a separate bowl, sift together the flour, baking powder, and salt. Gradually mix the dry ingredients into the big egg-sugar bowl along with the melted butter. Scrape the bowl as needed, stirring everything until just combined. Don’t expect a huge amount of batter–it’s there to act like delicious glue for all of the apple pieces!
- Reserve 1 heaping cup of the apple chunks. Fold the rest of the apples into the batter, coating them. Dump the mix into the prepared pan and even out with an uneven spatula. Arrange the remaining apples on top, pushing them into the batter and smoothing them out as much as possible.
- Bake for 20 minutes. Add sparkling sugar over the top. Bake another 20 minutes and check on the cake. It is done with apples in middle are tender and a digital thermometer plunged into the center reads at least 200-degrees. If needed, cook longer; if it’s browning too much, cover with foil.
- Let cake cool in pan for 15 minutes on a cooling rack. Carefully release the springform ring to let it completely cool for at least an hour; place in fridge to speed the chilling process, if desired.
- Slice into wedges. Enjoy cold, at room temperature, or warmed, with confectioners' sugar sprinkled over the top. Pieces can also be individually wrapped and frozen for later.
OM NOM NOM!
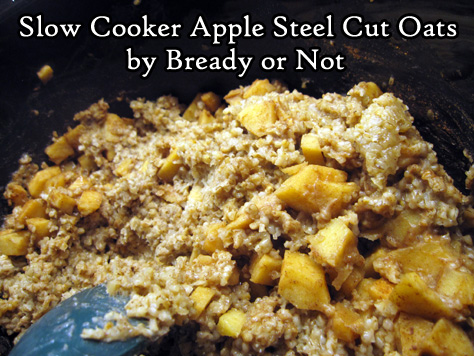
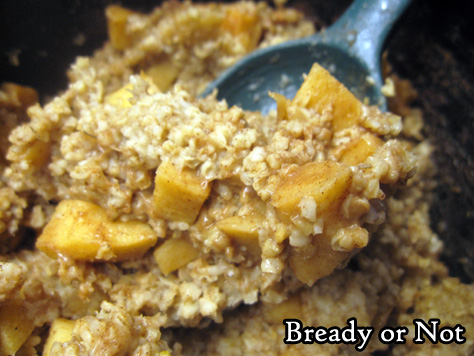
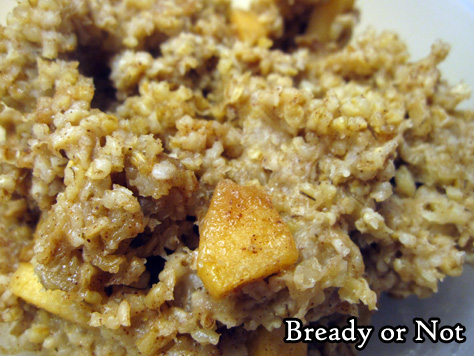
Bready or Not Original: Slow Cooker Apple Steel Cut Oats
These Slow Cooker Apple Steel Cut Oats are not the most photogenic of foods, but they are delicious, healthy, and good, and probably one of the most convenient meals in my cooking repertoire.
I’ve been cooking this recipe for over five years now, tweaking it here and there, making it better. What I present here is really a foundation. This recipe can be customized all kinds of ways–either when the food is being assembled, by adding in different spices or apples, or by tweaking it at serving time.
I love using Gala, Honeycrisp, or Pink Lady apples, but go for any good baking-type apple or a variety thereof. You don’t want the apples to go to mush. Or maybe you do? That might not be a terrible thing here.

I typically use unsweetened vanilla almond milk or cashew milk, but any plain or vanilla nut, soy, or oat milks would work, or you can opt for dairy milk.
This isn’t an overnight slow cooker oats recipe. I’ve tried that. Even on low and warm settings, the oats just plain overcooked for my preference. The consistency goes brick-like and the pot requires some intense scraping if you don’t use a removable liner. I prefer to make this during the day, and then portion out the oats to go in the fridge and freezer. They reheat beautifully.
Bready or Not Original: Slow Cooker Apple Steel Cut Oats
Equipment
- large slow cooker
Ingredients
- 2 cups steel cut oats no substitutes
- 2 cups nut milk or oat milk, regular or vanilla, sweetened or unsweetened
- 2 cups water
- 2 medium apples peeled and chopped
- 1/4 cup brown sugar packed
- 1/4 cup pure maple syrup
- 2 teaspoons ground cinnamon
- 1/4 teaspoon sea salt
- 2 teaspoons vanilla extract
Instructions
- Place all ingredients in slow cooker and stir to distribute. Place lid on pot and put heat level to LOW. Cook for 3 hours before lifting lid again. Stir and taste to test doneness. Continue to cook for 30 minutes to an hour more, dependent on the desired texture for the oats. The longer it cooks, the thicker it will be.
- Serve oats fresh, or stash in fridge to reheat in microwave over the next week. These oats are great to portion out and freeze for later. If desired, add more spices, fresh fruit, or extra milk when serving–the customization possibilities are endless!
*OM NOM NOM!*
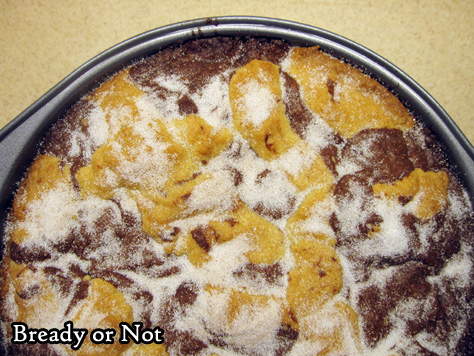
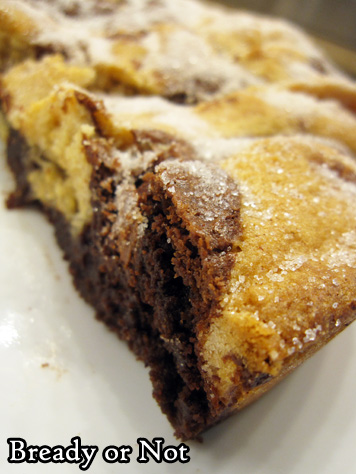
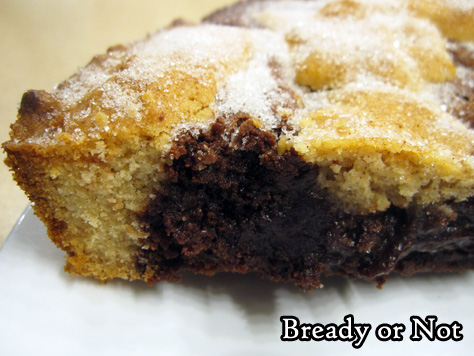
Bready or Not: Snickerdoodle Brookie
Don’t struggle to choose between Snickerdoodles and Brownies. Have them both at the same time in this extraordinary Snickerdoodle Brookie!
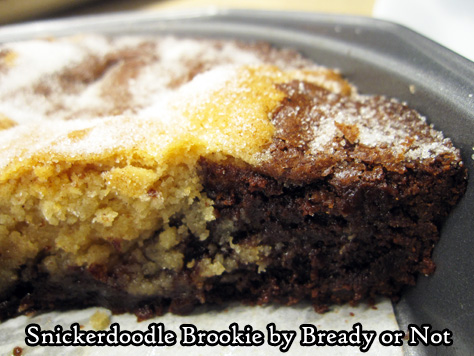
This is essentially like a massive cookie-cake hybrid. It looks impressive, and the flavor is impressive, too. If the layers work out right, you get a bit of everything in every bite.
If you eat the brookie warm, the chocolate flavor is quite strong. I actually liked this best at room temperature. The flavors play together better then.
I mean, it’d be a shame to not get to enjoy the Snickerdoodle side of things. A travesty.
I modified this from the original in my favorite food magazine, Bake from Scratch. I tried to make it easier by using the microwave, prepping the pan with parchment, and clarifying the steps throughout.
I can also testify that this is a great recipe to portion out and freeze. Pieces don’t take long to thaw and the brookie is dense enough to be pretty portable, too, though the dusting of cinnamon and sugar on top can sometimes be messy.
Modified from the March/April 2020 issue of Bake from Scratch Magazine.
Bready or Not: Snickerdoodle Brookie
Equipment
- 9-inch round cake pan
- parchment paper
Ingredients
Brownie batter:
- 6 ounces semisweet chocolate chips or bittersweet (170 grams)
- 1/2 cup unsalted butter 1 cube
- 1 cup white sugar
- 2 large eggs
- 1 teaspoon vanilla extract
- 3/4 cup all-purpose flour
- 1/4 cup Dutch process cocoa powder sifted
- 1/2 teaspoon kosher salt
Snickerdoodle dough:
- 1/3 cup unsalted butter softened
- 1/2 cup white sugar
- 1 large egg
- 1/2 teaspoon vanilla extract
- 1 cup all-purpose flour
- 1/2 teaspoon cream of tartar
- 1/2 teaspoon kosher salt
- 1/2 teaspoon ground cinnamon
- 1/4 teaspoon baking powder
Topping:
- 1 tablespoon white sugar
- 1/8 teaspoon ground cinnamon
Instructions
- Preheat oven to 350-degrees. Cut a piece of parchment to fit inside a 9-inch round cake pan. Apply nonstick spray in pan, place parchment, then spray parchment as well. Set aside.
Make brownie batter
- Melt together the chocolate and butter either in a double boiler on the stove or in the microwave in a microwave-safe bowl. Stir until everything is mixed and smooth. Stir in sugar. Set aside to cool for a few minutes before mixing in the eggs and vanilla.
- In a medium bowl, stir together flour, cocoa, and salt. Fold the dry ingredients into chocolate mixture just until combined. Set aside.
Make snickerdoodle dough
- Beat together the butter and sugar until they are fluffy; in a stand mixer, this will be at about 3 to 4 minutes. Scrape the sides of the bowl a few times. Add the egg and vanilla.
- In a separate bowl, stir together flour, cream of tartar, salt, cinnamon, and baking powder. Gradually mix the dry ingredients into butter mixture. Dough will be quite thick.
Assemble the cake
- Spoon large dollops (about 3 tablespoons each) of brownie batter into bottom of the prepared pan, leaving space between each lump. Crumble dollops of snickerdoodle dough in between brownie batter. Top with any more scoops of brownie batter and snickerdoodle dough. Gently use fingers to even out top.
- Bake until the middle passes the toothpick test, 33 to 40 minutes.
Make topping
- Stir together cinnamon and sugar. As soon as the cake is removed from the oven, sprinkle the mixture across the top.
- Let cool at least 15 minutes before cutting in. Cake can be served warm or at room temperature. It can also be frozen in slices and thawed for later enjoyment.
OM NOM NOM!
Follow me


