


Bready or Not Original: Citrus Scones
These citrus scones offer a bright way to start the day in portable and delicious form!

I managed to score a container of candied citrus peel–the stuff usually used in fruitcakes–on an after-Christmas clearance. “Oh, what to do with us?” I wondered.
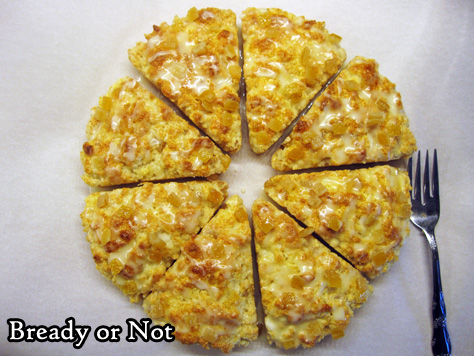
Finally, it hit me: scones! An original scone recipe that my husband could enjoy before work.

Of course, I had to add a glaze. Orange juice and confectioners’ sugar made that easy.

Plus, I found that the scones freeze like a charm, even while glazed! They thaw quickly at room temperature, too.
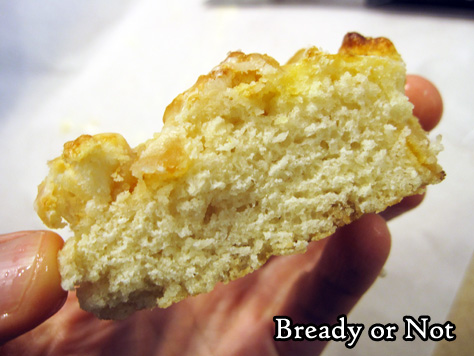
Unlike other scone recipes I’ve made, this one produces soft, fluffy results. Not dry or crumbly at all. I credit the sour cream for that. It sure works wonders in cakes and bars, too.

Bready or Not Original: Citrus Scones
Ingredients
Scones:
- 1 3/4 cups all-purpose flour
- 1/4 cup white sugar
- 4 teaspoons baking powder
- 1/8 teaspoon salt
- 5 Tablespoons unsalted butter
- 1/2 cup plus 1 Tablespoon milk or half & half
- 1/4 cup sour cream
- 1/3 cup candied orange peel
- 1 egg lightly beaten
Glaze:
- 1/2 cup confectioners' sugar
- 3 teaspoons orange juice [or water]
- sprinkle of additional orange peel optional
Instructions
- Preheat oven at 400-degrees.
- In a large bowl, whisk together flour, sugar, baking powder, and salt. Cut in the butter until it resembles coarse crumbs.
- In a different bowl, stir together 1/2 cup milk and sour cream. Stir into dry ingredients until it just holds together, adding more milk if needed. Fold in the candied citrus peel.
- If using a scone pan, pack the dough into the triangular holes. If shaping by hand, transfer the cohesive dough to a large piece of parchment paper on a large cookie sheet. Shape into a large, even circle. Slice into eight wedges and separate them slightly.
- Whisk egg and remaining tablespoon of milk and brush them atop each scone.
- Bake until scones are golden brown, 15 to 17 minutes. Leave on pan to cool for 20 minutes.
- To glaze, mix together confectioners' sugar and orange juice to create a thick, dribbly consistency. Spoon atop scones. Immediately sprinkle on more candied orange peel and gently press into tops of scones.
- Scones are best eaten within the day, but they can be frozen even while glazed. Freeze on waxed paper then transfer to a freezer bag or plastic container. They thaw quickly at room temperature.
- OM NOM NOM!
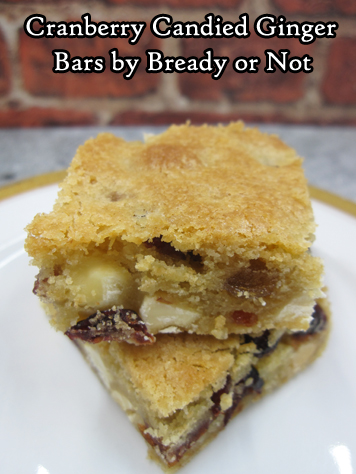
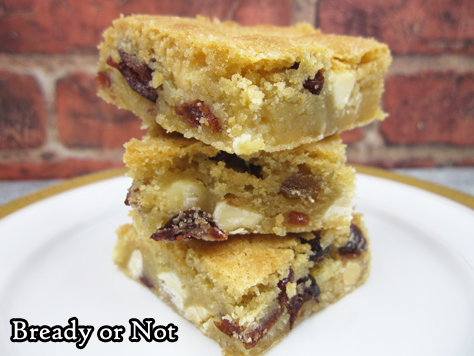
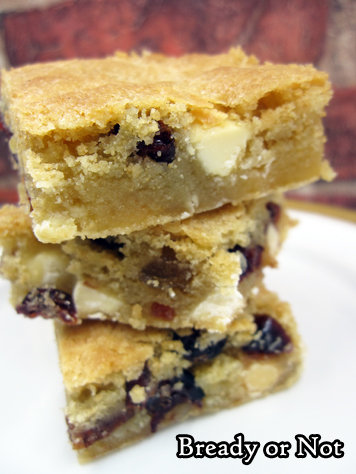
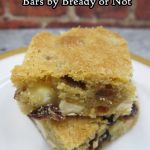
Bready or Not Original: Cranberry Candied Ginger Blondies
Cranberry Candied Ginger Blondies pack tart cranberries, zesty little nuggets of candied ginger, and mellow white chocolate in a chewy blondie base, to delicious results.
This begins a small spate of dried cranberry recipes that will be on Bready or Not over the next while.

This is because I bought a massive bag of dried cranberries on sale at Costco, and I had an existing stockpile to use up, too. Cue a “oh crap, I need to use up some of this stuff!” response.
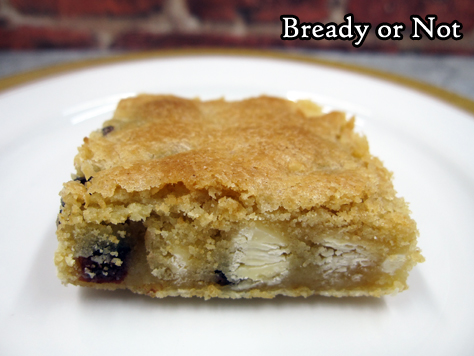
This recipe proved to be a fantastic one, too. The blondies are sweet and chewy, and that combination of dried cranberries, candied ginger, and white chocolate complements and contrasts in an amazing way.
I’ve been asked before about where to find candied ginger. Sometimes brands will sell it jarred alongside spices on the grocery store aisle. Also, check the bins at your local health food store or co-op. I’ve bought candied ginger at my local Sprouts.
The good news is that candied ginger (like dried cranberries) keeps well for ages, so you can stock up and enjoy it for months. Though space might be an issue if you’re buying at Costco…
Bready or Not Original: Cranberry Candied Ginger Blondies
Ingredients
- 1 cup unsalted butter softened
- 1 cup white sugar
- 1/2 cup brown sugar packed
- 2 large eggs room temperature
- 1 teaspoon vanilla extract
- 2 cups all-purpose flour
- 1 teaspoon baking powder
- 1/2 teaspoon fine sea salt
- 1 cup dried cranberries
- 1/3 cup candied ginger chopped
- 1 cup white chocolate chips
Instructions
- Preheat oven at 350-degrees. Line a 13x9 inch dish with aluminum foil and apply nonstick spray.
- Place butter and both sugars in a large bowl and beat until creamed together. Mix in eggs and vanilla. Follow up with the flour, baking powder, and salt, until just combined. Fold in the cranberries, candied ginger, and white chocolate chips.
- Spread batter in the ready pan and even out. Bake for 27 to 30 minutes, until edges are firm and the middle passes the toothpick test. Cool on a wire rack.
- Use foil to list contents onto cutting board. Slice into pieces. Store in an sealed container at room temperature.
- OM NOM NOM!
Bready or Not Original: No Bake Chocolate Almond Oatmeal Bars [Gluten Free]
I’m here to set you up with a breakfast or snack bar that is delicious and mostly healthy. Plus, these No Bake Chocolate Almond Bars can be tweaked for several dietary needs!
![Bready or Not Original: No Bake Chocolate Almond Oatmeal Bars [Gluten Free]](https://www.bethcato.com/blog/wp-content/uploads/2018/11/No-Bake-Choc-Almond-Breakfast-Bars5_sm.jpg)
If you need gluten-free, use GF rolled oats. If you need dairy-free, use different chocolate chips. If you have nut allergies… well, you could probably use all-purpose flour and a different nut butter or even Biscoff spread, but I haven’t tested that mod myself.
![Bready or Not Original: No Bake Chocolate Almond Oatmeal Bars [Gluten Free]](https://www.bethcato.com/blog/wp-content/uploads/2018/11/No-Bake-Choc-Almond-Breakfast-Bars1_sm.jpg)
Though I did test this recipe. A lot. Because it kept coming out tasty, but still a bit off.
![Bready or Not Original: No Bake Chocolate Almond Oatmeal Bars [Gluten Free]](https://www.bethcato.com/blog/wp-content/uploads/2018/11/No-Bake-Choc-Almond-Breakfast-Bars8_sm.jpg)
The first try, I used milk chocolate chips, which is always my preference in cookies. To my surprise, I found the end result to be too sweet.
![Bready or Not Original: No Bake Chocolate Almond Oatmeal Bars [Gluten Free]](https://www.bethcato.com/blog/wp-content/uploads/2018/11/No-Bake-Choc-Almond-Breakfast-Bars13_sm.jpg)
The second try, I became quite frustrated when pressing the base layer into the pan. It was a big sticky mess.
![Bready or Not Original: No Bake Chocolate Almond Oatmeal Bars [Gluten Free]](https://www.bethcato.com/blog/wp-content/uploads/2018/11/No-Bake-Choc-Almond-Breakfast-Bars6_sm.jpg)
Therefore, by the third try, I knew what to do. Use semisweet chips. Chill the oat mixture from the time it is mixed. I also found that these bars were fantastic to freeze; just use waxed paper between the stacked bars.
![Bready or Not Original: No Bake Chocolate Almond Oatmeal Bars [Gluten Free]](https://www.bethcato.com/blog/wp-content/uploads/2018/11/No-Bake-Choc-Almond-Breakfast-Bars5_sm-150x150.jpg)
Bready or Not Original: No Bake Chocolate Almond Oatmeal Bars [Gluten Free]
Ingredients
Crust
- 3 cups old fashioned oats
- 1/2 cup almond flour
- 3 Tablespoons coconut oil melted
- 1/2 cup + 2 Tablespoons pure maple syrup
- 3/4 cup almond butter
- 1/2 teaspoon ground cinnamon
- 1 teaspoon vanilla extract
Filling
- 3/4 cup dark chocolate chips or semisweet
- 1/4 cup almond butter
Instructions
- In a large bowl, mix together all of the crust ingredients. The mixture should be sticky and clump together. If it's not cohesive, add more almond butter; if it's too wet, add some more oats and/or almond flour. Chill bowl in fridge for an least an hour.
- Line an 8x8 or 9x9-inch pan with aluminum foil and apply nonstick spray.
- Press half of the crust mix evenly into the bottom of the pan. A piece of waxed paper or parchment and a heavy glass make it easier to compress as much as possible. Place pan and bowl in fridge for another 30 minutes.
- In the microwave or in a pan on the stovetop, melt together the chocolate chips and remaining almond butter. When they become creamy and smooth, remove from heat. Pour the chocolate to completely cover the oat layer. Chill for another hour.
- Dollop the remaining oat mixture atop the hardened chocolate. Again, compress contents into pan as much as possible. Chill another 30 minutes.
- Use the foil to lift contents onto a cutting board. Slice. Keep bars for up to 3 weeks in the fridge, in a sealed container with waxed paper between the layers, or freeze for up to a month.
- OM NOM NOM!
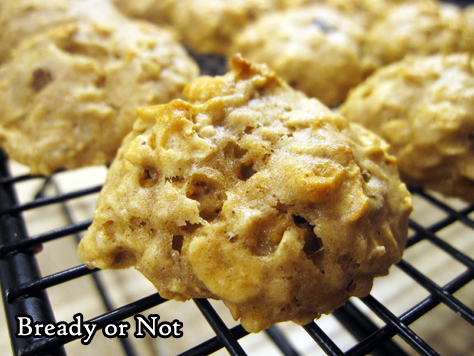
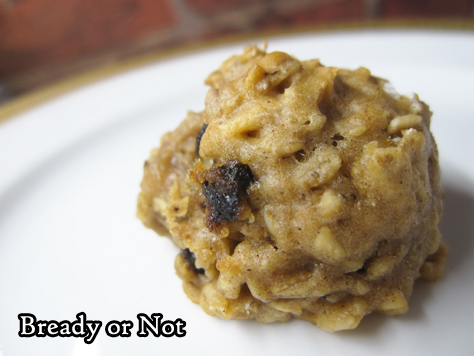
Bready or Not Original: Soft Muesli Breakfast Cookies
Let’s continue a healthy theme for another week with Soft Muesli Breakfast Cookies!

Think of these like plump little oatmeal cookies. The texture is cakey and thick, and will otherwise vary depending on the muesli you use.
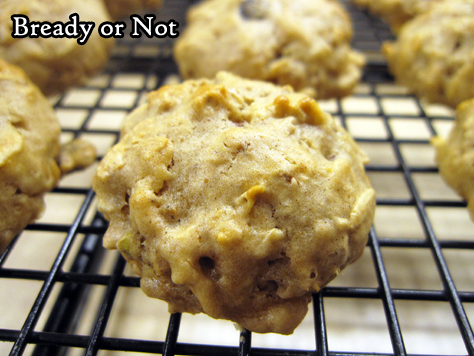
I tested out this recipe using Seven Sundays Vanilla Cherry Coconut Muesli, which was FANTASTIC in these cookies.
The customization options for this recipe are really endless. Get a new muesli and get baking! Muesli is often on sale at this time of year. Take advantage of that.

These cookies are slightly tacky because of the applesauce, so be sure to keep waxed paper or parchment between the cookies in their sealed container or they’ll stick together.
The cookies will keep well for up to a week, too. In fact, take them on the go. Enshroud some in plastic for a kid’s (or your own) snack or lunch.
The recipe makes about 55 cookies if you use a teaspoon scoop, so you’ll have plenty of cookies to enjoy!

Bready or Not Original: Soft Muesli Breakfast Cookies
Ingredients
- 1 1/2 cups all-purpose flour
- 1 teaspoon baking soda
- 1 teaspoon cinnamon
- 1/4 teaspoon salt
- 3/4 cup applesauce individual serving cup size
- 1/2 cup brown sugar packed
- 1/2 cup vanilla Greek yogurt or plain
- 2 Tablespoons vegetable oil or coconut oil
- 1 egg
- 1 teaspoon vanilla extract
- 2 1/2 cups muesli about 11 ounces
Instructions
- Preheat oven to 350-degrees.
- In a medium mixing bowl whisk together the flour, baking soda, cinnamon, and salt. Set aside.
- In a big mixing bowl, beat together the applesauce, brown sugar, yogurt, vegetable oil, egg, and vanilla with a mixer until well combined. Add flour mixture, followed by the muesli.
- Drop cookie dough by teaspoon scoops onto a parchment paper-lined cookie sheet. Bake for 10 to 12 minutes.
- Allow cookies to cool on pan for five minutes, then transfer to a wire rack to cool completely. Store in a sealed container between parchment or waxed paper layers; the applesauce will make the cookies slightly tacky if they touch each other. They'll keep for up to a week at room temperature.
- OM NOM NOM!
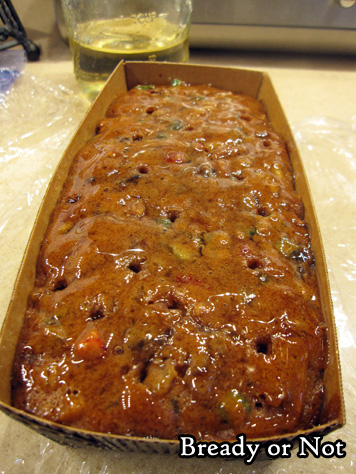
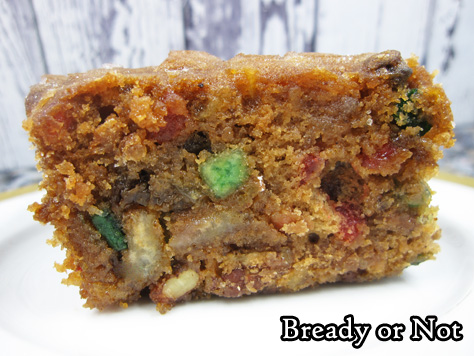
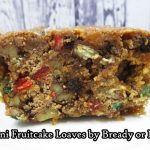
Bready or Not Original: Mini Fruitcake Loaves
Welcome to MACADAMIA NUT MONTH! Why is this Macadamia Nut Month? Because next month on the 23rd, the final book in my Blood of Earth trilogy comes out! Macadamia nuts are a big product of Hawaii, and Hawaii is a major setting in Roar of Sky. Plus, macadamia nuts are awesome.

If you love these nuts, get ready to bliss out. This month includes recipes for:
White Chocolate Macadamia Nut Pie
White Chocolate Macadamia Nut Cookies
Lemony Macadamia Nut Bars
Mini Fruit Cake Loaves to make now for the holidays (macadamia nuts optional) (today)
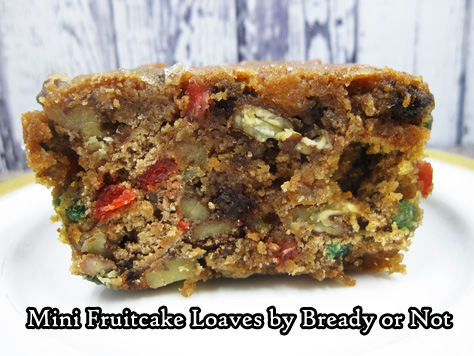
Fruitcake is one of the most maligned holiday foods out there, but people do love it. My dad sure does. I wanted to make him a fruitcake that proved how awesome they could be.
The recipe you see today is one I’ve been experimenting with for a few years now. One problem that I had with a lot of existing recipes is that they make a ton of fruitcakes. Therefore, I wanted to find the right recipe to cut in half for easier fridge storage and eventual transportation to California.
I used a highly-rated King Arthur Flour recipe and tweaked it a ton. I printed out guides of fruitcake-making advice and incorporated that information, too.
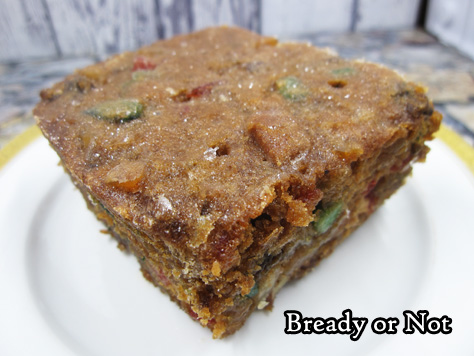
My dad doesn’t like fruitcakes that are heavy on nuts. Therefore, I place more emphasis on the fruit. Customize the kinds of fruits and nuts to your preference. I often use a combination of pre-made “fruitcake mixes” from the grocery store along with dried golden raisins, chopped apricots and dates, etc. Whatever I have in my cupboard or can grab on sale.

The same with the nuts. If you hate walnuts, don’t use walnuts. Include just one nut or use a wide variety, just make sure they are chopped up. You don’t want huge pieces.
The use of cocoa powder seems odd, but it’s there to add color. That’s a holdover from the original King Arthur Flour recipe. I was afraid that it would add a chocolate flavor, but it doesn’t at all. There are so many other complex flavors going on, it doesn’t stand out.
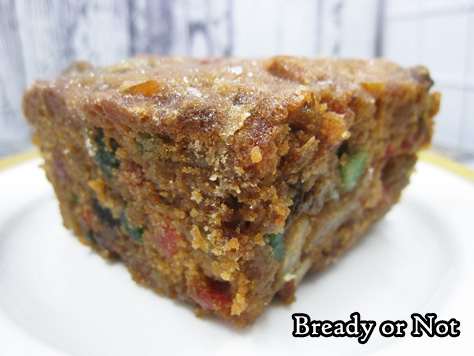
The liquid to macerate the fruit can be alcohol or standard fruit juice. My preference is to get some help from good old Captain Morgan. In the simple syrup, you can also omit the rum, if you so choose.
If you have any questions about this fruitcake recipe, feel free to comment on this page or reach out via social media. Just don’t wait too long–if you want these loaves ready for the holidays, you’ll need to bake them soon!
Bready or Not Original: Mini Fruitcake Loaves
Ingredients
Fruit:
- 1 lb + 4 ounces fruit 20 ounces total, dried and/or candied, including fruitcake mixes, raisins, chopped dates, cherries, apricots, crystallized ginger, etc
- 6 Tablespoons rum or brandy, apple juice, or cranberry juice
Batter:
- 1/2 cup unsalted butter 1 stick
- 1 cup brown sugar packed
- 1/2 teaspoon salt
- 1/2 teaspoon cinnamon
- 1/8 teaspoon allspice
- 1/8 teaspoon nutmeg
- 1/2 teaspoon baking powder
- 2 large eggs room temperature
- 1 1/2 cups all-purpose flour
- 1 Tablespoon cocoa optional, for color
- 2 Tablespoons corn syrup
- 1/4 cup apple juice or water
- 1 cup nuts chopped, one kind or a variety: almonds, pecans, walnuts, macadamia nuts, etc
Simple Syrup Glaze:
- 1 cup white sugar or caster; or for deeper flavor, turbinado
- 1/2 cup water
- 1/2 Tablespoon rum optional
Instructions
Prepare the fruit:
- Combine the fruit with the liquid of choice in a non-reactive bowl; cover and let rest overnight, at minimum.
Prepare simple syrup:
- Combine the sugar and water in a small saucepan. Heat until the sugar is dissolved. Stir in the liquor, if using. Cool completely. Keep stored in jar in fridge to brush the loaves over the coming weeks.
Make loaves:
- Preheat oven at 300-degrees. Place the butter and sugar in a large bowl and beat together, followed by the salt, spices, and baking powder.
- Beat in the eggs, scraping the bowl after each addition.
- In a separate bowl, whisk together the flour and cocoa.
- Add the flour mixture and the corn syrup to the butter mix. Scrape bowl well, then add the juice, the fruit with its liquid, and the nuts.
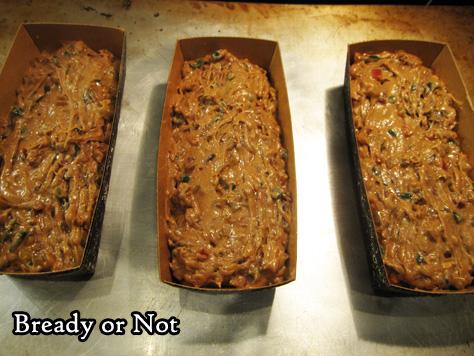
- Apply nonstick spray to the mini loaf pans; pan measurements vary, but this recipe should use 3 to 4 pans. Spoon batter into the pans, filling them about 3/4 full.
- Bake for about 1 hour to an 15 minutes. Cakes are done when a toothpick stuck in the middle comes out clean. If desired, poke the cakes throughout with a skewer to allow more liquid to seep in. Brush tops with simple syrup for the first time.
- Allow loaves to completely cool, then wrap them tightly in plastic wrap. Store in the fridge or in a cool, dark location.
After baking:
- Once a week for the next six weeks, unwrap loaves to brush with more simple syrup (making more in needed).
- After 6 weeks of ripening, the cakes can be eaten, stored in fridge longer, or frozen.
- OM NOM NOM!
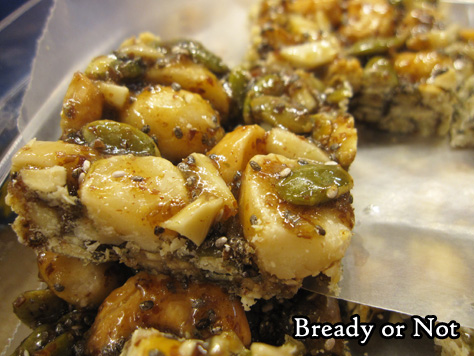
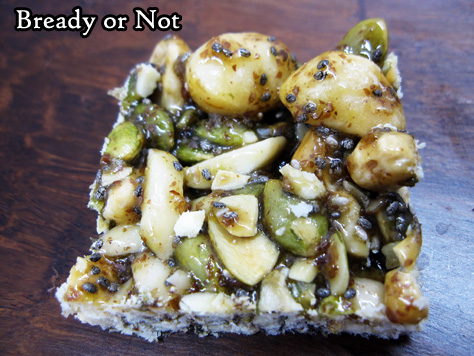
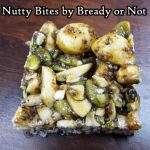
Bready or Not Original: Nutty Bites
I present to you my recipe for Nutty Bites. These are a fantastic snack or breakfast.
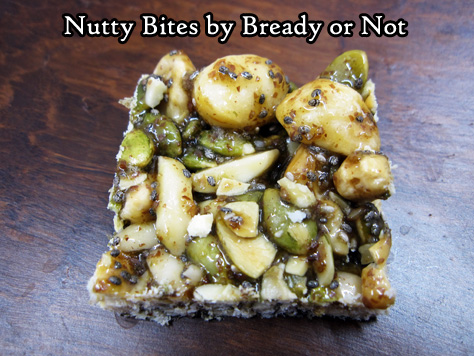
Plus, they are super-healthy, loaded with nuts and seeds, totally gluten-free, with honey as the sweetener and binding agent.
This is an easy recipe to customize, too. Keep the amounts of nuts and seeds the same, but switch in peanuts, hazelnuts, walnuts, wheat germ, sunflower kernels… whatever you like!
You can toast the nuts first, if you choose. I actually preferred it untoasted. Do note that some smaller add-ins like pepitas can burn quickly, and burned pepitas don’t taste that great. (Voice of experience here.)
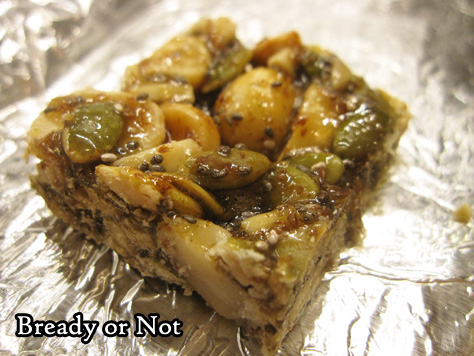
I can report that these keep well in the freezer for at least a month, too. Just make sure to have something like waxed paper between the layers–and even then, in a few spots with heavy honey, the bars might stick.
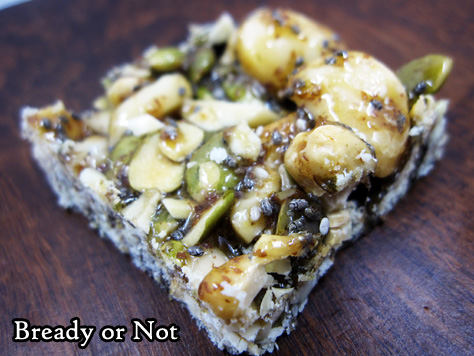
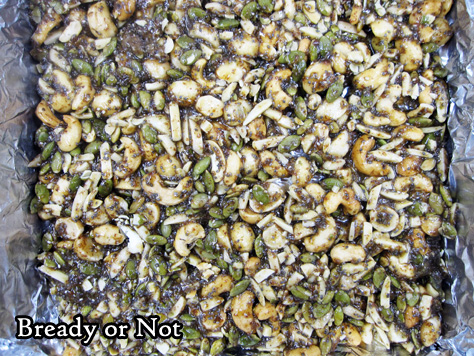
Oh, and did I mention that this is entirely made on stovetop? No need to heat up the house by turning on the oven! Whip out your candy thermometer and you’ll have Nutty Bites ready in no time flat.
Bready or Not Original: Nutty Bites
Ingredients
- 1/2 cup macadamia nuts
- 1/2 cup pecans
- 1/2 cup almonds
- 1/2 cup pepitas
- 1/4 cup chia seeds
- 1/4 cup ground flaxseed
- 3/4 cup honey
- 1/4 cup water
- sprinkle salt
Instructions
- Mix the nuts and seeds together in a large glass or metal bowl. Prepare an 8x8 pan with parchment paper or aluminum foil, and grease well.
- Heat the honey and water in a medium saucepan on medium-high. Use a candy thermometer to track the temperature as it rises to 275-degrees (soft crack stage). Stay close to the pan at all times! Once the honey starts boiling, it will bubble excessively, so keep stirring and use great caution.
- As soon as it reaches 275-degrees, pour the honey mix over the nuts and seeds. Stir to coat. It will harden quickly, so move fast! Pour everything into the ready pan and press out evenly.
- Let set out for an hour. Use a knife or bench knife to chop into squares. Store at room temperature in a sealed container between wax paper layers; they can also be frozen.
- OM NOM NOM!
