Bready or Not Original: Lemon Frangipane with Shortcrust Pastry
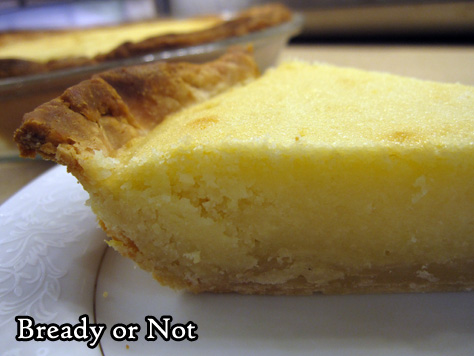
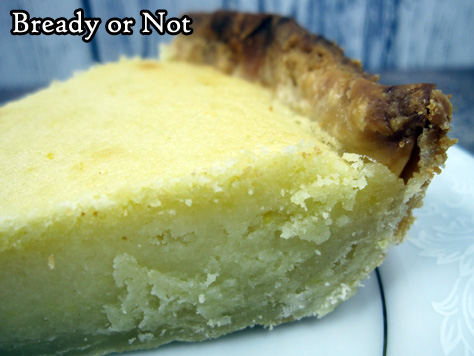
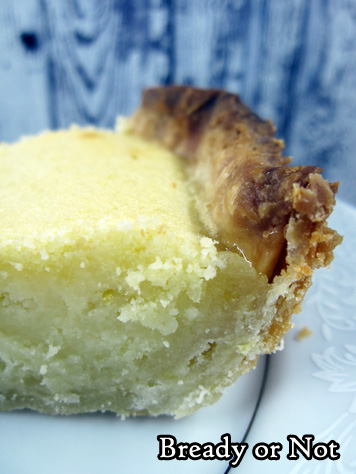
To finish off Lemon Month, I present a Lemon Frangipane along with a bonus recipe for Shortcrust Pastry.
What is frangipane? It’s a sweet filling made from almonds. It can be used in cookies, pastries, or–in this case–a shortcrust pie crust.
The nutty flavor of frangipane isn’t upfront in this recipe. This one is really all about lemony freshness, which happens to complement frangipane nicely.
The shortcrust recipe is a good, basic pie crust recipe, one that is doable even for beginning bakers. The dough can be made days or weeks in advance.
I first encountered frangipane on the Great British Bake Off. Since I associated it with fancy bakes, I was a bit intimidated about trying it myself, but this recipe makes it straightforward.
The end result is a lemony fresh frangipane with a crisp, delicious homemade crust. A crust that, thanks to being blind-baked first, should not have a soggy bottom.
Bready or Not Original : Sweet Shortcrust Pastry
Equipment
- food scale
- parchment paper
- pie weights
Ingredients
- 225 grams all-purpose flour
- 4 Tablespoons confectioners' sugar
- 150 grams cold butter cut into small cubes
- 1 large egg beaten
- 2 Tablespoons cold water plus more as needed
Instructions
- Mix flour and confectioners' sugar in a large bowl. Add pieces of butter and rub in with fingertips to break into smaller, flatter morsels. Make a well in the middle and add the beaten egg and one tablespoon of water. Use fingers to work in a bit before adding the second tablespoon.
- Work dough until it begins to lump together! Drizzle in tiny increments of additional water, if needed, to make it cohesive. The dough should be able to come together in a ball, not gluey.
- Wrap dough in plastic wrap and stash in fridge for at least 20 minutes--or for a few days, or freeze until ready to use.
- When ready to blind-bake crust, preheat oven at 375-degrees (180 C, Gas 5). Lightly grease pie plate.
- Lightly flour work surface. Use rolling pin to roll dough into proper size for your pan, at about 1/2 cm thickness. Gently set dough into dish and press into place. Make sure excessive amounts of dough don't stick out over the edge but do NOT trim exactly to edge yet.
- Cover the pastry surface with parchment paper. Use dried beans or other pie weights to completely fill plate. If using a 9-inch pie plate, bake for 20 to 25 minutes, until crust takes on a light golden color; for a smaller plate, reduce time and monitor color.
- Use parchment to lift out pie weights. Use a knife to trim excess dough from edge to form a nice, neat line. Follow filling recipe from here on and bake again as necessary.
OM NOM NOM!
Bready or Not Original: Lemon Frangipane with Shortcrust Pastry
Equipment
- 9-inch shallow pie/quiche plate
Ingredients
- 1 shortcrust pastry crust already partially baked
- 2 Tablespoons lemon curd
- 1/2 cup unsalted butter 1 stick, room temperature
- 1/2 cup white sugar
- 2 eggs room temperature
- 1 1/3 cup ground almonds sifted
- 2 1/2 Tablespoons all-purpose flour or substitute with extra ground almonds
- 1 lemon zested and juiced
- 1 Tablespoon lemon juice
- 4 Tablespoons milk or half & half
Instructions
- Preheat oven at 375-degrees (190C, Gas 5).
- Warm the lemon curd in the microwave for only 5-10 seconds, long enough to make it looser and more spreadable. Brush all over the bottom of the crust.
- In a large bowl, cream together butter and sugar until light and fluffy. Beat in eggs, one at a time. Add almond flour, flour, and lemon zest. Follow up with a tablespoon of lemon juice and the milk. Mix until just cohesive.
- Pour filling into crust. Bake for 25 minutes, or until it passes the toothpick test in center. If parts of the filling uplift in crazy ways, worry not--it should even out as it cools.
- Cool pan for an hour at room temperature for an hour to set. Cut into it then, or chill in fridge to enjoy later. Keep stored in fridge with foil covering.
OM NOM NOM!
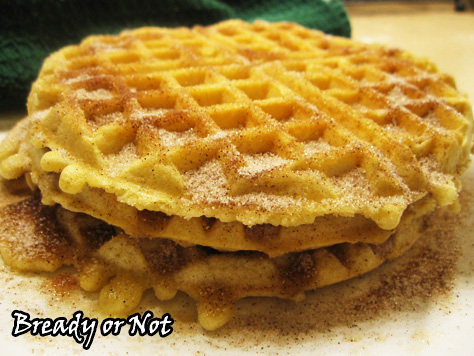
Bready or Not Classic: Churro Waffles
I prepared two classic recipes to repost while I was on vacation this summer. That isn’t happening now. Therefore, I’m sharing them earlier with the hope that my fellow #stressbakers can enjoy them. Eat well and stay safe out there!
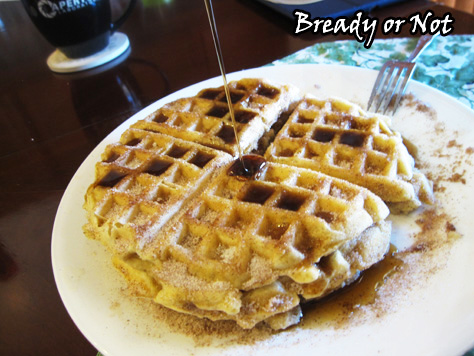
Churro Waffles. For real.
This reprinted Holy Taco Church recipe produces waffles that are sweet, fluffy, decadent, and not the slightest bit healthy. CHURRO WAFFLES, people. These are hardcore churro.
This recipe is amazingly easy. As typed up below, it makes three big waffles in your waffle iron. Double or triple to feed a crowd or stash extras to freeze. You won’t need extra pats of butter on top, and you’ll probably need just a minimal amount of maple syrup, dulce de leche, or chocolate sauce. Heck, even dip these in something like Nutella.
Be crazy. Be churro-y. Dip your whole day in cinnamon and sugar.
Bready or Not: Churro Waffles
Ingredients
- 1 cup all-purpose flour
- 1/2 teaspoon salt
- 2 teaspoons baking powder
- 1 Tablespoon white sugar
- 2 shakes cinnamon
- 1 egg
- 3/4 cup milk or almond milk
- 3 Tb unsalted butter melted
- 1/2 teaspoon vanilla extract
Topping:
- 1/2 cup white sugar
- 1 Tb cinnamon
- 1/4 cup melted butter
Instructions
- In a large bowl, mix together flour, salt, baking powder, sugar, and cinnamon. Melt the 3 tablespoons of butter so they can cool a few minutes. Preheat waffle iron.
- In a separate bowl, beat the egg with the milk, melted butter and vanilla extract. Pour the milk mix into the dry ingredients until just combined.
- Apply non-stick spray to the waffle maker. Use a 1/2 cup to add batter to the iron and close the lid. While the waffle cooks, melt the butter for the topping and in a separate bowl combine the cinnamon and sugar.
- Remove the waffle from the iron. Brush butter all over a side, then sift or spoon the cinnamon and sugar over it. Flip over waffle and repeat. Add more batter to the waffle iron and repeat the process.
- OM NOM NOM!
Bready or Not Original: Cream Cheese-Stuffed Lemon Bundt Cake [cake mix]
This is a simple-yet-fancy recipe that uses 1) cake mix, 2) a bundt pan, and 3) ends up tasting like a giant lemon Twinkie. YUM.
This is one of those cakes that looks like it requires tons of works, but it really doesn’t. Because of the addition of fresh lemon and lemon curd, the chemical taste of cake mix is completely masked, too.
The filling is an easy step, too. I hate piping, but it was not prob here. I used a gallon Ziploc, snipped off the corner, ta-da!
This cake would be great for breakfast, brunch, snack, or dessert. Whenever, really.
Make this when you have numerous people to share with. It’s just so, so tempting and delicious. Like Twinkies. BUT BETTER.
This recipe is over halfway through my April of lemon recipes!
Lemon Sour Cream Bundt Cake
Glazed Lemon Ginger Bars
Cranberry Lemon Biscotti
Cream Cheese Stuffed Lemon Bundt Cake [today]
Lemon Frangipane
Bready or Not Original: Cream Cheese-Stuffed Lemon Bundt Cake
Equipment
- large bundt pan
Ingredients
Filling
- 8 ounce cream cheese 1 box, softened
- 1/4 cup white sugar
- 1 large lemon zested and juiced
Cake
- 1/4 cup unsalted butter softened
- 3 eggs room temperature
- 1 box yellow cake mix
- 3/4 cup lemon curd
Glaze
- 1 cup confectioners' sugar
- 1 Tablespoon lemon juice
- 1 Tablespoon lemon curd
Instructions
Make the filling
- In a small bowl, mash together the cream cheese, white sugar, lemon zest and 1 Tablespoon of lemon juice; reserve the remaining juice for the glaze. Once the filling is combined, spoon it into a piping bag with large tip or a gallon Ziploc bag with the corner cut off.
Make the cake
- Preheat oven at 350-degrees. Apply nonstick spray to a large bundt pan.
- In a big bowl, cream together the butter and eggs. Add the cake mix, scraping bottom of bowl as needed. Add the lemon curd, beating until mix turns fluffy.
- Spoon about half the cake mix into the prepared pan. Pipe the filling in a circle around the top of the batter. Try to keep the filling from touching the sides. Add the rest of the batter on top and smooth it out.
- Bake for 40 to 45 minutes, until the middle passes the toothpick test.
- Cool on a wire rack about 20 minutes, then invert the cake onto a wire rack to completely cool.
Make the glaze
- Whisk together the confectioners' sugar, 1 Tablespoon lemon juice, and 1 Tablespoon lemon curd to form a thick yet oozy glaze. If necessary, add more juice or water to thin, or more confectioners' sugar to thicken. Drizzle atop cake.
- Store under a cake dome or plastic wrap in fridge.
OM NOM NOM!
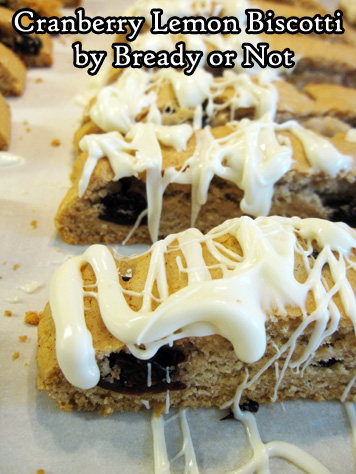
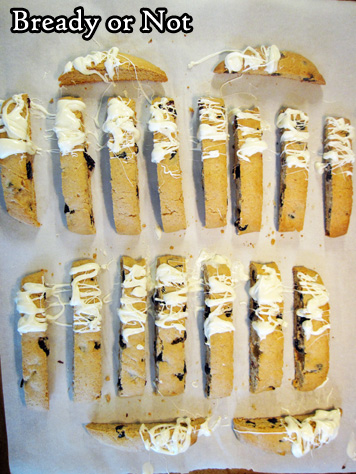
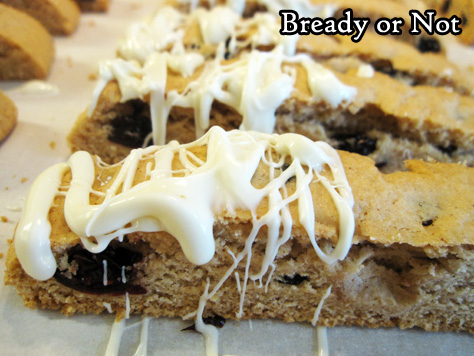
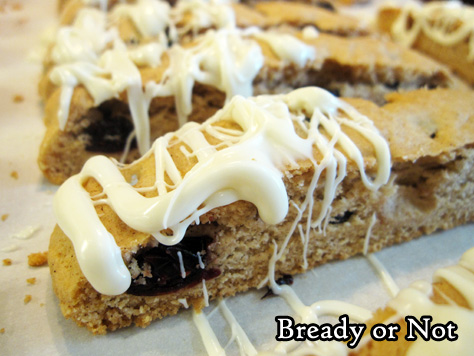
Bready or Not Original: Cranberry Lemon Biscotti
This lemon-themed month needs some breakfast food. How about some Cranberry Lemon Biscotti?
The lemon here isn’t hardcore. Zest throughout the dough adds freshness, and the dried cranberries are soaked in the juice to rehydrate. This gives the cranberries an especially pleasant zing.
For years, I was intimidated by biscotti, but now I enjoy coming up with a couple new recipes a year. Really, the trickiest thing about this is how sticky the dough is when it’s time to shape it.
I like the addition of white chocolate drizzle to add a touch more sweetness, but that’s optional.
The end result is a biscotti with a bright, sunny flavor that complements plump, tart cranberries, all in crispy, bready form that’s especially good dunked in coffee or tea!
This recipe is midway through my April of lemon recipes!
Lemon Sour Cream Bundt Cake
Glazed Lemon Ginger Bars
Cranberry Lemon Biscotti [today]
Cream Cheese Stuffed Lemon Bundt Cake
Lemon Frangipane
Bready or Not Original: Cranberry Lemon Biscotti
Ingredients
- 1 lemon
- 3/4 cup dried cranberries
- 2 cups all-purpose flour
- 1 1/4 teaspoon baking powder
- 1 teaspoon ground cinnamon
- 1/4 teaspoon salt
- 2 eggs
- 3/4 cup white sugar
- 1/3 cup vegetable oil
- 1 teaspoon vanilla extract
- 1 teaspoon lemon extract
- 4 ounces white chocolate optional, to drizzle on top
Instructions
- Preheat oven at 350-degrees. Zest and juice lemon. Set aside zest, and soak cranberries in juice.
- Line a large baking sheet with parchment paper.
- In a medium bowl, mix together flour, baking powder, cinnamon, and salt. Set aside.
- In a large bowl, beat eggs with white sugar. Add oil, vanilla extract, lemon extract, and zest. Gradually mix in the dry ingredients.
- Drain lemon juice out of cranberries; discard juice. Fold cranberries into dough to equally distribute.
- Divide dough in half. Place each piece spaced out on parchment. Dough will be very sticky, so shape with plastic spatula or greased or floured hands into 1-inch high flat rectangular logs.
- Bake for 20 minutes. Remove from oven and let set for 5 minutes. Use a long bread knife and slice down--don't saw--into long, even cookies. Space out cookies upright, if possible, or lay on sides.
- Bake for another 20 to 25 minutes; if cookies are laying on sides, flip them to other side halfway through. Biscotti should be golden and somewhat crisp.
- Let biscotti sit out for anywhere from 30 minutes to several hours so that they can cool off and dry out even more.
- If adding white chocolate on top, melt chocolate in microwave or on stovetop (keep in mind, white chocolate can burn fast!). Use a fork to drizzle chocolate, or dip an end of each biscotti into the chocolate. Let set again for an hour or so, then pack into sealed bags or plastic containers.
- Biscotti can keep in sealed containers for as long as a month.
OM NOM NOM!
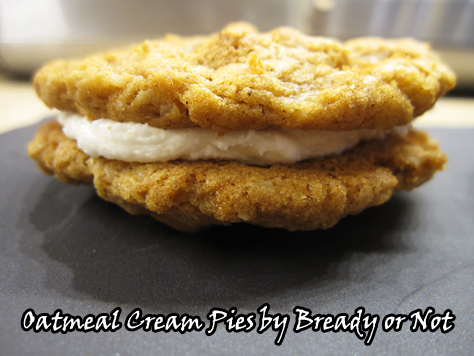
Bready or Not Classic: Oatmeal Cream Pies
I prepared two classic recipes to repost while I was on vacation this summer. That isn’t happening now. Therefore, I’m sharing them earlier with the hope that my fellow #stressbakers can enjoy them. Eat well and stay safe out there!
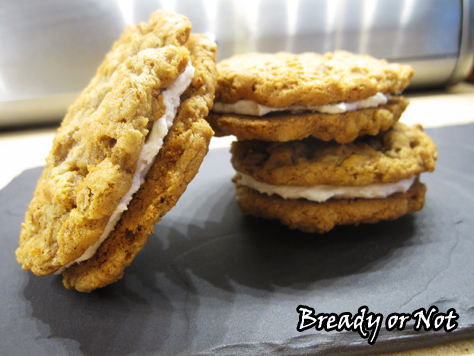
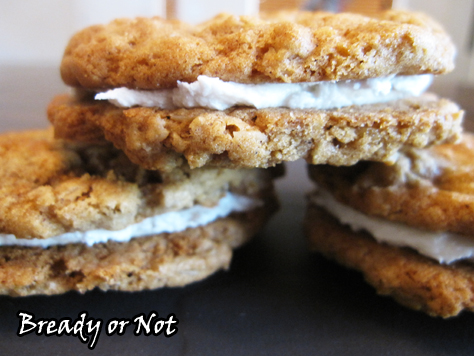
Today I present something seriously delicious: Oatmeal Cream Pies, aka Sandwich Cookies.
These things are about the size of a sandwich, too, and about as filling because of the chewy oatmeal cookies. You have two tablespoons worth of dough with a teaspoon of marshmallow cream between them. So yeah.
I don’t think I’d make smaller cookies, though, for sheer reasons of space and time. The recipe makes over four dozen cookies, which makes for over two dozen sandwich cookies. This is a recipe to make for a lot of hungry adults or kids!
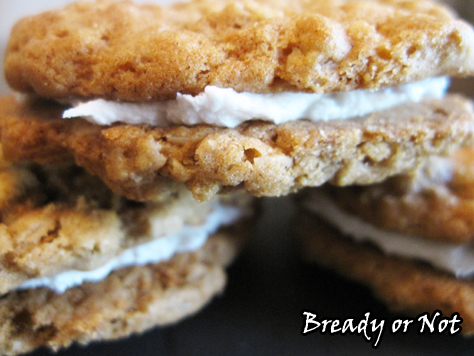
If you love commercial-made cream pies like the ones from Little Debbie, these homemade ones will blow your mind. They have that same taste and texture, but with some extra chewy freshness.
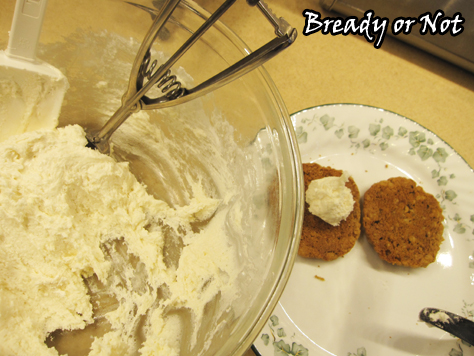
I highly advise that you use tablespoon and teaspoon scoops for this recipe, too. It helps a lot if the cookies are of uniform size and that the amount of filling is equally distributed.
Modified from Taste of Home.
Bready or Not: Oatmeal Cream Pies
Ingredients
Cookies:
- 1 1/2 cups shortening
- 2 2/3 cups brown sugar packed
- 4 large eggs
- 2 teaspoons vanilla extract
- 2 1/4 cups all-purpose flour
- 2 teaspoons ground cinnamon
- 1 1/2 teaspoons baking soda
- 1 teaspoon salt
- 1/2 teaspoon ground nutmeg
- 4 cups old-fashioned rolled oats
Filling:
- 3/4 cup shortening
- 3 cups confectioners' sugar sifted
- 7 oz marshmallow creme 1 jar
- 1 - 3 Tablespoons milk or half & half
Instructions
- Preheat the oven at 350-degrees. In a large bowl, cream together the shortening and brown sugar until they are light and fluffy. Beat in eggs, one at a time, followed by the vanilla extract.
- In another bowl, combine the flour, cinnamon, baking soda, salt and nutmeg; gradually add this dry mix to the creamed mix. Stir in oats. If you're using a stand mixer, you'll probably need to stir the last of the oats in by hand. This is a lot of dough!
- Use a tablespoon scoop to dole out the dough onto a cookie sheet, keeping two inches between each spoonful. These will spread.
- Bake for 10 to 12 minutes; they brown very fast, so keep an eye on them at the end. Remove them when they are turning golden brown. Let sit on cookie sheet for 10 minutes before transitioning them to a rack to cool.
- To make the filling, start by sifting the confectioners' sugar into a large bowl. Add the shortening and marshmallow crème. Add a tablespoon of milk and gradually add more as needed to get it to spreadable consistency. Use a heaping teaspoon to dollop filling onto the base of a cookie. Spread it with a knife, top with another cookie, and press together to get cream to the edges.
- End result: about 30 large sandwich cookies.
- OM NOM NOM!
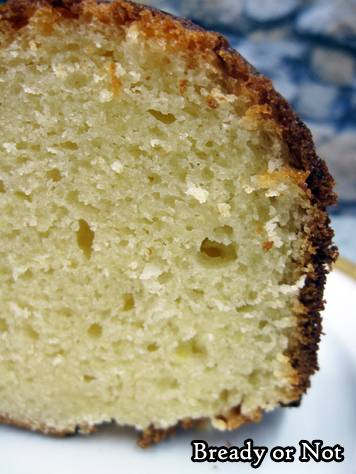
Bready or Not Original: Lemon Sour Cream Bundt Cake
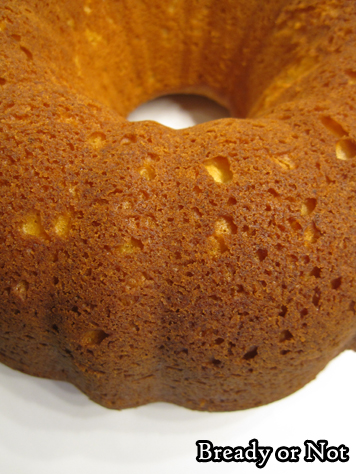
No foolin’. This Lemon Sour Cream Bundt Cake is simple and delicious.
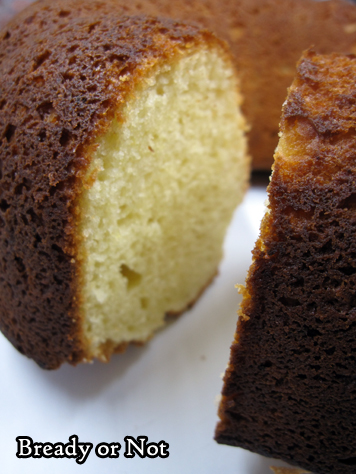
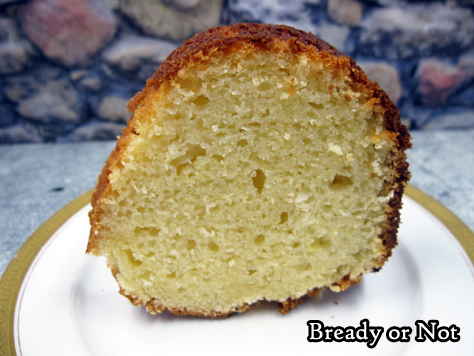
This isn’t a hardcore sweet dessert. I found it similar to a mild lemony shortcake, something good on its own and over-the-top amazing with the addition of fresh fruit and whipped cream.
I didn’t even bother with a glaze. Doesn’t need it. That makes this an especially friendly recipe to slice and freeze for later enjoyment.
I know some people worry about the taste of sour cream in cakes. Don’t. Sour cream (or substitute with vanilla or plain Greek yogurt) adds moisture, creating a soft, tender crumb.
This recipe kicks off an entire month of lemon recipes! Look forward to these delectable treats in the coming weeks:
Glazed Lemon Ginger Bars
Cranberry Lemon Biscotti
Cream Cheese Stuffed Lemon Bundt Cake
Lemon Frangipane
Bready or Not Original: Lemon Sour Cream Bundt Cake
Equipment
- large bundt cake pan
Ingredients
- 3 cups all-purpose flour
- 2 teaspoons baking powder
- 1/2 teaspoons baking soda
- 1/4 teaspoons salt
- 1 cup unsalted butter 2 sticks softened
- 1 1/2 cups white sugar
- 1/2 cup lemon juice
- 4 eggs
- 1 cup sour cream 8 ounces
Instructions
- Preheat oven at 350-degrees. Grease a bundt pan and set aside.
- In a medium bowl, combine the flour, baking powder, baking soda, and salt together.
- In a large bowl, cream together the butter and sugar. Add the lemon juice, then mix in the eggs one at a time. Stir in half the flour mix. Add the sour cream, then follow up with the rest of the dry ingredients. Pour into prepared pan.
- Bake for 55 to 60 minutes, until it passes the toothpick test. Cool for twenty minutes in the pan, then invert onto a wire rack to completely cool.
- Store covered at room temperature.






![Bready or Not Original: Cream Cheese-Stuffed Lemon Bundt Cake [cake mix]](https://www.bethcato.com/blog/wp-content/uploads/2020/01/Cream-Cheese-Stuffed-Lemon-Bundt-Cake13_sm.jpg)
![Bready or Not Original: Cream Cheese-Stuffed Lemon Bundt Cake [cake mix]](https://www.bethcato.com/blog/wp-content/uploads/2020/01/Cream-Cheese-Stuffed-Lemon-Bundt-Cake8_sm.jpg)
![Bready or Not Original: Cream Cheese-Stuffed Lemon Bundt Cake [cake mix]](https://www.bethcato.com/blog/wp-content/uploads/2020/01/Cream-Cheese-Stuffed-Lemon-Bundt-Cake16_sm.jpg)
![Bready or Not Original: Cream Cheese-Stuffed Lemon Bundt Cake [cake mix]](https://www.bethcato.com/blog/wp-content/uploads/2020/01/Cream-Cheese-Stuffed-Lemon-Bundt-Cake14_sm.jpg)
![Bready or Not Original: Cream Cheese-Stuffed Lemon Bundt Cake [cake mix]](https://www.bethcato.com/blog/wp-content/uploads/2020/01/Cream-Cheese-Stuffed-Lemon-Bundt-Cake12_sm.jpg)
![Bready or Not Original: Cream Cheese-Stuffed Lemon Bundt Cake [cake mix]](https://www.bethcato.com/blog/wp-content/uploads/2020/01/Cream-Cheese-Stuffed-Lemon-Bundt-Cake10_sm.jpg)
