


Bready or Not Original: Blueberry Crumble Bars
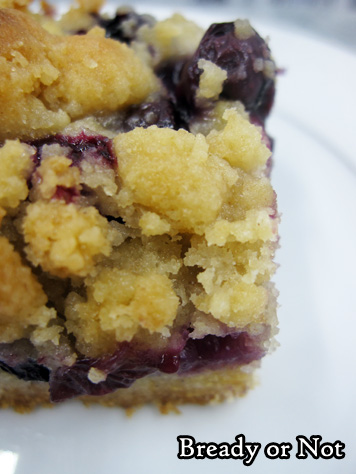
Nothing says summer to me quite like blueberry bars, and this version has a delectable crumb topping and loads of blueberries!
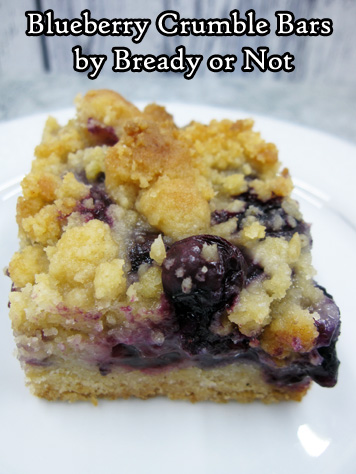
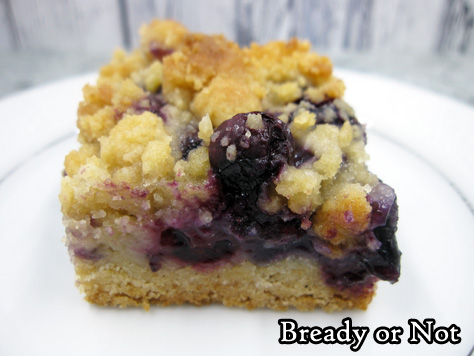
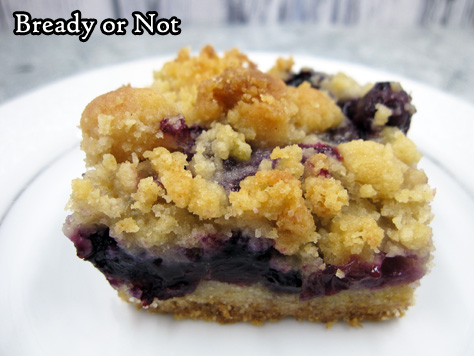
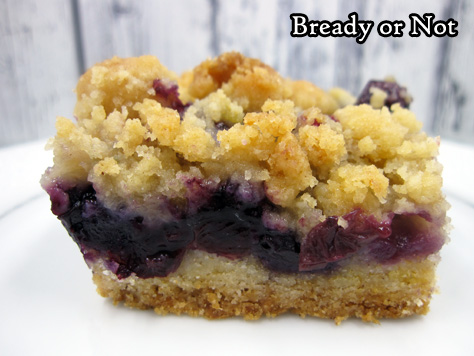
This is really the best kind of fruit and shortbread combo. The bottom and top acquire a buttery crispness as they bake, the perfect contrast for the oozy, sweet berries.

I am frustrated when recipes only list blueberries by cup measurement, which is useless when I’m in the grocery store trying to figure out how much to buy in pints or ounces. I can say that 4 cups or 20 ounces is what you need for this recipe.
Be careful at the final stage when it’s time to slice into bars. The blueberries can stick to the foil quite a bit. Therefore, be sure to generously grease the pan prior to baking, and gently pry the foil away when ready to slice.
The recipe makes a full 9×13 pan, so be sure you have a lot of people present to eat them. These would be very dangerous treats to keep around when home alone, just sayin’.
Bready or Not Original: Blueberry Crumble Bars
Ingredients
- 3 cups all-purpose flour
- 1 cup white sugar divided
- 1/2 cup brown sugar packed
- 1 teaspoon baking powder
- 1/4 teaspoon salt
- pinch ground cinnamon
- 1 cup unsalted butter 2 sticks, room temperature
- 1 egg
- 3 teaspoons cornstarch
- 4 cups fresh blueberries 20 ounces
Instructions
- Preheat oven at 375-degrees. Line a 9x13 pan with foil and apply nonstick spray. Wash the blueberries and remove any stems or smashed berries, then gently blot dry with a towel.
- In a big bowl, mix together the flour, 1/2 cup white sugar, the brown sugar, and baking powder. Add the salt and cinnamon. Add the butter and mix until it forms crumbly dough.
- Pat about 2/3 of the dough into the prepared pan. A piece of waxed paper and a heavy glass will help compress it into an even layer.
- In another bowl, stir together the remaining 1/2 cup white sugar and cornstarch. Gently stir the blueberries to coat. Sprinkle the blueberries over the bottom crust, then crumble the remaining dough evenly over the top.
- Bake for 45 minutes, but check at the 30 minute point. If it's looking golden on top, cover it with foil then continue to bake.
- Cool at room temperature, then chill in fridge to make it even more cohesive to cut. Use the foil to lift the contents onto a cutting board. Carefully peel back the foil from the edges; a knife might help to hold the bars in place if the blueberry layer is being especially sticky.
- Slice into bars. Store in a sealed container in the fridge, with waxed paper between the stacked layers.
OM NOM NOM!
Bready or Not Original: White Chocolate Macadamia Nut Granola Bars [Gluten Free]
These delicious White Chocolate Macadamia Nut Granola Bars are perfect for breakfasts and snacks–and they are packed with protein and gluten-free, too!
![Bready or Not Original: White Chocolate Macadamia Nut Granola Bars [Gluten Free]](https://www.bethcato.com/blog/wp-content/uploads/2020/02/Wh-Choc-Mac-Nut-Granola-Breakfast-Bars-GF8_sm.jpg)
I love making no-bake batch breakfast recipes in the summer. No need to turn on the oven and heat up my kitchen! Or to fuss with making something every day!
![Bready or Not Original: White Chocolate Macadamia Nut Granola Bars [Gluten Free]](https://www.bethcato.com/blog/wp-content/uploads/2020/02/Wh-Choc-Mac-Nut-Granola-Breakfast-Bars-GF3_sm.jpg)
This recipe is even better because it is SO GOOD. I made it numerous times to experiment with ingredients and amounts. I prefer it with cashew butter and almond flour as it gives it a very cookie dough taste, but use what you have.
![Bready or Not Original: White Chocolate Macadamia Nut Granola Bars [Gluten Free]](https://www.bethcato.com/blog/wp-content/uploads/2020/02/Wh-Choc-Mac-Nut-Granola-Breakfast-Bars-GF7_sm.jpg)
To make this gluten-free, be sure to use GF quick oats from a place like Bob’s Red Mill. Also, DON’T use old fashioned/rolled oats. They are too dense. The time I tried that kind, I had to add a lot more nut butter and honey to make the mixture stick together.
![Bready or Not Original: White Chocolate Macadamia Nut Granola Bars [Gluten Free]](https://www.bethcato.com/blog/wp-content/uploads/2020/02/Wh-Choc-Mac-Nut-Granola-Breakfast-Bars-GF10_sm.jpg)
Make these on the weekend and your breakfasts are ready for the week! Just grab a bar from the fridge, eat, and enjoy!
![Bready or Not Original: White Chocolate Macadamia Nut Granola Bars [Gluten Free]](https://www.bethcato.com/blog/wp-content/uploads/2020/02/Wh-Choc-Mac-Nut-Granola-Breakfast-Bars-GF6_sm.jpg)
Bready or Not Original: White Chocolate Macadamia Nut Granola Bars [Gluten Free]
Ingredients
- 2 cups quick oats
- 1 cup almond flour or oat flour
- 1/4 cup macadamia nuts chopped
- 1 cup cashew butter or almond butter
- 1/2 cup honey
- 1/2 teaspoon salt
- 1 teaspoon vanilla extract
- 1/4 cup white chocolate chips
Instructions
- Line a 9x9 or 8x8 square pan with foil and apply nonstick spray. Set aside.
- In a bowl, measure out the quick oats, almond flour, and macadamia nuts. Also set aside.
- Place the cashew butter, honey, and salt in a large pot on the stove. Bring the temperature to medium, stirring everything until it is melted and combined. Remove from heat and stir in the vanilla extract.
- Pour the dry ingredients into the wet and stir until fully incorporated. Dump the mix into the prepared pan. Use a piece of waxed paper and a heavy glass to compress the contents into an even layer. Sprinkle white chocolate chips across the top and quickly press in by hand, as they will soften fast on the warm dough.
- Set pan in fridge to chill for at least 30 minutes.
- Use foil to lift square onto a cutting board. Slice into desired sizes. They keep in the fridge, in a sealed container, for as long as a week, and as long as a month in the freezer. If stacking, place wax paper between the layers.
OM NOM NOM!
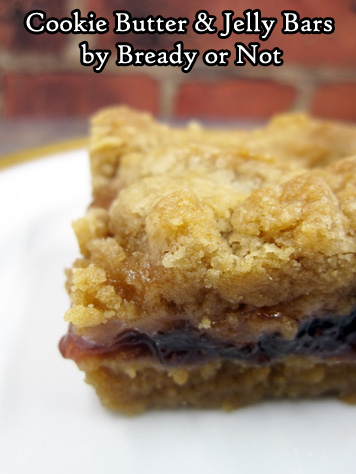
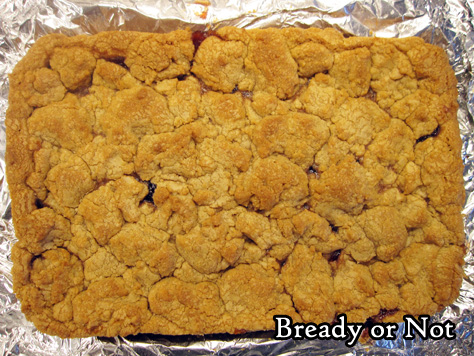
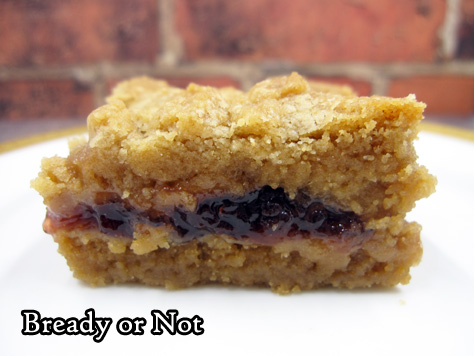
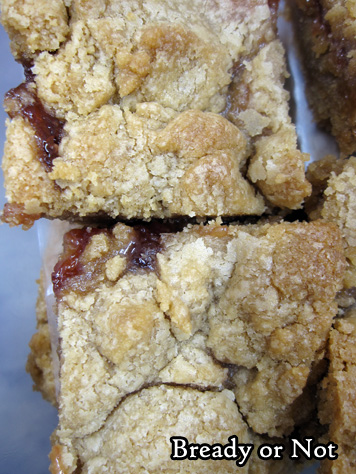
Bready or Not Original: Cookie Butter and Jelly Bars
Cookie butter and Jelly Bars! These things are soft and chewy, creating a whole casserole dish-worth of luscious goodies.
As often as I’ve advocated for cookie butter on Bready or Not, it seems people are always discovering it for the first time. Lucky you! It’s essentially pulverized cookies in spreadable form.
You can find generic versions or Biscoff brand at places like Walmart, Target, and Sprouts, and Trader Joe’s is famous for their Speculoos jars.
In these bars, cookie butter adds incredible softness and amps up the cookie flavor. That’s right, it has this weird ability to make cookies taste more like cookies.

Use whatever jelly or jam or preserves you want. Try not to spread it to the very edge, as it can be very sticky on the foil, even if it’s well-greased.
Bready or Not Original: Cookie Butter and Jelly Bars
Ingredients
- 1 cup unsalted butter 2 sticks, room temperature
- 1 1/2 cups white sugar
- 1 teaspoon vanilla extract
- 2 large eggs
- 2 cups creamy cookie butter
- 3 cups all-purpose flour
- 1 teaspoon baking powder
- 13 ounce jelly or preserves or jam, about 1 1/2 cups
Instructions
- Preheat oven at 350-degrees. Line a 13x9 baking pan with foil and apply nonstick spray or butter.
- In a big bowl, cream together butter and sugar until light and fluffy, scraping bottom of bowl as necessary. Follow up with the eggs, vanilla, and cookie butter, until blended.
- Gradually mix in the flour and baking powder.
- Spread about 2/3 of the batter in the prepared pan. Spread the jelly but not quite to the edges. Dollop the remaining dough all over the top.
- Bake for 25 to 30 minutes, until the surface is golden and not jiggly, with the middle passing the toothpick test.
- Cool completely at room temperature or in the fridge. Use foil to lift contents onto a cutting board to parcel into bars. Store in a sealed container with waxed paper or parchment paper between the layers, either in the fridge or on the counter.
OM NOM NOM!
Bready or Not Original: Lemon Frangipane with Shortcrust Pastry
To finish off Lemon Month, I present a Lemon Frangipane along with a bonus recipe for Shortcrust Pastry.
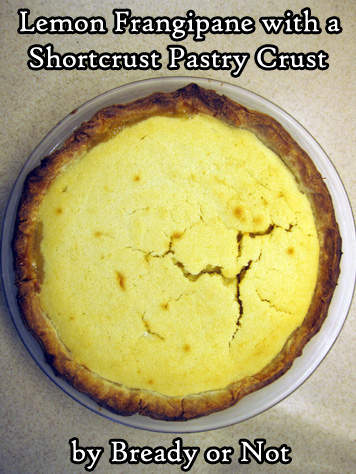
What is frangipane? It’s a sweet filling made from almonds. It can be used in cookies, pastries, or–in this case–a shortcrust pie crust.
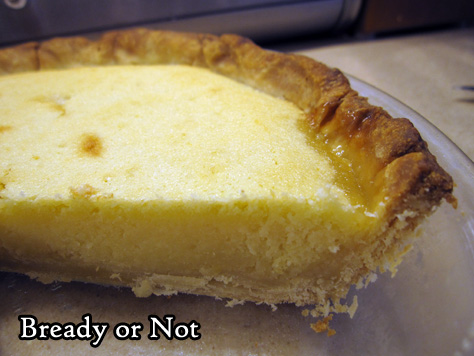
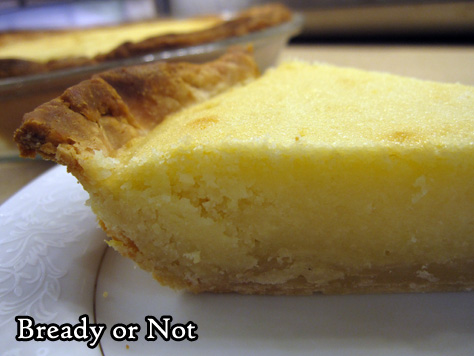
The nutty flavor of frangipane isn’t upfront in this recipe. This one is really all about lemony freshness, which happens to complement frangipane nicely.
The shortcrust recipe is a good, basic pie crust recipe, one that is doable even for beginning bakers. The dough can be made days or weeks in advance.

I first encountered frangipane on the Great British Bake Off. Since I associated it with fancy bakes, I was a bit intimidated about trying it myself, but this recipe makes it straightforward.
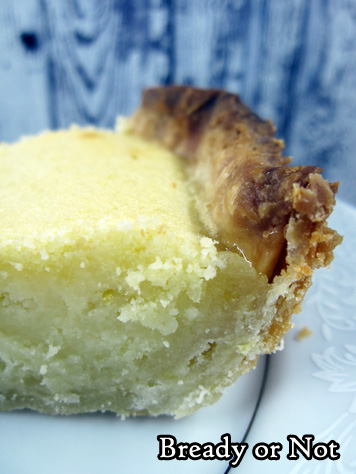
The end result is a lemony fresh frangipane with a crisp, delicious homemade crust. A crust that, thanks to being blind-baked first, should not have a soggy bottom.
Bready or Not Original : Sweet Shortcrust Pastry
Equipment
- food scale
- parchment paper
- pie weights
Ingredients
- 225 grams all-purpose flour
- 4 Tablespoons confectioners' sugar
- 150 grams cold butter cut into small cubes
- 1 large egg beaten
- 2 Tablespoons cold water plus more as needed
Instructions
- Mix flour and confectioners' sugar in a large bowl. Add pieces of butter and rub in with fingertips to break into smaller, flatter morsels. Make a well in the middle and add the beaten egg and one tablespoon of water. Use fingers to work in a bit before adding the second tablespoon.
- Work dough until it begins to lump together! Drizzle in tiny increments of additional water, if needed, to make it cohesive. The dough should be able to come together in a ball, not gluey.
- Wrap dough in plastic wrap and stash in fridge for at least 20 minutes--or for a few days, or freeze until ready to use.
- When ready to blind-bake crust, preheat oven at 375-degrees (180 C, Gas 5). Lightly grease pie plate.
- Lightly flour work surface. Use rolling pin to roll dough into proper size for your pan, at about 1/2 cm thickness. Gently set dough into dish and press into place. Make sure excessive amounts of dough don't stick out over the edge but do NOT trim exactly to edge yet.
- Cover the pastry surface with parchment paper. Use dried beans or other pie weights to completely fill plate. If using a 9-inch pie plate, bake for 20 to 25 minutes, until crust takes on a light golden color; for a smaller plate, reduce time and monitor color.
- Use parchment to lift out pie weights. Use a knife to trim excess dough from edge to form a nice, neat line. Follow filling recipe from here on and bake again as necessary.
OM NOM NOM!
Bready or Not Original: Lemon Frangipane with Shortcrust Pastry
Equipment
- 9-inch shallow pie/quiche plate
Ingredients
- 1 shortcrust pastry crust already partially baked
- 2 Tablespoons lemon curd
- 1/2 cup unsalted butter 1 stick, room temperature
- 1/2 cup white sugar
- 2 eggs room temperature
- 1 1/3 cup ground almonds sifted
- 2 1/2 Tablespoons all-purpose flour or substitute with extra ground almonds
- 1 lemon zested and juiced
- 1 Tablespoon lemon juice
- 4 Tablespoons milk or half & half
Instructions
- Preheat oven at 375-degrees (190C, Gas 5).
- Warm the lemon curd in the microwave for only 5-10 seconds, long enough to make it looser and more spreadable. Brush all over the bottom of the crust.
- In a large bowl, cream together butter and sugar until light and fluffy. Beat in eggs, one at a time. Add almond flour, flour, and lemon zest. Follow up with a tablespoon of lemon juice and the milk. Mix until just cohesive.
- Pour filling into crust. Bake for 25 minutes, or until it passes the toothpick test in center. If parts of the filling uplift in crazy ways, worry not--it should even out as it cools.
- Cool pan for an hour at room temperature for an hour to set. Cut into it then, or chill in fridge to enjoy later. Keep stored in fridge with foil covering.
OM NOM NOM!
Bready or Not Classic: Churro Waffles
I prepared two classic recipes to repost while I was on vacation this summer. That isn’t happening now. Therefore, I’m sharing them earlier with the hope that my fellow #stressbakers can enjoy them. Eat well and stay safe out there!
Churro Waffles. For real.
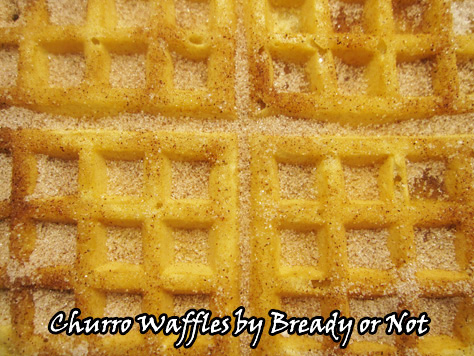
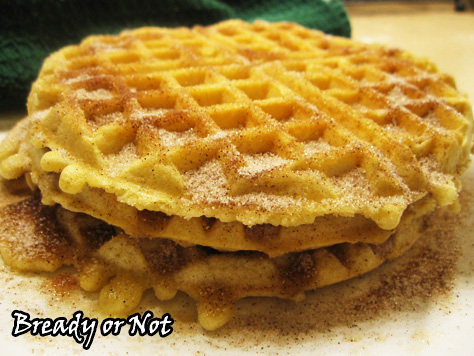
This reprinted Holy Taco Church recipe produces waffles that are sweet, fluffy, decadent, and not the slightest bit healthy. CHURRO WAFFLES, people. These are hardcore churro.

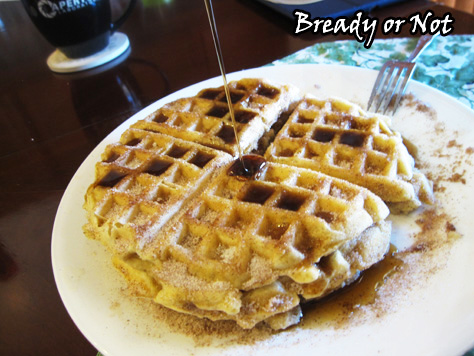
This recipe is amazingly easy. As typed up below, it makes three big waffles in your waffle iron. Double or triple to feed a crowd or stash extras to freeze. You won’t need extra pats of butter on top, and you’ll probably need just a minimal amount of maple syrup, dulce de leche, or chocolate sauce. Heck, even dip these in something like Nutella.
Be crazy. Be churro-y. Dip your whole day in cinnamon and sugar.
Bready or Not: Churro Waffles
Ingredients
- 1 cup all-purpose flour
- 1/2 teaspoon salt
- 2 teaspoons baking powder
- 1 Tablespoon white sugar
- 2 shakes cinnamon
- 1 egg
- 3/4 cup milk or almond milk
- 3 Tb unsalted butter melted
- 1/2 teaspoon vanilla extract
Topping:
- 1/2 cup white sugar
- 1 Tb cinnamon
- 1/4 cup melted butter
Instructions
- In a large bowl, mix together flour, salt, baking powder, sugar, and cinnamon. Melt the 3 tablespoons of butter so they can cool a few minutes. Preheat waffle iron.
- In a separate bowl, beat the egg with the milk, melted butter and vanilla extract. Pour the milk mix into the dry ingredients until just combined.
- Apply non-stick spray to the waffle maker. Use a 1/2 cup to add batter to the iron and close the lid. While the waffle cooks, melt the butter for the topping and in a separate bowl combine the cinnamon and sugar.
- Remove the waffle from the iron. Brush butter all over a side, then sift or spoon the cinnamon and sugar over it. Flip over waffle and repeat. Add more batter to the waffle iron and repeat the process.
- OM NOM NOM!
Bready or Not Original: Cream Cheese-Stuffed Lemon Bundt Cake [cake mix]
This is a simple-yet-fancy recipe that uses 1) cake mix, 2) a bundt pan, and 3) ends up tasting like a giant lemon Twinkie. YUM.
![Bready or Not Original: Cream Cheese-Stuffed Lemon Bundt Cake [cake mix]](https://www.bethcato.com/blog/wp-content/uploads/2020/01/Cream-Cheese-Stuffed-Lemon-Bundt-Cake13_sm.jpg)
This is one of those cakes that looks like it requires tons of works, but it really doesn’t. Because of the addition of fresh lemon and lemon curd, the chemical taste of cake mix is completely masked, too.
![Bready or Not Original: Cream Cheese-Stuffed Lemon Bundt Cake [cake mix]](https://www.bethcato.com/blog/wp-content/uploads/2020/01/Cream-Cheese-Stuffed-Lemon-Bundt-Cake8_sm.jpg)
The filling is an easy step, too. I hate piping, but it was not prob here. I used a gallon Ziploc, snipped off the corner, ta-da!
![Bready or Not Original: Cream Cheese-Stuffed Lemon Bundt Cake [cake mix]](https://www.bethcato.com/blog/wp-content/uploads/2020/01/Cream-Cheese-Stuffed-Lemon-Bundt-Cake16_sm.jpg)
This cake would be great for breakfast, brunch, snack, or dessert. Whenever, really.
![Bready or Not Original: Cream Cheese-Stuffed Lemon Bundt Cake [cake mix]](https://www.bethcato.com/blog/wp-content/uploads/2020/01/Cream-Cheese-Stuffed-Lemon-Bundt-Cake14_sm.jpg)
Make this when you have numerous people to share with. It’s just so, so tempting and delicious. Like Twinkies. BUT BETTER.
![Bready or Not Original: Cream Cheese-Stuffed Lemon Bundt Cake [cake mix]](https://www.bethcato.com/blog/wp-content/uploads/2020/01/Cream-Cheese-Stuffed-Lemon-Bundt-Cake12_sm.jpg)
This recipe is over halfway through my April of lemon recipes!
Lemon Sour Cream Bundt Cake
Glazed Lemon Ginger Bars
Cranberry Lemon Biscotti
Cream Cheese Stuffed Lemon Bundt Cake [today]
Lemon Frangipane
![Bready or Not Original: Cream Cheese-Stuffed Lemon Bundt Cake [cake mix]](https://www.bethcato.com/blog/wp-content/uploads/2020/01/Cream-Cheese-Stuffed-Lemon-Bundt-Cake10_sm.jpg)
Bready or Not Original: Cream Cheese-Stuffed Lemon Bundt Cake
Equipment
- large bundt pan
Ingredients
Filling
- 8 ounce cream cheese 1 box, softened
- 1/4 cup white sugar
- 1 large lemon zested and juiced
Cake
- 1/4 cup unsalted butter softened
- 3 eggs room temperature
- 1 box yellow cake mix
- 3/4 cup lemon curd
Glaze
- 1 cup confectioners' sugar
- 1 Tablespoon lemon juice
- 1 Tablespoon lemon curd
Instructions
Make the filling
- In a small bowl, mash together the cream cheese, white sugar, lemon zest and 1 Tablespoon of lemon juice; reserve the remaining juice for the glaze. Once the filling is combined, spoon it into a piping bag with large tip or a gallon Ziploc bag with the corner cut off.
Make the cake
- Preheat oven at 350-degrees. Apply nonstick spray to a large bundt pan.
- In a big bowl, cream together the butter and eggs. Add the cake mix, scraping bottom of bowl as needed. Add the lemon curd, beating until mix turns fluffy.
- Spoon about half the cake mix into the prepared pan. Pipe the filling in a circle around the top of the batter. Try to keep the filling from touching the sides. Add the rest of the batter on top and smooth it out.
- Bake for 40 to 45 minutes, until the middle passes the toothpick test.
- Cool on a wire rack about 20 minutes, then invert the cake onto a wire rack to completely cool.
Make the glaze
- Whisk together the confectioners' sugar, 1 Tablespoon lemon juice, and 1 Tablespoon lemon curd to form a thick yet oozy glaze. If necessary, add more juice or water to thin, or more confectioners' sugar to thicken. Drizzle atop cake.
- Store under a cake dome or plastic wrap in fridge.
OM NOM NOM!
Follow me


