Bready or Not: Spiced Apple Scones
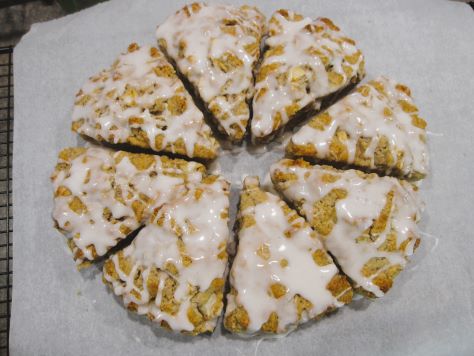
These Spiced Apple Scones make for a delicious breakfast. They are great fresh, but they can also be frozen for a convenient meal on the go later in the week.
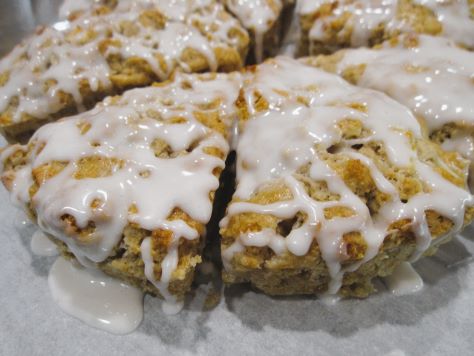
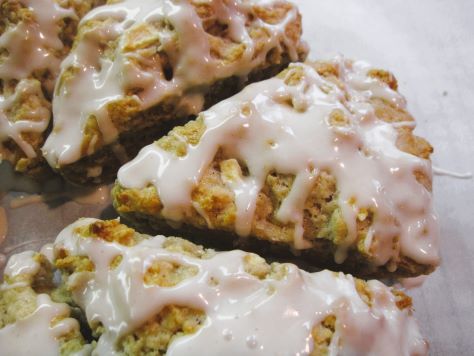
These are not super sweet. There is enough sugar inside to elevate them above what Americans regard as a biscuit; the glaze not only adds some sweetness, but a texture for contrast. If you want these plainer, just omit the glaze!
If you don’t have pie spice, just use cinnamon with perhaps a sprinkle of nutmeg.
Greatly modified from Bake from Scratch Magazine September/October 2023.
Bready or Not: Spiced Apple Scones
Equipment
- baking sheet with parchment or scone pan
- knife or bench knife
Ingredients
Scones
- 2 cups all-purpose flour plus more for surface
- 1/4 cup white sugar
- 2 1/2 teaspoons baking powder
- 1 1/4 teaspoons pie spice
- 1 teaspoon kosher salt
- 1/2 teaspoon baking soda
- 6 Tablespoons unsalted butter cut into cubes and cold
- 1 teaspoon vanilla extract
- 1 cup half & half or milk, plus more for tops if desired
- 1 medium baking apple (about 120 grams) peeled and diced
Glaze
- 1 cup confectioners' sugar plus more if needed
- sprinkle pie spice
- 1 Tablespoon half & half plus more if needed
- 1/2 teaspoon clear vanilla extract
Instructions
- Preheat oven at 375-degrees. Line a baking sheet with parchment paper or pull out a scone pan.
- In a big bowl, stir together flour, sugar, baking powder, pie spice, salt, and baking soda. Cut in the butter, mashing it until it resembles coarse crumbs. Pour in the vanilla and half & half, stirring until just combined. Fold in the diced apple.
- If using a baking sheet to bake, flour a work space. Flour hands and fold and pat the dough into a thick disc. Use a knife or bench knife to slice it into 8 wedges. Move wedges, spaced out, onto baking pan. Alternatively, press dough into scone pan to evenly fill each hole. Whichever method is used, chill scones for about 15 minutes.
- If softer scones are desired, measure out a tablespoon of milk and brush that atop the scones. If crisper tops are wanted, leave the scones be.
- Bake scones until tops are golden brown, 15 to 20 minutes. Let cool for about 20 minutes.
- Make the glaze. Whisk together confectioners’ sugar, a sprinkle of pie spice, half & half, and clear vanilla until they achieve a thick but oozy texture. Drizzle over scones.
- Enjoy scones right away, or store at room temperature in a sealed container for up to 2 days. They can also be frozen and thawed for later enjoyment.
OM NOM NOM!
Bready or Not Original: Chewy Apple-Cranberry Oatmeal Cookies
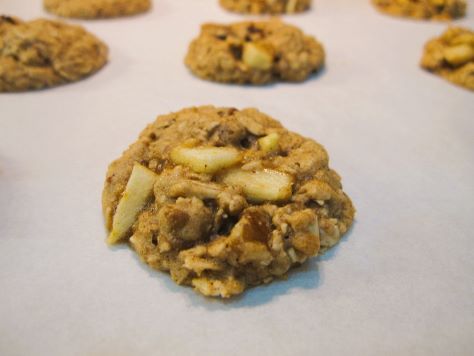
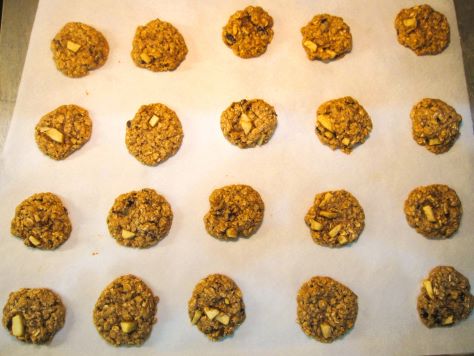
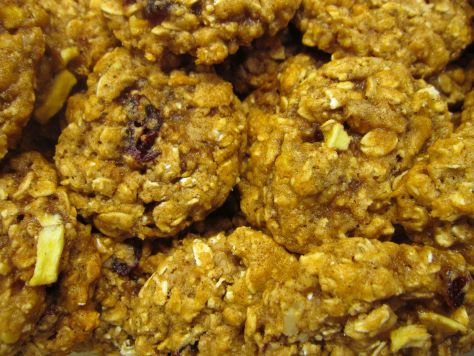
Ready for fall, even if only psychologically? These Chewy Apple-Cranberry Oatmeal Cookies are loaded with apple, cranberry, and walnut. They are autumn in a single bite!
I will always prefer chewy cookies over crisp ones, and these are especially chewy thanks to the apple pieces, dried cranberries, and walnut bits along with the oats. They are such a great combination!
I love using apple butter in this recipe because of the deeper flavor, but by all means, you can substitute applesauce. It’s certainly cheaper and easier to find. (Just to note, I have a great Crock Pot Apple Butter recipe on the old Live Journal if you want to make your own.)
Bready or Not Original: Chewy Apple-Cranberry Oatmeal Cookies
Equipment
- cookie sheet
- parchment paper
- teaspoon scoop or spoon
Ingredients
- 1 baking apple such Granny Smith or Gala
- 2 cups old-fashioned oats also called rolled oats
- 1 cup all-purpose flour
- 1 teaspoon ground cinnamon
- 1/2 teaspoon baking soda
- 1/2 teaspoon kosher salt
- 1/4 teaspoon ground nutmeg
- 1 cup brown sugar packed
- 1/4 cup unsalted butter melted and cooled
- 1/4 cup apple butter or applesauce
- 1 large egg room temperature
- 1/2 cup dried cranberries
- 1/2 cup walnuts or pecans, chopped
Instructions
- Preheat oven at 35-degrees. Line cookie sheet with parchment paper. Peel apple and finely chop enough to fill 1/2 cup. This likely will not be an entire apple; eat and enjoy the rest.
- Mix together oats, flour, cinnamon, baking soda, salt, and nutmeg. In a separate bowl, combine the brown sugar, butter, apple butter, and egg. Gradually incorporate the contents of bowls. Fold in the chopped apple, cranberries, and walnuts.
- Use a teaspoon scoop or spoon to place dough, spaced on, on prepared cookie sheet. Bake for 10 to 12 minutes, until set but still soft. Let sit on cookie sheet on stove for a few minutes before transferring to a cooling rack. Continue to bake rest of dough.
- Store in a sealed container at room temperature.
OM NOM NOM!
Bready or Not: Apple Cream Cheese Brioche Tart
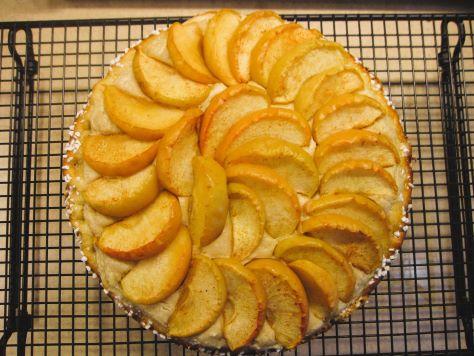
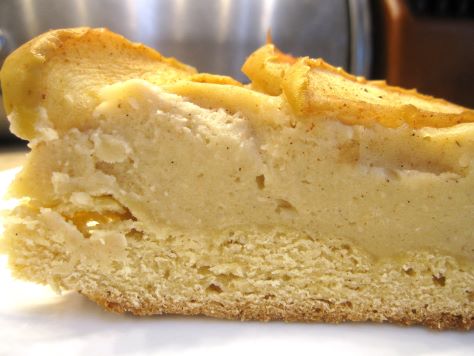
This Apple Cream Cheese Brioche Tart isn’t a beginner’s recipe, I’ll say that straight up. There are gobs of steps, multiple rise times, lots of dirty dishes. But the result? Wow.
This is really a show-stopper kind of bread for a dessert, breakfast, or brunch. You have an enriched bread with a creamy, rich filling topped with spiced apples.
We had to test the best ways to eat the leftovers, too. The tart is fantastic fresh. Because of the creamed cheese, it needs to be stored in the fridge–but it’s thick and cloggy if eaten cold.
However, heating it in the toaster oven doesn’t work–the cream cheese will melt off! Like Goldilocks, we eventually found the “just right.” It was a quick zap in the microwave, maybe 15-20 seconds depending on your machine. Enough to take the chill off without making it hot.
The things we bakers must do for science and the good of the people…
Bready or Not: Apple Cream Cheese Brioche Tart
Equipment
- rimmed baking sheet
- 9-inch springform pan
- parchment paper
- stand mixer with paddle and dough hook
- nonstick spray with flour
- pastry brush
- uneven spatula
- instant read thermometer
Ingredients
Apples
- 2 cups apples peeled then sliced to 1/4-inch, about 1 1/2 medium apples (Honeycrisp recommended)
- 1 Tablespoon white sugar
- 1/2 teaspoon lemon juice
- 1/4 teaspoon apple pie spice
Dough
- 2 cups all-purpose flour divided
- 1 1/2 Tablespoons white sugar
- 1 1/2 Tablespoons light brown sugar packed
- 1 0.25oz package Platinum Yeast
- 1 1/2 teaspoons kosher salt
- 1/4 cup milk or half & half, warmed to 120-F to 130-F
- 2 large eggs room temperature
- 3/4 teaspoon pure vanilla extract
- 1/4 cup unsalted butter softened
Filling
- 2 Tablespoons unsalted butter softened
- 3 Tablespoons white sugar
- 2 Tablespoons light brown sugar firmly packed
- 1 teaspoon pure vanilla extract
- 1/4 teaspoon kosher salt
- 1/4 teaspoon apple pie spice
- 8 ounces cream cheese room temperature
- 1 large egg room temperature
- 3 Tablespoons all-purpose flour
Topping
- 1 large egg for egg wash
- 1 Tablespoon water for egg wash
- Swedish pearl sugar for sprinkling
Instructions
- Preheat oven to 400-degrees. Line a rimmed baking sheet with parchment paper.
- Prepare the sliced apples by using a large bowl to stir them with sugar, lemon juice, and pie spice. Let the mixture stand for 15 minutes, stirring occasionally. Spread apple mixture in an even layer on prepared pan.
- Bake the apples until they are fork-tender and have released significant moisture, 12 to 16 minutes. Rotate the pan and stir halfway through. The apples should reduce in size slightly but retain their shape. Let the apples cool while continuing with other stages. Also, turn off the oven, as it won’t be needed for a while.
- Begin the dough. In the bowl of a stand mixer fitted with the paddle attachment, beat 1/2 cup flour, white sugar, brown sugar, yeast, and salt at medium-low speed. Add the warm milk, eggs, and vanilla, beating everything on medium about 2 minutes until it’s combined. Scrape the bottom and sides of bowl a few times. Gradually add the remaining 1 1/2 cups flour.
- Switch to the dough hook attachment. Beat at low speed until dough is smooth and elastic. It should start to pull away from sides of bowl. This will be around 6 to 9 minutes.
- Add the softened butter, 1 tablespoon at a time, beating well after each addition. This will take 6 to 8 minutes total. Scrape the sides of bowl and dough hook as needed. If the dough looks slightly broken during this stage, that's okay–keeping beating it and it'll come back together.
- Increase mixer speed to medium-low and beat until a smooth, elastic dough forms, about 6 minutes.
- Turn out dough onto a clean surface and knead 4 to 5 times. Shape into a smooth round. Place dough in a large ungreased bowl. (At this stage, the dough could be covered and placed in the fridge for a few hours or overnight.) Cover it and place it in a warm spot until it doubles in size, about 45 minutes to 1 hour.
- Cut a piece of parchment to fit in the base of a springform pan. Apply nonstick spray with flour in pan. Add cut paper. Spray again to coat paper and sides.
- Punch down dough, then cover it and let it rest for about 10 minutes. On a lightly floured surface, roll dough into an 11-inch circle. Use the bottom of the springform pan to poke a 9-inch circle in the middle of the dough. Fold and press outside edges inward to create a crimped edge. Lift the dough to place it in the prepared pan. Press dough to make sure it fills the bottom. Crimp and secure the edges again if needed. Cover and let rise again in a warm place for 25 minutes. Dough should be puffed and hold an indentation when it’s poked.
- Preheat oven to 325-degrees.
- Now make the filling. In the clean bowl of the stand mixer, using the paddle attachment, beat the butter, white sugar, brown sugar, vanilla, salt, and pie spice at medium speed. Gradually add the cream cheese, beating until smooth. Add egg, beating until combined, then add the flour. Scrape the bowl to make sure everything is mixed.
- Use your fingertips to dimple center of dough back down, leaving outside crust higher and puffed. Crimp and secure edges if necessary, and press out any air bubbles if you see them.
- Spoon and spread cream cheese mixture in an even layer in center of dough. Arrange the sliced apples slightly overlapping in two concentric circles. (You may have leftover slices. Eat’em on their own!)
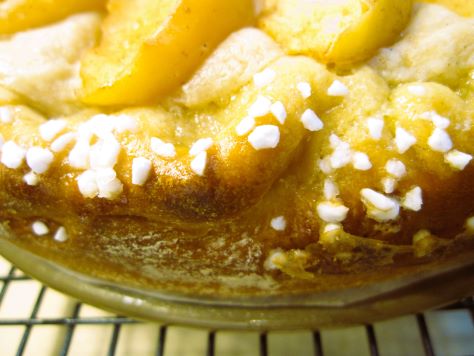
- In a small bowl, whisk together egg and water. Brush outer edge of dough with egg wash. Sprinkle pearl sugar along the crust.
- Bake for 20 minutes. Rotate pan. If the crust is browning, cover it with foil. Bake for another 25 to 28 minutes. When the tart is done, the crust will be golden brown. The filling should be set around outside edges and slightly jiggly in center. An instant-read thermometer inserted in center should register at least 175-degrees.
- Let cool in pan for 10 minutes. Using a small offset spatula, loosen edges of bread. Remove sides of springform pan. Let cool completely on pan base on a wire rack.
- The tart can be enjoyed fresh after it cools. Leftovers should be stored in the fridge, but will be cloggy if eaten chilled. It’s best warmed with a short zap in the microwave, about 15-20 seconds; if it’s made too hot, the cream cheese melts! Leftovers can also be individually wrapped and frozen for later. Thaw in fridge.
OM NOM NOM!
Bready or Not: Apple Sheet Cake
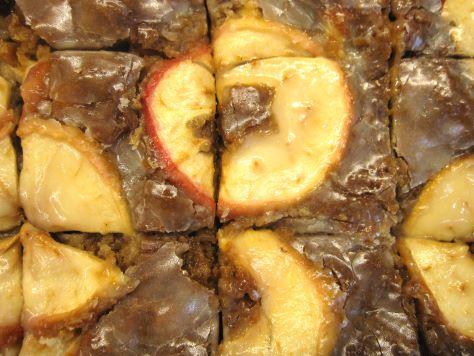
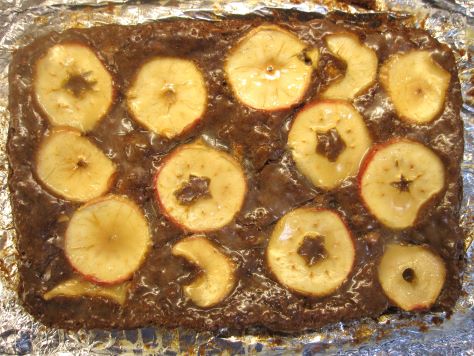
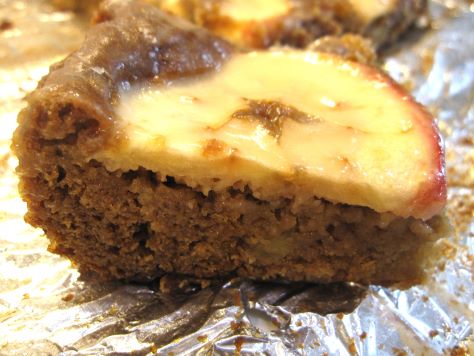
I’ve done a lot of different apple cakes. This Apple Sheet Cake is unique in that it’s 1) in a casserole dish, so can feed a lot of people, and 2) uses apple butter, diced fresh apple, diced dried apple, and cross-wise sliced fresh apples on top!
It probably goes without saying that this cake is loaded with apple flavor. There’s just enough batter to complement the fruit. Really, this is all about the apples.
I think the apple butter in particular carries a lot of weight here. It adds a touch more spice, but most of all it adds moist texture to the crumb.
Modified from a clipping for Applicious Sheet Cake.
Bready or Not: Apple Sheet Cake
Equipment
- 13×9 pan
- aluminum foil
- uneven spatula
Ingredients
Cake
- 2 medium baking apples
- 1/3 cup unsalted butter melted
- 1 2/3 cup brown sugar packed
- 1 cup apple butter
- 2 large eggs room temperature
- 2 teaspoons vanilla extract or vanilla bean paste
- 1 2/3 cups all-purpose flour
- 1 teaspoon baking powder
- 1 teaspoon baking soda
- 1/4 teaspoon salt
- 1 cup dried apples finely chopped
Icing
- 1 Tablespoon unsalted butter melted
- 1 Tablespoon maple syrup
- 1/2 cup confectioners’ sugar
- 1/4 teaspoon vanilla extract
- 1 Tablespoon milk or half & half
Instructions
- Preheat oven at 350-degrees. Line a 13×9 pan with foil and apply nonstick spray or butter. Set aside.
- Peel, core, and shred or finely dice-up one apple. Thinly slice the other apple cross-wise, removing the seeds.
- In a large bowl, mix together butter, brown sugar, apple butter, eggs, and vanilla. Add flour, baking powder, baking soda, and salt, scraping bottom of bowl to make sure everything is mixed. Fold in the shredded/diced fresh apple and the chopped dried apple. Spread batter in pan, using uneven spatula to level out. Arrange apple cross-sections over cake.
- Bake for about 40 minutes. The middle should pass the toothpick test. Move to a wire rack.
- Immediately mix glaze to go over hot cake. Drizzle it all over the top, using the back of a spoon or a pastry brush to distribute across surface. Cool completely to set the glaze, speeding process in fridge if desired.
- Use foil to lift cake onto a cutting board to slice. Pieces can be individually wrapped and frozen for later, or will keep several days covered in the fridge. Eat cold or warmed slightly in microwave.
OM NOM NOM!
Bready or Not: Double Apple Spice Cake
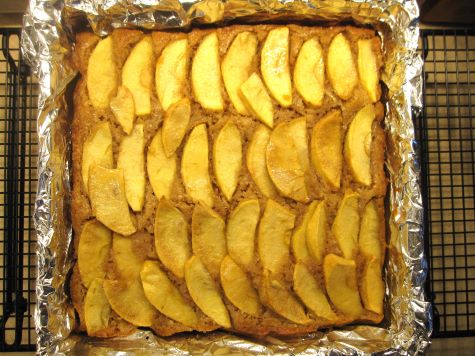
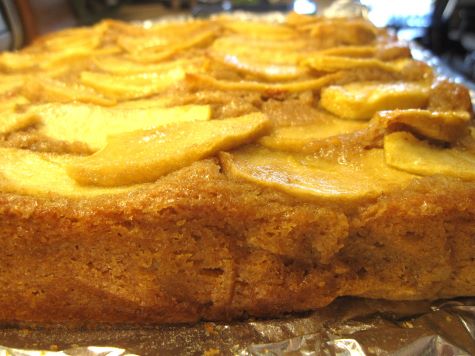
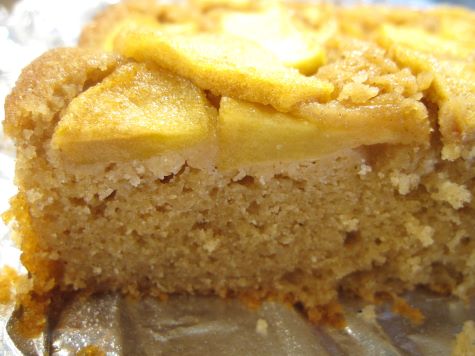
This Double Apple Spice Cake includes chopped apples in the batter and sliced apples prettily arranged on top. You’re pretty much guaranteed to get apple in every bite!
I came across a version of this recipe promoted by Kerrygold Irish Butter. I thought it looked amazing, but I wanted to change it to a square pan for easier slicing and freezing and make a number of other little changes, too.
Instead of dusting the top with confectioners’ sugar, I decided to use a technique I also use for my Calvados Apple Galette: brushing honey across the top near the end of baking to add some sweetness and glisten.
This is really such a pretty cake. The spices are gentle, but present enough to boost the flavor of the apples.
Modified from Kerrygold.
Bready or Not: Double Apple Spice Cake
Equipment
- 8×8 or 9×9 square pan
- aluminum foil
- nonstick spray
- basting brush
Ingredients
- 3/4 cup brown sugar packed
- 2 large eggs room temperature
- 3/4 cup sour cream or full-fat Greek yogurt
- 2 teaspoons pure vanilla extract
- 8 ounces Kerrygold Salted Butter melted
- 1 1/2 cups all-purpose flour
- 1/2 teaspoon kosher salt
- 1 1/2 teaspoons baking powder
- 2 teaspoons ground cinnamon
- 1/8 teaspoon ground cardamom
- 1/2 teaspoon ground ginger
- 1/4 teaspoon allspice
- 3 medium baking apples like Pink Lady, Envy, Granny Smith, etc
- 2 Tablespoons turbinado sugar
- 1/3 cup honey
Instructions
- Preheat the oven to 350° F. Line an 8×8 or 9×9 square pan with aluminum foil and apply nonstick cooking spray.
- Prepare the apples. Peel then dice up one of the apples. The other two, peel and slice thinly.
- To a large bowl, add the brown sugar and eggs. Whisk for about a minute until thoroughly combined and creamy.
- Add the sour cream/yogurt, pure vanilla extract, and melted butter. Whisk well.
- In a separate medium size bowl, combine flour, kosher salt, baking powder, cinnamon, cardamom, ginger, and allspice.
- Add the dry ingredients to the wet ingredients. Before the dry ingredients are fully incorporated, add the diced apples. Continue to fold in until no streaks of flour remain.
- Pour batter into the prepared baking pan, then use an offset spatula to smooth it out. Shingle the thinly sliced apples on top. The sprinkle turbinado sugar all over the slices.
- Bake for 35 minutes. Pull out the cake and brush on the honey across all of the nooks and crannies. Place the cake back in oven to bake for another 5 to 10 minutes, until the top is turning golden brown. The apples on top should be fork-tender with the center cake passing the toothpick test.
- Let cool at least 30 minutes before slicing in. Store covered in the fridge. Cake can also be frozen for later enjoyment.
OM NOM NOM!
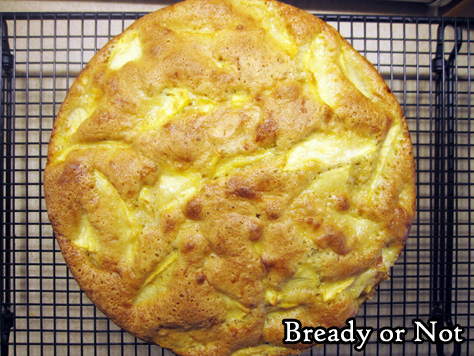
Bready or Not: Sharlotka (Apple Cake)
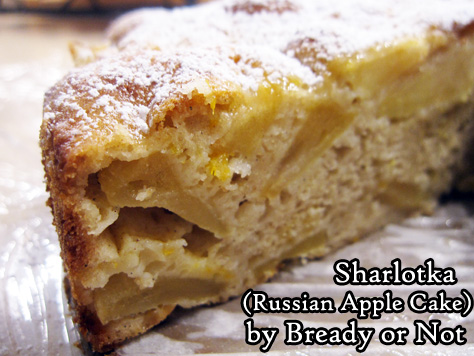
As you might have noticed, I’ve been experimenting with many different kinds of apple cakes over the past while. This Sharlotka has a Russian name but British origins, because that’s the way of the world.
I modified this from a recipe in Bake from Scratch’s October 2020 issue. There, they say the first Sharlotka was a very different kind of cake that was served for Czar Alexander during a London visit–and made by a French chef. Because of course.
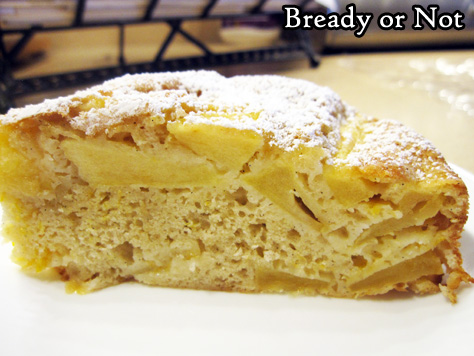
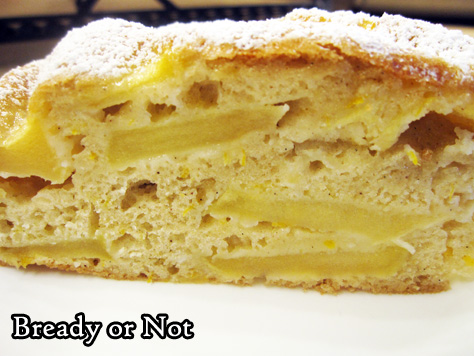
The cake that evolved after that became more of a basic apple cake. The batter is minimal, and beaten for a prolonged time to increase volume. It’s pretty much there to act like adhesive for the mélange of apples.
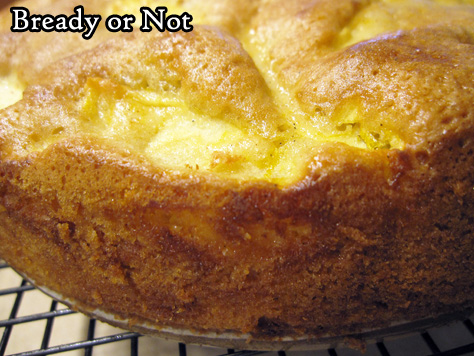
The resulting cake is light and airy. The flavor of the apples really shines through.
This cake is great for a breakfast, snack, or dessert. Eat it on its own, or with some ice cream.
Bready or Not: Sharlotka (Apple Cake)
Equipment
- 9-inch springform pan
- parchment paper
- fine mesh sieve
- offset spatula
Ingredients
- 4 medium apples such as Granny Smith, Ambrosia, Fuji, or Golden Delicious; go for a mix!
- 1 cup plus 1 Tablespoon white sugar divided
- 1 large orange or 1 large lemon zested and juiced
- 4 large eggs room temperature
- 1 1/2 teaspoons vanilla extract or vanilla bean paste
- 3/4 teaspoon kosher salt
- 1 1/4 cups all-purpose flour
- 1 1/2 teaspoons baking powder
- 1/2 teaspoon ground cinnamon
- 1/4 teaspoon ground cardamom
- confectioners’ sugar for dusting
Instructions
- Preheat oven at 350-degrees. Cut parchment to fit the bottom of the springform pan. Grease the pan, then place in parchment round, then spray that as well.
- Peel and thinly slice the apples. In a big bowl, coat the apples with 1 Tablespoon white sugar, the citrus zest, and 2 teaspoons of fresh juice. Set aside.
- In the bowl of a stand mixer with a whisk attachment, beat eggs, vanilla, salt, and remaining 1 cup of sugar at medium high speed for about 7 minutes. It should turn thick and pale, the batter forming ribbons when the whisk is lifted up. Remove bowl from mixer.
- In a medium bowl, combine flour, baking powder, cinnamon, and cardamom. Use a fine-mesh sieve to sift the dry ingredients into the egg mix. Gently fold the flour in until it’s just combined and there are no white streaks.
- Place half the apples in the prepared pan. Pour half the batter over them. Use an offset spatula to work the batter into nooks and crannies. Scatter the rest of the apples on top, followed by the rest of the batter. Again, use the spatula to spread the small amount of batter. For a couple minutes, thump the pan on the counter and tap the sides every now and then to cause bubbles to rise, smoothing batter again after.
- Bake cake. Check it at 30 minutes to see if it is getting too brown; if so, cover it with foil. Continue baking 10 more minutes (40 total) then test the middle with a toothpick. If it comes out clean, the cake is done. Let it cool on a rack for 15 minutes before carefully releasing the sides of the pan.
- Serve the cake warm, at room temperature, or cold from the fridge. Add a dusting of confectioners’ sugar on top for serving; if keeping cake for later, add fresh sugar each time, as it will gradually be absorbed. Store covered in the fridge or at room temperature.


