


Bready or Not EXTRA CHEESY: Farmer’s Cheese Cookies
Welcome to the second installment of our special month of Bready or Not. My cheese-centric cozy mystery Cheddar Luck Next Time just came out yesterday (picture the Kermit-flail gif) so we’re celebrating with another cheesy recipe from the Bready or Not archives.
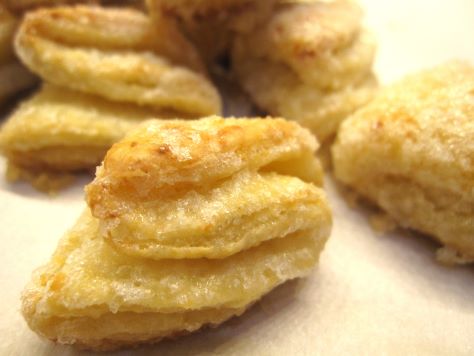
This week’s feature is Farmer’s Cheese Cookies.
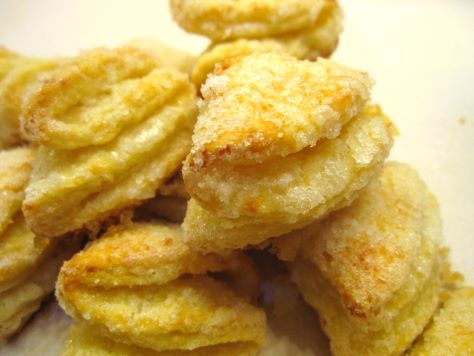
These cookies aren’t cheesy in a gooey, cheese-pull kind of way. Instead, the cheese here adds a touch of savory flavor and a lot of light, chewy texture. Expect a dry, crumbly texture in the cheese. Mine became somewhat powdery as I broke it down, which was fine. I was able to incorporate everything with an extra touch of water.
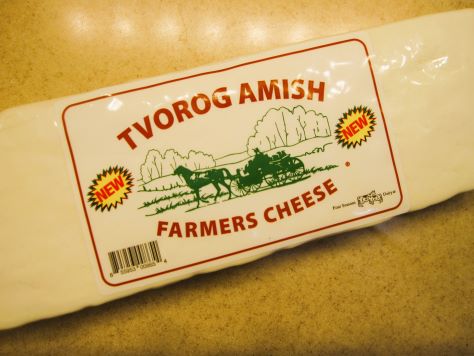
Cookies like this are traditional in Ukraine and Russia. Look for a product like Ukrainian Tvorog Farmer’s Cheese at your local import markets.
The end result is a cookie that, quite honestly, tastes fancy–light, crisp, sugary, like something that one would find in a fine bakery. Most people wouldn’t guess there’s cheese in the dough, I bet, but they’ll know there’s something different about them. Something delicious.

Please grab a copy of Cheddar Luck Next Time, which features an autistic (like me!) lead character with a passion for cheese (like me!).
Amazon: paperback | ebook (affiliate links)
Barnes & Noble: paperback & ebook
Bookshop: paperback
Bready or Not: Farmer’s Cheese Cookies
Equipment
- grater or food processor
- pastry blender
- 3-inch round cutter or the top of a glass
- parchment paper
- saucer or bowl
- Rolling Pin
Ingredients
- 1 cup unsalted butter 2 sticks, chilled
- 8 oz farmer's cheese such as Ukrainian Tvorog cheese
- 2 cups all-purpose flour
- 2 egg yolks
- 2-3 Tablespoons water
- 1 1/2 cups white sugar
Instructions
- Grate the butter using a hand grater or a grater attachment on a food processor. In a large bowl, use a pastry blender to cut in the cheese, which will be crumbly. Add the flour, followed by the yolks and water. Knead the dough until it comes together in a cohesive mass.
- Form the dough into a disc and encase it in plastic wrap to chill for anywhere from an hour to several days.
- When it’s cookie time, preheat oven at 375-degrees. Line a large baking sheet with parchment paper. Place a small amount of water in a saucer or bowl. Measure the white sugar into a deep bowl.
- Prepare a clean work surface with a dusting of flour. Break off some of the dough and roll it into a thin layer, like for a pie crust. Use the cutter to slice out 3-inch rounds; place the leftover and unused dough to chill in the fridge while cookies are shaped.
- Dampen fingers in the prepared water. Brush wet fingers over one side of a dough round. Dip moist dough into the sugar to coat it. Fold in half with the sugared portion on the inside. Dampen fingers and stroke another folded side of the dough, and dip that in sugar. Fold a final time with the sugared section on the inside. Use wet fingers on outside of cookie and coat that in sugar, too. Gently press the pleats together to prevent them from unfolding during baking. Place formed cookie on sheet and repeat process with remaining rounds.
- Bring together dough scraps, using a little water if needed, to roll out again. Use rest of dough to form cookies.
- Bake in batches for 19 to 22 minutes, until puffed and set with a golden base. Store in a sealed container at room temperature.
OM NOM NOM!
Bready or Not EXTRA CHEESY: Swirled Goat Cheese Brownies
Welcome to a special month of Bready or Not. My cheese-centric cozy mystery Cheddar Luck Next Time will be released on April 8–next Tuesday–so we’re celebrating with a month of cheesy recipes from the Bready or Not archives. These recipes haven’t been featured for years and are well worth a revisit.
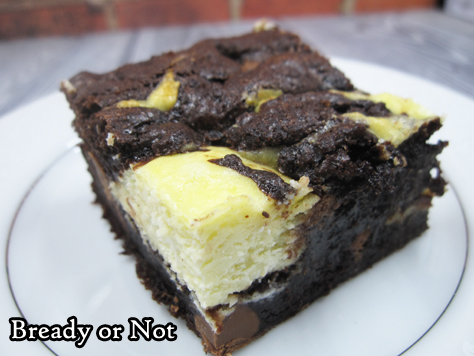
We’re starting with a luscious and indulgent recipe for Swirled Goat Cheese Brownies.
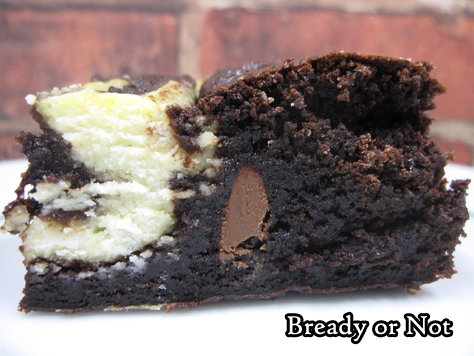
This recipe makes a small pan of brownies, 8×8 or 9×9, but it’s heavy on the cheese. A plain goat cheese log from Costco or Sam’s Club is especially cost efficient here, or get a couple of small logs from Aldi, if you’re so fortunate as to have one nearby. There’s a good dose of chocolate flavor here as well through both cocoa powder and chocolate chips.
These brownies are thick and rich, perfect alongside some tea or coffee–and a good book.
Please grab a copy of Cheddar Luck Next Time, which features an autistic (like me!) lead character with a passion for cheese (like me!).
Amazon: paperback | ebook (affiliate links)
Barnes & Noble: paperback & ebook
Bookshop: paperback
Bready or Not Original: Swirled Goat Cheese Brownies
Ingredients
Goat Cheese Swirl
- 10 1/2 ounces goat cheese room temperature
- 2 Tablespoons confectioners’ sugar
- 2 Tablespoons all-purpose flour
- 2 large eggs room temperature
Brownie Base
- 2/3 cup Dutch process cocoa powder sifted
- 1 cup white sugar
- 1/2 cup brown sugar packed
- 1/2 cup confectioners’ sugar
- 3/4 teaspoon sea salt
- 1 cup all-purpose flour
- 1 cup semisweet chocolate chips or milk chocolate chips
- 3 large eggs room temperature
- 1/2 cup canola oil
- 1 teaspoon vanilla extract
Instructions
- Preheat oven to 350-degrees. Line an 8×8 or 9×9-inch square pan with aluminum foil and apply nonstick spray or butter.
- Mix goat cheese swirl ingredients. Set aside.
- Make the brownie base by whisking together the cocoa, sugars, salt, flour, and chips in a big mixing bowl. Add the eggs, oil, and water and vanilla extract until everything is just combined.
- Spoon half the brownie batter into the prepared pan. Dollop the cheese mixture atop it, then add the remaining brownie batter into the open spots. Use a knife to swirl the two layers together while still keeping them a bit distinct.
- Bake the brownies for 35 to 45 minutes, depending on the pan size. Use the toothpick test to check for doneness. The center should be set with the consistency still moist and fudgy. Cool to room temperature, then place in fridge to chill an hour or two prior to cutting.
- Use foil to lift brownies onto cutting board for easy slicing. Store in a sealed container in fridge, with parchment or waxed paper between the layers.
- OM NOM NOM!
Bready or Not Original: Cadbury Egg Brownies 13×9 Size (Redux)
Eight years have passed since I shared one of my signature recipes: it is time to revisit Cadbury Egg Brownies.

These homemade brownies taste like the Cadbury Eggs I was obsessed with as a kid. If you’re not familiar with this candy, it features a hollow chocolate egg the size of a real large chicken egg. Inside is a gooey super-sweet filling that is white and yellow to simulate the white and yolk of a real egg.
These special brownies are not hard to make; if you can make brownies from scratch, you can do this recipe. There is some extra planning involved, though, as the layers must be worked on in spurts, with chilling time in between.
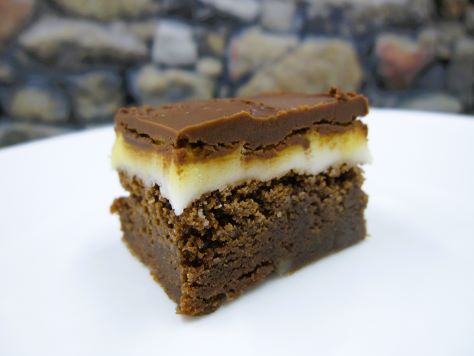
Truly, these Cadbury Egg Brownies are a showstopper recipe. They look cool. They taste amazing. Keep in mind that this recipe makes a lot, so do make sure you’re sharing these with a crowd.
Bready or Not: Cadbury Egg Brownies
Equipment
- 9×13 pan
- aluminum foil or parchment paper
- uneven spatula
- microwave safe bowl or double boiler
Ingredients
For Brownies:
- 1 1/3 cup all-purpose flour
- 1/4 cup cocoa powder sifted
- 1 teaspoon salt
- 1 teaspoon espresso powder optional
- 12 ounces milk chocolate chopped
- 1 cup unsalted butter (2 sticks) cut into cubes
- 1/2 cup white sugar
- 1 cup light brown sugar packed
- 4 large eggs room temperature, lightly beaten
- 2 teaspoons vanilla extract
For Cream Filling:
- 1/2 cup light corn syrup
- 4 tablespoons unsalted butter (half stick) room temperature
- 1 teaspoon vanilla extract
- 1/4 teaspoon salt
- 3 cups confectioners' sugar sifted
- yellow food coloring gel
For Glaze:
- 8 ounces milk chocolate chopped
- 4 Tablespoons unsalted butter half stick, cut into cubes
Instructions
Brownie stage
- Preheat oven to 350-degrees. Line the bottom and sides of a 9×13-inch pan with aluminum foil or parchment paper, making sure to overlap the sides to create handles. Cover with nonstick spray.
- Sift together flour, cocoa, and salt (and espresso powder, if using) in a small bowl and set aside.
- Melt chocolate and butter together in a double boiler or in slow increments in microwave. Stir until smooth. Whisk in sugars and stir until dissolved and mixture has cooled slightly, then add eggs and vanilla extract until just combined.
- Fold together the chocolate and flour mixes until just incorporated. Pour into prepared pan.
- Bake for 25 to 30 minutes or until toothpick inserted into the middle comes out clean. Transfer pan to a wire rack and allow to cool completely.
Cream filling stage
- Beat together corn syrup, butter, vanilla, and salt on medium-high speed until smooth. Add powdered sugar, a little bit at a time, mixing until creamy.
- Dump 3/4 of the cream mixture on top of cooled brownies and spread into an even layer. Add a drop of yellow food coloring gel to remaining cream mixture and stir until evenly colored. Drop dollops of yellow cream on top of white layer, and then swirl gently with a spatula. Refrigerate for at least 2 hours or until set.
Glaze stage
- Slowly melt the chocolate and butter together in a double boiler or microwave bowl. Stir until smooth. Pour over cream filling, carefully spreading into a thin, even layer.
- Chill in the fridge long enough for the chocolate to not quite harden, 15-20 minutes, OR let it chill for several hours and then let set at room temperature for about 15 minutes. The chocolate needs to be soft enough to cut through without cracking, but not soft enough to smear with each cut.
- Use the foil/paper to lift the entire block out of the pan and onto a cutting board. Using a large sharp knife, cut into 2-inch squares. Keep in sealed container in fridge; brownies will keep upward of a week.
OM NOM NOM!
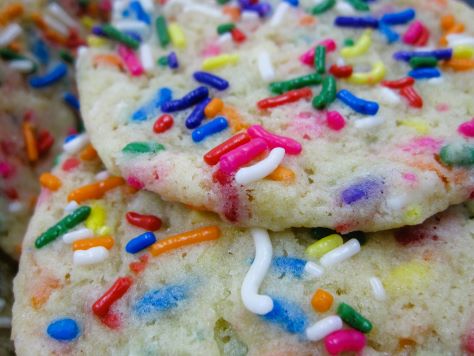
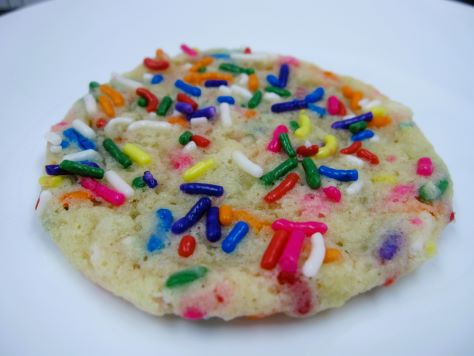
Bready or Not Original: Rainbow Sprinkle Cookies
These Rainbow Sprinkle Cookies taste eerily like birthday cake. They are super-sweet, vivid in flavor and color.
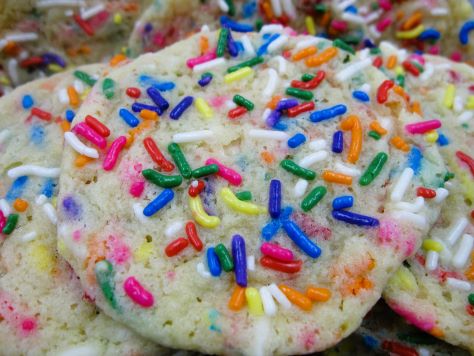
I confess, I love rainbow sprinkles. They are just so FUN. They are so easy to customize, too. Go classical just-because, or to celebrate pride. Or use colors of a favorite team, or to designate a certain holiday.
Note that the cookie dough here needs to chill for at least a few hours, but can also wait in the fridge for a couple days. I think this dough is a great one to make ahead to spare yourself some extra effort on baking day!
Bready or Not Original: Rainbow Sprinkle Cookies
Equipment
- plastic wrap
- parchment paper
- cookie scoop or spoon
Ingredients
- 1 cup unsalted butter (2 sticks) softened
- 1 1/2 cups white sugar
- 2 large eggs room temperature
- 1 Tablespoon vanilla extract
- 1/2 teaspoons almond extract
- 2 1/4 cups all-purpose flour
- 3/4 cup bread flour
- 2 teaspoons baking powder
- 2 teaspoons baking soda
- 2 teaspoons cream of tartar
- 1 teaspoon kosher salt
- 2 tablespoons milk or half & half
- 1 cup rainbow sprinkles plus 1/2 cup for topping
Instructions
- In a large bowl, beat butter and white sugar until fluffy. Add eggs one at a time followed by the vanilla and almond extracts.
- In another bowl, combine the flours, baking powder, baking soda, cream of tartar, and salt. Gradually add the dry ingredients to the butter mixture along with the milk. Scrape the bottom of the bowl to make certain everything is incorporated. Fold in the sprinkles.
- Wrap dough in plastic wrap and set to chill for at least 2 hours, or up to 3 days.
- When it is baking time, preheat oven at 350 degrees. Line a baking pan with parchment paper. Place the topping sprinkles in a small bowl.
- Shape the cookies by using a scoop or a spoon. Dip the top of each round into the sprinkles. Set spaced out on the cookie sheet.
- Bake for 10 to 13 minutes, until set. Let them rest on the sheet about 10 minutes before moving to a cooling rack.
- Pack into a sealed container and store at room temperature.
OM NOM NOM!
Bready or Not Original: Roasted Cherry Brownies
These Roasted Cherry Brownies are thick, soft, and cakey, the strong chocolate flavor complemented by cherries in most every bite.

I looked to two older recipes of mine for inspiration as I came up with a new recipe: Fudgy Chocolate Chunk Brownies and a Roasted Cherry Brownies version I did on the original LiveJournal Bready or Not.

The result of this combo? Lush brownies that are the perfect melding of chocolate and cherry. This may become your new favorite brownie recipe.

Bready or Not Original: Roasted Cherry Brownies
Equipment
- rimmed cookie sheet
- cherry pitter
- 9×13 dish
- aluminum foil
- uneven spatula
Ingredients
Cherries
- 2 cups fresh red cherries
- 3 Tablespoons white sugar
Brownie Batter
- 3/4 cup unsalted butter (1 1/2 sticks)
- 8 ounces dark chocolate
- 1 1/2 cups all-purpose flour
- 1/2 cup cocoa powder sifted
- 1/2 teaspoon salt
- 2 cups white sugar
- 6 large eggs room temperature
- 1 1/2 cups semisweet chocolate chips or milk chocolate chips or a mix
Instructions
- Preheat oven at 400 degrees. Wash and pit cherries, then cut them in half. Place on rimmed cookie sheet. Sprinkle with sugar and stir. Roast for 10 minutes then remove from oven. Reduce oven temperature to 325.
- In a large microwave-safe bowl or in a pot on the stovetop, melt together the butter and dark chocolate until smooth. Set aside to cool slightly.
- Line a 9×13 pan with foil and apply nonstick spray or butter. In a small bowl, combine the flour, cocoa powder, and salt.
- Return to the large container with the melted butter and chocolate. Stir in the white sugar until no pale streaks remain. Beat in the eggs one at a time. Gradually fold in the dry ingredients until no white is visible. Fold in 1 cup of chocolate chips and most of the cherries.
- Pour batter into the prepared dish. Use an uneven spatula to spread it into an even layer. Sprinkle the remaining 1/2 cup chocolate and cherries over the top.
- Bake for 55 minutes to 1 hour, until the middle passes the toothpick test. Set on a rack to cool for at least an hour, speeding process in fridge if desired. Use foil to lift contents onto a cutting board to slice up. Store in a sealed container at room temperature. Keeps for at least 3 days.
OM NOM NOM!
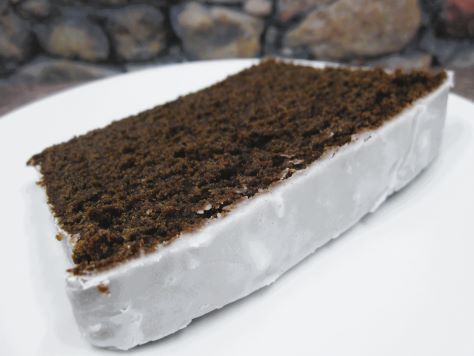
Bready or Not: Sourdough Chocolate Loaf Cake
This Sourdough Chocolate Loaf Cake is rich with a deep chocolate flavor and tender crumb. It’s a fancy way to use up sourdough discard. My starter imbued this cake with a flavor like malt, so combined with chocolate, I was reminded of a chocolate milkshake.

When I say discard, I mean the mother starter should be 1) active and 2) likely fed the evening before if this is being made in the morning. After the starter is divided to be used in this recipe, feed the mother starter again and tend as usual.
Now, a confession: my first attempt at this recipe was a cake fail. The original Bake from Scratch recipe calls for baking an hour and five minutes. I did that, and the center of my loaf collapsed during cooling because it was completely raw inside. I did salvage the bottom, top, and sides, though.
On my second attempt, I monitored closely after the hour point, and I kept baking. At an 1 hour 30 minutes, I declared it baked, and slicing into it later revealed it was just barely done. So, keep an eye on things. I’d rather have a bake overdone than underdone.
Bready or Not: Sourdough Chocolate Loaf Cake
Equipment
- loaf pan
- parchment paper
- nonstick spray
Ingredients
Loaf
- 1/2 cup unsalted butter (1 stick) softened
- 1 cup brown sugar firmly packed
- 1/2 cup white sugar
- 1 large egg room temperature
- 1 cup sourdough starter discard 275 grams
- 1/2 cup buttermilk or soured milk
- 1 teaspoon vanilla extract
- 1 cup all-purpose flour
- 3/4 cup cocoa powder sifted
- 1/2 teaspoon baking powder
- 1/4 teaspoon baking soda
- 1/4 teaspoon kosher salt
Glaze
- 1 cup confectioners’ sugar
- 1 Tablespoon milk or half & half
Instructions
- Preheat oven at 325 degrees. Cut parchment to fit inside the loaf pan like a sling, sticking up at the two long sides. Use nonstick spray in the pan and on the parchment paper.
- Beat butter and both sugars until fluffy. Add egg. Add sourdough discard, buttermilk or soured milk, and vanilla, scraping the bottom of the bowl a few times to make sure everything is incorporated.
- In another bowl, combine flour, cocoa powder, baking powder, baking soda, and salt. Gradually add the dry ingredients to the wet, scraping the bottom again. Pour the batter into the prepared pan.
- Bake for somewhere between 1 hour and 10 minutes to 1 hour and 40 minutes. After the hour point, use the toothpick test every so often to check for doneness; a digital thermometer is also a good way to check inside, with a goal of seeing over 190-degrees in the middle.
- After about 15 minutes, use the paper sling to lift the loaf out. Let cool completely on a wire rack, speeding in the fridge if desired.
- Make the glaze. Spoon it over the loaf pan to dribble over the sides. Let set at least 30 minutes. Slice and enjoy! Store in a sealed bag or container. Cake can also be frozen in slices for later enjoyment.
