


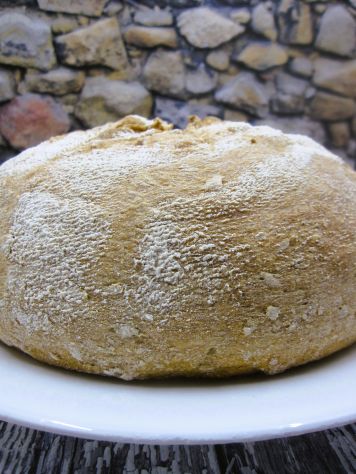
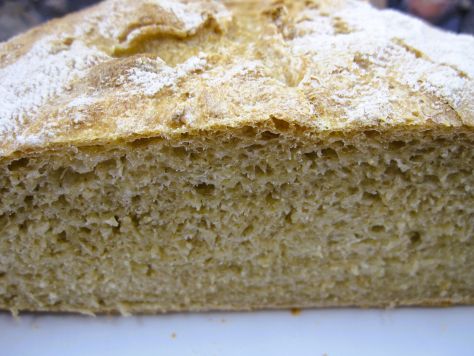
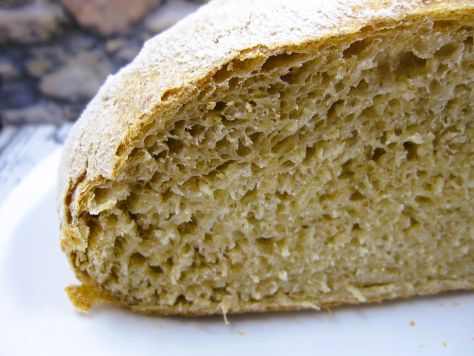
Bready or Not: Sourdough Beer Bread
Not gonna lie: this Sourdough Beer Bread takes time, working in spurts over a day. It dirties many things. However, it also makes a big loaf of bread, so the effort can likely provide a delicious side for a few meals.
When I say this is an all day recipe, I point to my own experience. I started making this at 7:15AM, and it was done about 3PM.
A few other data points. I advise using a kitchen scale to measure the ingredients here. It’s very hard to reliably use a cup to measure sticky, goopy sourdough starter. The original recipe at King Arthur Flour had the instant yeast listed as optional, but for me, it wasn’t optional. I appreciate the extra oomph in the rise.
Find the original recipe here. I rewrote it quite a bit for clarification.
Also, a reminder that my book featuring a sentient sourdough starter character is out in about TWO MONTHS! Find out more about A House Between Sea and Sky on its page.
Bready or Not: Sourdough Beer Bread
Equipment
- kitchen scale
- parchment paper
- baking stone or cast iron skillet
Ingredients
Soaker
- 1 1/4 cups old-fashioned rolled oats (112g)
- 1/2 cup boiling water (113g)
Dough
- 1 cup ripe sourdough starter (227g)
- 1 cup plus 2 tablespoons beer (255g beer) such as an amber ale or dark ale, room temperature
- 3 1/2 cups bread flour (420g)
- 1 teaspoon instant yeast
- 1 Tablespoon honey (21g) add more flavor using a variety such as basswood honey
- 2 teaspoons table salt (12g)
Instructions
- To make the soaker: Place oats in a heatproof bowl and pour the boiling water over them. Stir. Allow to cool while you start to prepare the dough.
- Using a kitchen scale and weighing everything is highly recommended.
- Combine the sourdough starter, beer, flour, and yeast in a large bowl. Mix well, by hand or with a mixer, the dough forms a cohesive mass.
- Cover and let it rest (autolyse) for about 30 minutes.
- Add the soaked oats, honey, and salt to the dough, fully incorporating. By hand or with a mixer, knead dough until it’s smooth, though it will still be tacky.
- Cover dough and let it rise for 1 hour.
- Turn the dough out onto a floured surface. Fold it over itself and stretch gently several times. Return the dough to the bowl and cover.
- Let dough rise for another hour.
- Repeat the stretching and folding process one more time. Return dough to the bowl to rise for a third, final hour.
- At the end of the rise, turn the dough out onto a lightly floured surface. Cover with greased plastic wrap and let it rest for 20 minutes.
- Place a clean cotton towel to cover the interior of a large bowl (or use a brotform). Add a heavy dusting of flour.
- Shape the dough into a tighter round by tucking dough underneath to tighten the top. Place it seam-side up in the bowl.
- Cover and let proof for 2 1/2 to 3 hours in a warm place; if your house is cool, it may need 4 hours. An oven with a proofing mode can also be used. When the dough is ready, it will look puffy and will jiggle when gently shaken.
- When the rise time is nearing end, begin preheating oven at 450 degrees with a baking stone or cast iron pan inside (obviously, if the proof mode was being used, remove the bread to continue rising in a warm spot elsewhere). To use steam during the baking process, to create a crunchy crust, place another empty pan (such as a cast iron skillet or a cake pan) beneath the baking vessel.
- Gently tip the risen loaf onto a piece of parchment. Slash the loaf several times with a sharp knife or lame–this creates vents for steam inside so the bread doesn’t grossly split–then use the parchment as a sling to CAREFULLY place the loaf on the very hot stoneware or cast iron.
- While wearing thick oven mitts, pour 1 cup water into the empty pan on the lower rack, with the bread in the pan on the level above. Close oven and keep it closed as the bread bakes.
- Bake bread for 15 minutes at 450, then reduce temperature to 400 F. Bake for another 25 to 30 minutes, until the loaf is deeply browned and sounds hollow when tapped. Remove loaf from the oven and carefully transition to a cooling rack. Cool at least 30 minutes before slicing.
- Store leftover bread in a paper bag or loosely covered by plastic wrap for up to a few days. To preserve it longer, freeze and place in a freezer bags. Slicing the bread before freezing makes it easy to pull out portions to quickly defrost for later meals.
OM NOM NOM!
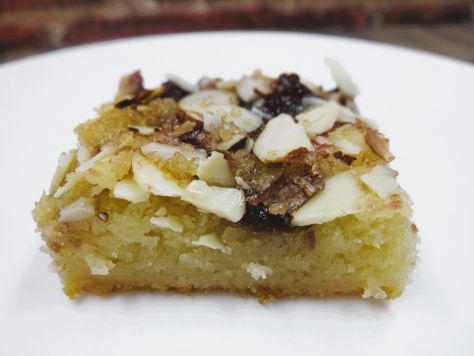
Bready or Not: Dutch Letter Bars
These Dutch Letter Bars are super-easy to make. Soft, chewy, and crunchy, these have it all.

The name for these bars is kind of weird, isn’t it? These are bars, no letter involved. Well, they are made to taste like a Dutch pastry that is traditionally shaped in a letter S. You can read all about it here.
The bar version mimics the flavor and texture, but is a lot easier to make! In the US, it’s apparently more common to find in Iowa.
This is modified from a recipe in Better Homes & Gardens Christmas Cookies 2021.
Bready or Not: Dutch Letter Bars
Equipment
- 13×9 pan
- aluminum foil
- nonstick cooking spray
Ingredients
- 1 cup unsalted butter (2 sticks) softened
- 7-8 ounces almond paste store-bought or homemade
- 2 large eggs
- 2 cups white sugar
- 2 cups all-purpose flour
- 3/4 cup raspberry jam or mixed fruit jam
- 1/2 cup sliced almonds
- 1 Tablespoon turbinado sugar
Instructions
- Preheat oven at 350 degrees. Line the 13×9 pan with foil. Add a coating of nonstick spray.
- In a large bowl, beat together butter, almond paste, and eggs. Add the white sugar, beating until light and fluffy. Gradually beat in the flour until combined. Spread dough in the prepared pan.
- Measure the jam into a microwave-safe bowl and gently warm until it is soft and spreadable. Dollop the jam on top of the dough and spread out, swirling with dough slightly. Sprinkle the almonds on top followed by the turbinado sugar.
- Bake for 35 to 45 minutes, until the top is golden brown and a toothpick in the middle comes out clean. Cool completely.
- Use the foil to lift the contents onto a cutting board, slice into bars. If stacking in storage containers, place waxed paper to make it tidier. Store at room temperature.
OM NOM NOM!
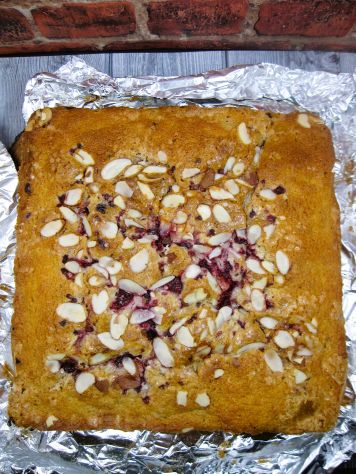
Bready or Not Original: Raspberry-Almond Snack Cake
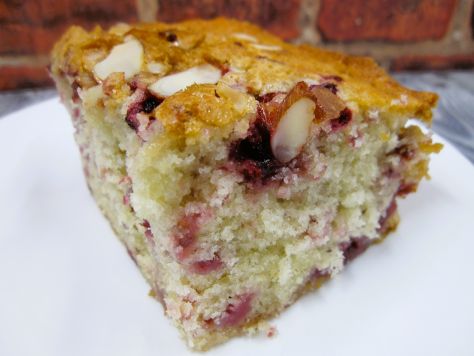
This Raspberry-Almond Snack Cake is a delicious treat. It’s great for everything from breakfast to snack to dessert.
What I like about it is that it’s packable. This is not a fragile coffee cake. Encase this in plastic wrap or stick it in a sandwich bag, and it’s a dense homemade treat-to-go.
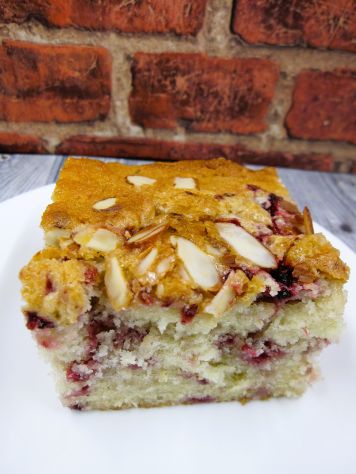
This is also a good cake to bake, cool, slice up, and freeze some for later. It keeps for weeks like that, and is fast to thaw later on.
Bready or Not Original: Raspberry-Almond Snack Cake
Equipment
- 9×9 pan
- aluminum foil
- nonstick spray
- food scale
Ingredients
Cake
- 300 grams frozen raspberries
- 3/4 cup unsalted butter (1 1/2 sticks) softened
- 1 3/4 cups white sugar
- 3 large eggs room temperature
- 1/2 teaspoon vanilla extract or vanilla bean paste
- 1/4 teaspoon almond extract
- 2 1/4 cups all-purpose flour
- 1/4 cup corn starch
- 1 1/2 teaspoons baking powder
- 1 teaspoon kosher salt
- 1/4 teaspoon baking soda
- 1/2 cup milk or half & half
- 1/2 cup Greek vanilla yogurt or sour cream
Topping
- 2 Tablespoons turbinado sugar
- 1/4 cup sliced almonds
Instructions
- Preheat oven at 375 degrees. Press foil into a 9×9 pan. Apply nonstick spray.
- Weigh out the 300 grams of raspberries. Use kitchen shears or a knife to gently shatter the berries into smaller pieces. Place back in freezer as the recipe is assembled.
- In a mixing bowl, beat together the butter and sugar until they are fluffy. Add the eggs one at a time, followed by both the extracts.
- In a separate bowl, stir together the flour, corn starch, baking powder, kosher salt, and baking soda. In another bowl, combine the milk and the yogurt.
- Take turns adding the dry ingredients and the milk mix in the big mixing bowl with the butter. Scrape the bottom of the bowl to make certain everything is combined. Gently fold in the frozen raspberries.
- Spread the batter in the prepared pan and even out. Sprinkle the turbinado sugar over the top, followed by the sliced almonds. Gently press in.
- Bake for 15 minutes, then reduce the oven temperature to 350. Continue baking for an additional 45 to 55 minutes. (Note that the bake time is longer because of the moisture in the frozen berries. If you’re using fresh instead, the bake time will likely be reduced, so monitor closely.) The middle should pass the toothpick test.
- Let cool in pan for 10 minutes. Use the foil to lift the cake onto a rack to fully cool.
- Store in an airtight container or bag in the fridge or at room temperature for up to 3 days. This is also a great cake to freeze in slices.
OM NOM NOM!
4th Street Fantasy 2025
I’ll be at 4th Street Fantasy in Minneapolis this weekend! I’ll be around Friday through Sunday morning. I have one panel, too, the first of the con at 4pm Friday: “Fear, Loathing and Transcendence on the Great American Road Trip.”
Catch me early on, and you can get an individually-wrapped Chewy Honey Maple Cookie and earn one of my prized “I Ate Beth Cato’s Cookies!” badge stickers.
Oh, and check the freebie ebook table on occasion. You might find something special.

Bready or Not Original: Chocolate-Hazelnut Sables
These Chocolate-Hazelnut Sables are a fancy kind of shortbread, perfect to pair with some coffee or tea!

The chocolate flavor here is pleasant and deep thanks to the pairing of cocoa powder and mini chocolate chips. The hazelnuts provides a welcome sporadic crunch.

The hazelnuts will need to have their brown papery skin removed for the recipe. Look at the end of the cookie directions for instructions on how to do that! It’s a fiddly, time-consuming thing, but it’s not hard, but do be careful with the fizzing-hot baking soda.
Bready or Not Original: Chocolate-Hazelnut Sables
Equipment
- food processor
- plastic wrap
- food scale
- parchment paper
- knife or bench knife
Ingredients
- 1/2 cup blanched hazelnuts see note for blanching advice
- 3 oz mini semisweet chocolate chips
- 1 1/3 cups all-purpose flour
- 1/3 cup unsweetened cocoa powder sifted
- 1/4 teaspoon baking soda
- 1/4 teaspoon salt
- 1/2 cup unsalted butter (1 stick) room temperature
- 1/4 cup white sugar
- 1/4 cup brown sugar packed
- 1 large egg
- 1/2 teaspoon vanilla extract
- 1/4 cup turbinado sugar for topping
Instructions
- Use the food processor to finely chop the hazelnuts. Transfer them to a bowl with the mini chocolate chips.
- In another bowl, stir together the flour, cocoa, baking soda, and salt. Set aside.
- In a mixing bowl, beat together the butter and white and brown sugars until they are light and fluffy. Add the egg and vanilla. Gradually mix in the dry ingredients, scraping the bottom of the bowl a few times. Fold in the hazelnuts and chocolate.
- Divide the dough between two long sheets of plastic wrap. Form the dough into logs, then encase in plastic, rolling to smooth out. Each should be about 1 inch high and 9 inches long.
- Wrap airtight and chill for at least an hour, or freeze for upwards of a month; thaw later in fridge.
- When it is baking time, preheat the oven at 350. Lay parchment paper on baking pan. Place turbinado sugar in a saucer.
- Use a knife or bench knife to slice logs about 1/4-inch thick. Press the top of each cookie into the turbinado sugar, then set spaced out on parchment.
- Bake for about 14 minutes. Let set for 5 minutes, then move to a cooling rack. Store in a sealed container at room temperature.
OM NOM NOM!
Notes
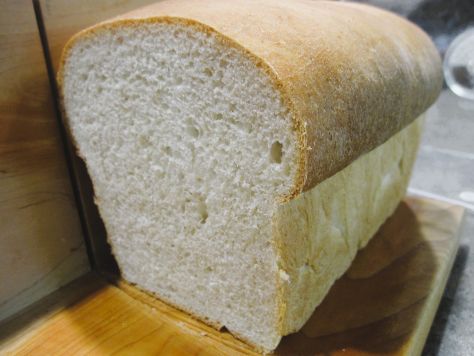
Bready or Not Original: Soft Sourdough Loaf or Bratwurst Buns mixed in a bread machine
Today’s Bready or Not features two variations on the same ingredients: a Soft Sourdough Loaf baked in a pan or Soft Sourdough Bratwurst Buns.
This recipe is written for use in a bread machine, for maximum physical and time accessibility, but it can absolutely be made by hand or with a stand mixer.
The recipe includes two leaveners, which means it is done in hours rather than all day or over multiple days, as is usually the case with sourdough. The sourdough flavor still comes through beautifully.
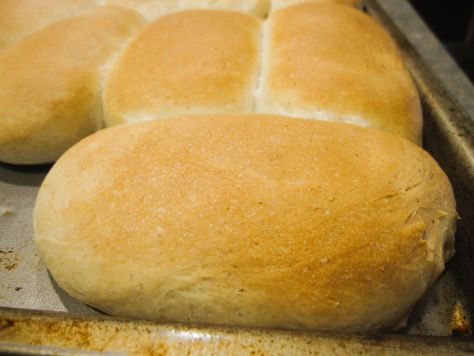
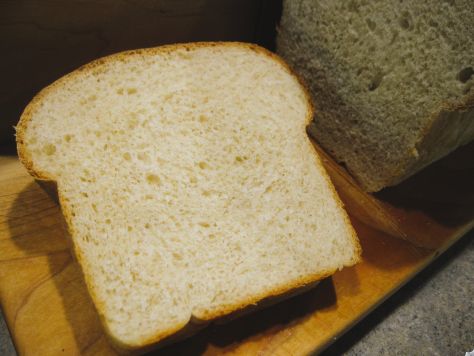
This loaf is ideal for sandwiches or garlic bread. The buns, made by dividing the dough into eighths, are the perfect size for a bratwurst or other large sausage. Yes, it takes practice to get the shaping right by hand. The important thing is to remember to make the top look smooth and nice, and hide the messy seams underneath.

This bread will keep in a sealed, room temperature bag for up to 3 days, and it is fantastic to freeze for later.
By the way, I baked up sourdough recipes like this one because I have maintained a starter for book research reasons: my next release, A House Between Sea and Sky, features a sourdough starter named Mother as an important character. Find out more (and preorder) here!
Bready or Not Original: Soft Sourdough Loaf mixed in a bread machine
Equipment
- digital thermometer
- kitchen scale
- bread machine
- loaf pan
- nonstick spray
- aluminum foil
- pastry brush
Ingredients
Dough
- 3/4 cup active sourdough starter room temperature (about 170 to 190 grams)
- 1/3 cup lukewarm milk or half & half (about 100-110 degrees)
- 1 large egg
- 3 Tablespoons melted butter
- 2 Tablespoons white sugar
- 1 1/2 teaspoons sea salt
- 3 cups white bread flour plus more for surface
- 1 1/2 teaspoons instant dry yeast
Topping
- softened butter to brush on loaf at end
Instructions
- Add ingredients to the bread machine bucket in the order specified by the manufacturer; it is usually wet ingredients first. Set machine on Dough mode and begin. Monitor the dough as it begins mixing, adding a touch more milk if it is lumpy or flour if it is too loose. Dough should come together smoothly.
- After the cycle ends, apply nonstick spray to the loaf pan.
- Dump the dough onto a lightly floured surface. Shape, folding and tucking the dough to tighten what will become the top. Place dough in pan. Set in a warm place to rise, such as on a counter, a cabinet, or in an oven on proofing mode.
- After about 45 minutes to an hour, the dough should rise about 2 inches over the rim of the pan. If it is in the warm oven, remove from there. Preheat oven at 350 degrees.
- Bake bread about 20 minutes. Cover with shaped foil to prevent overbrowning. Continue to bake for about another 20 minutes. Bread should sound hollow when tapped, and if tested with a digital thermometer, over 190 degrees inside.
- Immediately tip loaf from pan, carefully setting upright on a cooling rack. Brush on the softened butter.
- Let cool for at least an hour before slicing. Bread will keep in a sealed bag at room temperature for up to 3 days, and can also be frozen for several months either whole or in slices.
OM NOM NOM!
Bready or Not Original: Soft Sourdough Bratwurst Buns
Equipment
- kitchen scale
- parchment paper
Ingredients
- 3/4 cup active sourdough starter room temperature (about 170-190 grams)
- 1/3 cup lukewarm milk or half & half (about 100-110 degrees)
- 1 large egg
- 3 Tablespoons melted butter
- 2 Tablespoons white sugar
- 1 1/2 teaspoons sea salt
- 3 cups white bread flour plus more for surface
- 1 1/2 teaspoons instant dry yeast
Instructions
- Add ingredients to the bread machine bucket in the order specified by the manufacturer; it is usually wet ingredients first. Set machine on Dough mode and begin. Monitor the dough as it begins mixing, adding a touch more milk if it is lumpy or flour if it is too loose. Dough should come together smoothly.
- After the cycle ends, prepare a sheet pan with parchment paper. Use a kitchen scale to divide the dough by 8.
- Shape each piece, folding and tucking the dough while elongating it, creating a tightened top. Place each bun slightly spaced out on pan; baker’s choice as to if they touch or not after rising. After all of the buns are shaped, place in a warm place to rise, such as on a counter, a cabinet, or in an oven on proofing mode.
- After about 45 minutes to 1 1/2 hours, the buns should look rounded and puffy. If pan is in the oven, remove from there. Preheat oven at 350 degrees.
- Bake bread about 21 to 25 minutes, until they are lightly browned. Bread should sound hollow when tapped, and if tested with a digital thermometer, over 190 degrees inside.
- Cool on pan or rack for at least an hour before eating. Slice bun from the side or top to insert the bratwurst and other toppings.
- Buns will keep in a sealed bag at room temperature for up to 3 days, and can also be frozen for several months.
