


Judith Starkston’s Of Kings and Griffins is out today!
The Phoenix area is home to a lot of awesome authors, and Judith Starkston is among them. Her Tesha historical fantasy series is unique because it’s inspired by the Hittite Empire. Yes, we’re talking ancient history, an era usually ignored these days except for a few brief mentions in school history class.
The 3rd book in the series, Of Kings and Griffins, is out as of today. I read it as an early draft and I’m excited to see how it is in final, polished form! This is a book that works well as a stand-alone. You can grab it in ebook or paperback at Amazon.

I do highly recommend the whole series, though. Start with Priestess of Ishana (in ebook and paperback) and continue from there. If you love historical fiction as I do, you’ll appreciate some fantasy-tinted insights into a time and setting we know little about. If you want to know more about the actual history that inspires her books, her blog is a great resource.
[Book links above utilize the Amazon Affiliate program.]
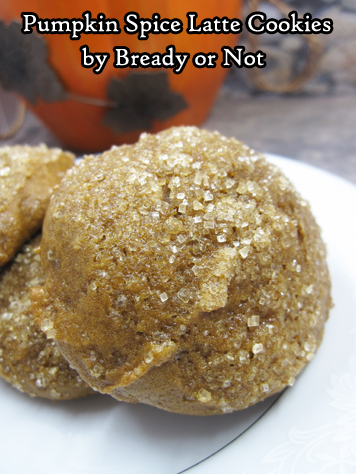
Read MoreBready or Not Original: Pumpkin Spice Espresso Cookies
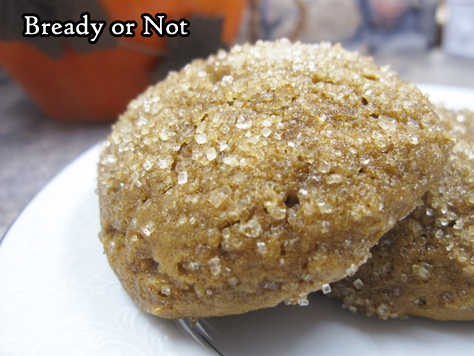
These Pumpkin Spice Espresso Cookies look a perfect autumnal orange and taste like fall, too–with an added kick of espresso.
I love pumpkin recipes that use a whole can of puree. No messing with leftovers, y’know? This recipe will use a full 15-ounce can!

The pumpkin flavor comes through in the baked cookies, too, along with warm spices and coffee.
Expect a texture that is light and cakey in the mouth, and slightly tacky to the fingertips. That’s pretty common with pumpkin cookies–or ones with applesauce, and this recipe includes both.

I stored these cookies in the fridge because I live in Arizona and my kitchen is warm through fall, but these should keep fine at room temperature elsewhere.
The recipe does make about 50 cookies, but as light and delicious as they are, they might not last that long at all.
Bready or Not Original: Pumpkin Spice Espresso Cookies
Equipment
- tablespoon cookie scoop
- parchment paper
- waxed paper
Ingredients
- 3 cups all-purpose flour
- 1 teaspoon baking powder
- 1 teaspoon baking soda
- 1 teaspoon salt
- 2 large eggs room temperature
- 15 ounces pure pumpkin puree
- 2 cups light brown sugar packed
- 1/4 cup unsalted butter (4 Tablespoons) room temperature
- 1/2 cup applesauce
- 2 Tablespoons half & half or milk
- 1 Tablespoon pumpkin pie spice
- 2 teaspoons espresso powder
- 2 teaspoons vanilla extract
- turbinado sugar for top
Instructions
- Preheat oven at 375-degrees. Line large cookie sheets with parchment paper.
- In a medium bowl, mix together the flour, baking powder, baking soda, and salt. Set aside.
- In a large mixing bowl, beat together the eggs, pumpkin, brown sugar, butter, and applesauce. Add the half & half, pumpkin pie spice, espresso powder, and vanilla, until well combined. Gradually mix in the dry ingredients.
- Use a tablespoon scoop to dollop dough onto the parchment paper, spacing out to allow for slight spread. Sprinkle turbinado sugar over the tops.
- Bake for 9 to 11 minutes, until the tops are dry and set. Move to a rack to completely cool.
- Cookies will be slightly tacky, as many pumpkin cookies are, and should be stored with waxed paper between the layers to prevent them from sticking together. Store in a sealed container at room temperature or in the fridge.
OM NOM NOM
My Capclave Online Schedule for October 17-18
I’m happy to announce that I’m taking part in Capclave’s online convention over the weekend of October 17th and 18th. This con only costs $10 for a membership! For two packed days of convention! Do note that the convention is Eastern time–that’s important for me to be mindful of, as it means I need to be ready for my first panel at 5:45am. *gulp*
In addition to several panels AND a reading and a kaffeeklatsch shared with friends, I’ll also be watching the WSFA Small Press Award Ceremony on Saturday because my story “The Blighted Godling of Company Town H” is in the running! (You can read it or listen to the podcast over at Beneath Ceaseless Skies.)
The full schedule is available here. Below are my events, which are, of course, subject to change, especially in the topsy-turvy year of 2020. Follow my Twitter and Facebook for the latest news.
Saturday
9:00 am Eastern / 6:00 am Pacific Speculative Poetry
Participants: Beth Cato, Ada Hoffmann, B. Sharise Moore, Samusara, Catherynne Valente
There is a lot of poetry with speculative and horror themes, but it doesn’t always receive a lot of love at conventions. Our panelists discuss their themes and may even share some brief recitations of their favorites.
1:30 pm Eastern / 10:30 am Pacific Author Reading – Cato, Colter, & Greenblatt
Join Cato, Colter, & Greenblatt for an hour-long reading of their fiction.
4:30 pm Eastern / 1:30 pm Pacific Kaffeeklatsch – Cato, Colter & Greenblatt
Join Beth Cato, L.D. Colter and A.T. Greenblatt for a small-group discussion on anything of interest. Limited spaces, advanced sign-up required.
6:00 pm Eastern / 3:00 pm Pacific WSFA Small Press Award Ceremony
Sunday
1:30 pm Eastern / 10:30 am Pacific When To Outline and When To Pants It
Participants: Beth Cato, Scott Edelman, Mary Fan, Carolyn Ives Gilman, Alan Smale (M)
“Fleshing out a detailed outline” versus “Diving right into an idea and seeing where the story goes” is one of the perennial debates of the writing craft. What are the advantages of each approach? What are the weaknesses and limitations? Our panelists will discuss when to prefer one approach over the other, and when it’s a good idea to switch to the opposite style even when it’s not your preferred method.
3:00 pm / Noon Pacific Best Fiction of 2020
Participants: Beth Cato, Andy Duncan, Sarah Pinsker, A.C. Wise (M)
Best Novels & Short fiction of 2020. What is the best new fiction you read (or heard about) in 2020. Suggestions for what should be nominated for various awards.
#SFWAPro
Read MoreBook Blog: American Cheese: An Indulgent Odyssey Through the Artisan Cheese World by Joe Berkowitz
I review everything I read and post reviews on Goodreads and LibraryThing. That’s not enough. Good books are meant to be shared. Therefore, I’m spotlighting some of my favorite reads here on my site.
American Cheese: An Indulgent Odyssey Through the Artisan Cheese World by Joe Berkowitz
out now in print and ebook; BookShop, B&N, and Amazon [affiliate link]
I received an advance galley through NetGalley.
American Cheese is my kind of book. Author Joe Berkowitz had a near-religious experience with artisan cheese that awoke him to the diverse flavors and textures of the world’s cheese, resulting in a country and world-spanning odyssey to understand the joys of modern cheese and the industry as a whole. It’s enlightening. It’s laugh-out-loud funny throughout. Perhaps most of all, I felt as if I had connected with a friend who gets it.
I love cheese. I chronicle every cheese that I try and constantly seek out new experiences. It has become one of my prime (and most expensive) hobbies. I’ve had many of the cheeses he viscerally describes in this book, and discovered many more to add to my wish list (and yes, there is an actual wish list). Even more, he gets to experience and describe incredible things I never will, like volunteering at Murray’s Cheese in NYC, attending and eating his way through the Cheesemonger Invitational, hanging out with cheese influencers like Cheese Sex Death (one of my favorites online), traveling the California Cheese Trail (totally a goal of mine, though as a native Californian, I was appalled that the author didn’t know California made cheese), and attending world-class cheese events in France and Italy. Through his words, I was vicariously there, and left desperately craving the cheeses he describes.
Throughout everything, he is easy to relate to, modest, and hilarious. Some choice quotes include:
“I wanted to run outside doing full Kermit-arms and scream for everybody to try this cheese right now, which probably wouldn’t be the weirdest thing anyone overheard on Bleecker Street that day.”
“Cheese is literally heaven. It’s what happens after milk sheds this mortal coil and ascends to a higher plain of existence.”
Seriously, if you love cheese, get this book.
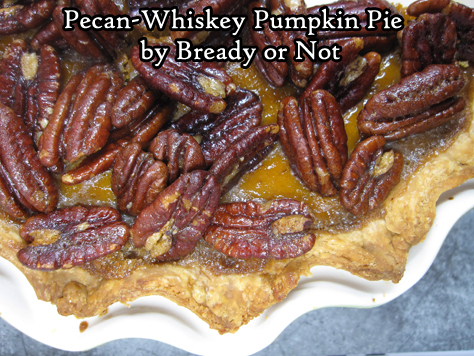
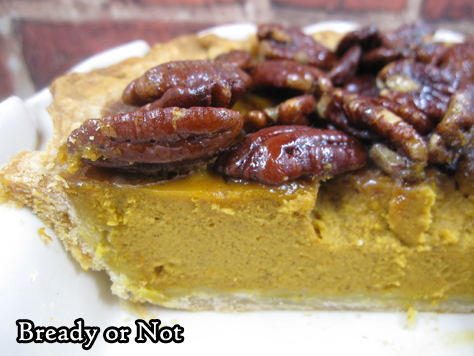
Read MoreBready or Not: Pecan-Whiskey Pumpkin Pie
This Pecan-Whiskey Pumpkin Pie is FANCY. It looks fancy, and let me assure you, it tastes fancy.
I’m relieved that the results are amazing, because honestly, this is the most complicated pumpkin pie recipe I have ever made.

I’m used to the basic, yummy Libby’s pie. This pie is substantially more intimidating, but doable.
I found the original recipe in the November 2019 issue of Bon Appetit. I do not like how the original recipe is written. It’s confusing at several points. Therefore, I largely rewrote it, creating what (I hope) is a more straightforward version.
But it is still complicated. I suggest making the pie crust a day ahead, just to avoid dirtying everything all at once.
The end result is a pumpkin pie with a custard that is delicately firm and soft, with nuanced spices that perfectly complement the candied pecans on top.
This is a pie to make to impress people. Truly, this is a Bake Off showstopper kind of pie.
Recipe heavily rewritten from original in Bon Appetit November 2019.
Bready or Not: Pecan-Whiskey Pumpkin Pie
Equipment
- deep dish pie pan
- parchment paper
- pie weights
- immersion blender or blender
Ingredients
Crust
- 1 3/4 cups all-purpose flour
- 1 Tablespoon white sugar
- 3/4 teaspoon kosher salt
- 3/4 cup unsalted butter (1 1/2 sticks) cold, cut into pieces
- 3/4 cup ice water
- 1 large egg white reserve yolk to use in pie filling
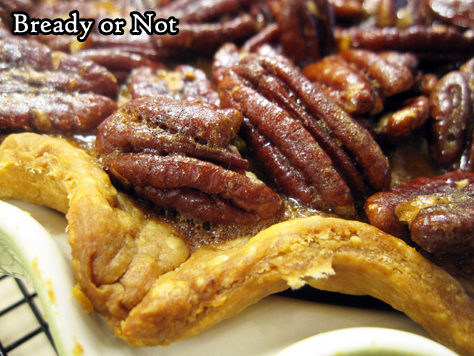
Pecan Topping
- 1 1/2 cups whole pecans
- 2 Tablespoons brown sugar packed
- pinch kosher salt
- 1 Tablespoon unsalted butter melted
- 1 Tablespoon pure maple syrup
Pumpkin Pie
- 3 large eggs
- 1 egg yolk
- 15 oz pure pumpkin puree
- 3/4 cup heavy cream
- 1/4 cup white sugar
- 2 Tablespoons rye whiskey
- 1 teaspoon ground cinnamon
- 1 teaspoon ground ginger
- 1/4 teaspoon ground nutmeg
- 1/4 teaspoon ground cardamom
- pinch ground cloves
- 6 Tablespoons brown sugar packed
- 2 Tablespoons unsalted butter melted
- 1/4 teaspoon kosher salt
Instructions
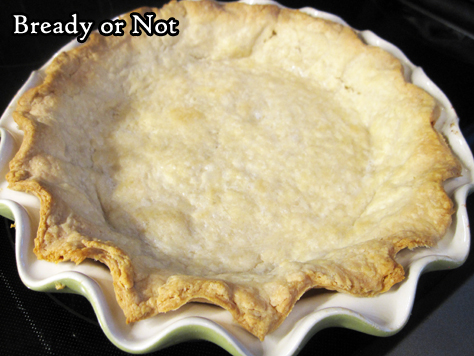
Make the crust
- Note that the dough can be made as days in advance and kept chilled. The crust can also be baked a day or two before the pie is finished; keep it covered at room temperature in the meantime.
- Whisk together flour, sugar, and salt. Add butter and coat it with flour, then use fingers to press butter into shaggy pieces of varying sizes. Drizzle in about 5 Tablespoons of cold water and knead it into flour. Add additional small increments of water until dough just starts to come together. There should still be visible pieces of butter.
- Dump dough onto a clean, lightly-floured surface and knead a few more times to work in any dry, shaggy bits. Form the dough into an even, broad disc and encase in plastic wrap. Tuck inside fridge to chill for at least 30 minutes, or up to 3 days.
- To blind-bake crust, preheat oven at 400-degrees.
- On a floured surface, roll out dough to make about an even 12-inch round. Loop it over the rolling pin to lift it onto a deep dish pie plate. Shape it into pan. Form the crust edge as desired and trim away any excess dough.
- Line the inside of the crust with parchment paper. Fill entire crust with pie weights, such as dry beans.
- Bake until the edges of the crust start to brown, about 20 minutes. Use parchment to lift out pie weights and set aside to cool--do so with great care!
- Decrease the oven temperature to 350-degrees, and continue to bake for another 20 to 25 minutes. While it is baking, separate an egg; place the white in a bowl and beat it slightly, and reserve the yolk in fridge to use for the pie filling.
- Remove crust from oven. Immediately brush a tablespoon of egg white over the bottom, which will help it resist going soggy once the filling is added. Return crust to oven for another 5 to 10 minutes. Reserve the remaining egg white for use in the pie.
- At this point, the recipe can proceed to the filling stage, or the crust can cool completely and be covered to sit at room temperature for a few days.
Filling
- Heat oven at 350-degrees; set a baking sheet inside oven at heat up, too.
- While mixing the filling ingredients, toast the pecans on a foil-lined rimmed baking sheet for about 8 to 10 minutes, stirring them once at the halfway point. The pecan should be a little darker and fragrant.
- If using an immersion blender, combine the following ingredients in an even-bottomed large pot (a slow cooker pot works for this) or use a large blender (in two batches, if needed). Combine eggs, egg yolk, pumpkin puree, heavy cream, and white sugar. Add the whiskey, cinnamon, ginger, nutmeg, cardamom, cloves, 6 Tablespoons brown sugar, 2 Tablespoons melted butter, and kosher salt. Blend until smooth.
- Pour into crust and bake until the filling is puffed and mostly set--a little wobble is okay--about 40 to 45 minutes.
- While that is finishing up, coat the pecans. Pull out the leftover egg white and whisk in 2 Tablespoons brown sugar and kosher salt. Add maple syrup and Tablespoon of melted butter, stirring until just combined. Add the pecans and toss to coat.
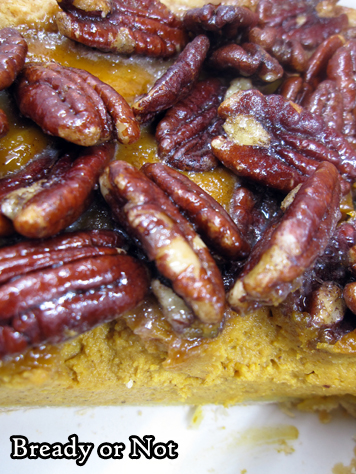
- Carefully use baking sheet to bring out the pie. Use a slotted spoon to add the pecans on top of the pumpkin, letting the excess egg white slurry stay in the bowl.
- Return pie to oven. Bake until filling is completely set, until a butter knife stabbed into center (avoiding pecans) comes out clean. This can take anywhere from 10 to 30 minutes. If necessary, cover the edge of crust with foil to prevent overbrowning.
- Let pie cool at least 2 hours before cutting in, chilling first if desired. Store pie loosely covered by foil at room temperature or in fridge.
OM NOM NOM!
Read More
