Four poems on the 2025 Rhysling Long List

Four of my poems were nominated for the Rhysling Award long list! A jury will decide the finalists from here. This is the first year that the Hugo Awards have a poetry category, and I’m hopeful that people will consider these already-recognized poems for that award as well.
Here are links to each of them:
Short form:
- “You are a Monster” at Worlds of Possibility
Long Form:
- “Defiance by Cake” at Worlds of Possibility
- “Five Nights in the Castle” in Penumbric
- “Meat, Bone, and Soul” in Haven Spec
Bready or Not: Sourdough Chocolate Loaf Cake
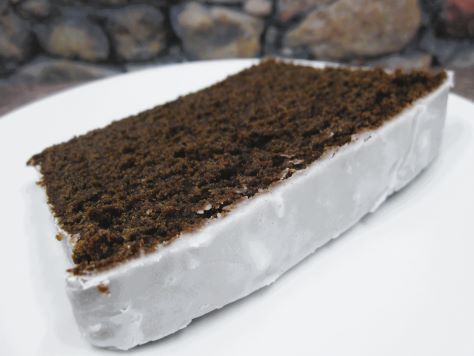
This Sourdough Chocolate Loaf Cake is rich with a deep chocolate flavor and tender crumb. It’s a fancy way to use up sourdough discard. My starter imbued this cake with a flavor like malt, so combined with chocolate, I was reminded of a chocolate milkshake.
When I say discard, I mean the mother starter should be 1) active and 2) likely fed the evening before if this is being made in the morning. After the starter is divided to be used in this recipe, feed the mother starter again and tend as usual.
Now, a confession: my first attempt at this recipe was a cake fail. The original Bake from Scratch recipe calls for baking an hour and five minutes. I did that, and the center of my loaf collapsed during cooling because it was completely raw inside. I did salvage the bottom, top, and sides, though.
On my second attempt, I monitored closely after the hour point, and I kept baking. At an 1 hour 30 minutes, I declared it baked, and slicing into it later revealed it was just barely done. So, keep an eye on things. I’d rather have a bake overdone than underdone.
Bready or Not: Sourdough Chocolate Loaf Cake
Equipment
- loaf pan
- parchment paper
- nonstick spray
Ingredients
Loaf
- 1/2 cup unsalted butter (1 stick) softened
- 1 cup brown sugar firmly packed
- 1/2 cup white sugar
- 1 large egg room temperature
- 1 cup sourdough starter discard 275 grams
- 1/2 cup buttermilk or soured milk
- 1 teaspoon vanilla extract
- 1 cup all-purpose flour
- 3/4 cup cocoa powder sifted
- 1/2 teaspoon baking powder
- 1/4 teaspoon baking soda
- 1/4 teaspoon kosher salt
Glaze
- 1 cup confectioners’ sugar
- 1 Tablespoon milk or half & half
Instructions
- Preheat oven at 325 degrees. Cut parchment to fit inside the loaf pan like a sling, sticking up at the two long sides. Use nonstick spray in the pan and on the parchment paper.
- Beat butter and both sugars until fluffy. Add egg. Add sourdough discard, buttermilk or soured milk, and vanilla, scraping the bottom of the bowl a few times to make sure everything is incorporated.
- In another bowl, combine flour, cocoa powder, baking powder, baking soda, and salt. Gradually add the dry ingredients to the wet, scraping the bottom again. Pour the batter into the prepared pan.
- Bake for somewhere between 1 hour and 10 minutes to 1 hour and 40 minutes. After the hour point, use the toothpick test every so often to check for doneness; a digital thermometer is also a good way to check inside, with a goal of seeing over 190-degrees in the middle.
- After about 15 minutes, use the paper sling to lift the loaf out. Let cool completely on a wire rack, speeding in the fridge if desired.
- Make the glaze. Spoon it over the loaf pan to dribble over the sides. Let set at least 30 minutes. Slice and enjoy! Store in a sealed bag or container. Cake can also be frozen in slices for later enjoyment.
OM NOM NOM!
Notes
Bready or Not Original: Red Velvet Cookies
Last month I shared a recipe for Red Velvet Brownies in Two Sizes. Today, I share a Red Velvet Cookie recipe.
These things are just so pretty. Use enough food gel to achieve a vivid red that contrasts with the white chocolate chips. The cocoa in the dough comes through in flavor, as do the chips. Really, these are fantastic for chocolate lovers.
Two notes of caution: first of all, the dough needs to chill prior to baking, as it is quite sticky, and two, if you stack the baked cookies, they might stick together, so use something like waxed paper between the layers.
Bready or Not Original: Red Velvet Cookies
Equipment
- plastic wrap
- parchment paper
- cookie scoop or spoon
- waxed paper
Ingredients
- 2 cups all-purpose flour
- 2 Tablespoons unsweetened cocoa powder sifted
- 1/2 teaspoon baking soda
- 1/2 teaspoon baking powder
- 1/2 teaspoon salt
- 1/2 cup unsalted butter (1 stick) room temperature
- 1/2 cup white sugar
- 1/2 cup brown sugar packed
- 2 large eggs room temperature
- 1 teaspoon vanilla extract
- 1/4 cup vanilla yogurt or plain yogurt or sour cream
- red gel food coloring
- 1 bag white chocolate chips
Instructions
- Combine flour, cocoa powder, baking soda, baking powder, and salt in a medium bowl. Set aside.
- In a mixing bowl, beat together the butter and two sugars until they are pale and fluffy. Add the eggs one at a time followed by the vanilla. Gradually mix in the dry ingredients followed by the yogurt or sour cream. Add a few squirts of red gel food coloring, mixing in until the entirety of the dough is colored and reaches the desired depth of color. Measure out 1 1/2 cups white chocolate chips. Fold them into the dough. Reserve the rest of the bag for topping later.
- Wrap dough in plastic wrap and chill for at least 2 hours, or overnight.
- Preheat oven at 375 degrees. Line a baking sheet with parchment paper.
- Use a small cookie scoop or teaspoon to dole out round of dough spaced out on the sheet. Add a couple of the reserved white chocolate chips atop each round.
- Bake 10 to 12 minutes, until cookies are set, then let them rest on the sheet 5 to 10 minutes before transferring to a cooling rack.
- If stacking the cookies in a container, place waxed paper between the layers to prevent the cookies from slumping together. Cookies will keep well for at least 3 days stored in a sealed container at room temperature.
OM NOM NOM!
Bready or Not: Confetti Pudding Cookies
These Confetti Pudding Cookies are such classic, happy-making cookies. They have sprinkles inside and out, and they taste like cookie dough even after being baked!
What causes that, you ask? That’s part of the magic imbued by instant pudding mix. You can use Bird’s Custard Powder (which can be hard to find or expensive in the US) or a standard Jell-O Vanilla Instant Pudding Powder. DO NOT make the pudding. You use the powder! Just make sure it’s not clumpy.
Use rainbow sprinkles to make these festive for a birthday, pride, or any old day, or use colors coordinated to holidays throughout the year.
Modified from Bake from Scratch Magazine May/June 2024.
Bready or Not: Confetti Pudding Cookies
Equipment
- parchment paper
- small cookie scoop or spoon
Ingredients
- 3/4 cup unsalted butter (1 1/2 sticks) room temperature
- 1 cup white sugar
- 1 large egg
- 1/2 teaspoon vanilla extract
- 1/2 teaspoon almond extract
- 1 1/2 cups all-purpose flour
- 3.4 oz vanilla instant pudding mix or Bird’s Custard Powder (96 grams)
- 1/2 teaspoon baking soda
- 1/2 teaspoon kosher salt
- 1/3 cup rainbow sprinkles plus more for the top
Instructions
- These cookies can be baked right away or chilled/frozen for later. Note that if they are chilled, the dough may get extra hard, and need to soften at room temperature for 20 minutes before shaping.
- If baking right away, preheat oven at 350 degrees. Line a baking sheet with parchment paper.
- In a big bowl, mix together butter and sugar until light and fluffy. Add egg and both extracts, scraping the bottom of the bowl to incorporate everything.
- In another bowl, stir together flour, pudding mix (make sure that any clumps are pressed out), baking soda, and salt.
- Gradually mix the dry ingredients into the wet. Fold in the sprinkles. Pour some extra sprinkles into a saucer.
- Use a scoop or spoon to shape the dough into a small ball. Press one side into the sprinkles and set on baking sheet with the super-sprinkly side on top. Continue with rest of dough balls.
- Bake for 10 to 12 minutes, until cookies are flatter and no longer look gooey. Let them rest about 5 minutes before moving them to a rack to finish cooling.
- Store cookies in a sealed container at room temperature. Best eaten within 4 days.
OM NOM NOM!
Bready or Not: Vanilla Sablé Cookies
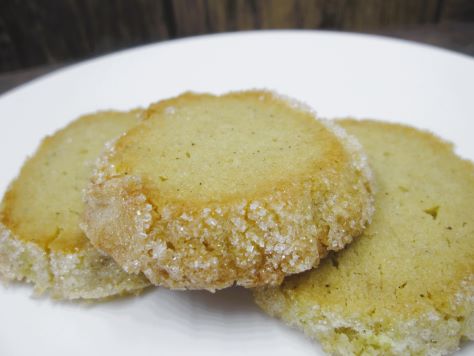
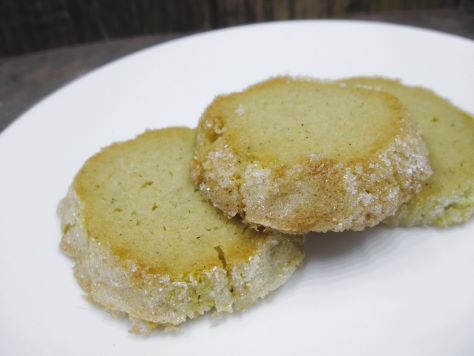
These Vanilla Sablé Cookies are a delicate French take on shortbread. They are not heavily sweet, perfect for people who like their desserts a bit gentler.
This recipe calls for vanilla bean paste. It will imbue the dough with a deeper vanilla flavor as well as beautiful flecks of vanilla. It makes the end result prettier–which is saying a lot, as they are already pretty courtesy of a sparkling sanding sugar crust.
Note that this dough requires chill time, as it is very soft. You don’t want it warm as it is sliced or baked!
Bready or Not: Vanilla Sablé Cookies
Equipment
- plastic wrap
- pastry brush
Ingredients
- 1 Tablespoon vanilla bean paste
- 1/3 cup white sugar
- 1 cup unsalted butter 2 sticks
- 1/2 teaspoon fine sea salt
- 1/3 cup confectioners’ sugar sifted
- 2 large egg yolks separated
- 2 cups all-purpose flour
- 1/2 cup sanding sugar white or other color
Instructions
- Mix together the vanilla bean paste, white sugar, and butter until smooth and creamy, not light and fluffy. Add the salt and confectioners’ sugar until smooth. Add 1 egg yolk. Mix in the flour until just combined.
- Turn out dough onto counter to lightly knead. Divide in half and shape into long logs about 1-inch tall. Wrap dough in plastic wrap and chill for at least 3 hours, or freeze up to 2 months.
- When it is baking time, preheat oven at 350 degrees. Line a baking sheet with parchment paper.
- Place egg yolk into a small bowl or ramekin. Add a splash of water and whisk it with the yolk. Pour sanding sugar onto a plate.
- Brush the yolk down the length of a cookie log, fully coating it. Roll the log in the sanding sugar. Place on a cutting board and slice into pieces 1/2-inch thick. Place spaced out on cookie sheet. Repeat process with other log. Don’t squeeze the cookies too close, as they will spread.
- Bake for 11 to 13 minutes, until set and just turning a hint of gold. Let them set on sheet for 5 minutes, then transfer to a rack to fully cool.
- Pack cookies in a sealed container at room temperature. They will keep for at least 4 days.


