


New publications for spring!
I’m staying incredibly busy these days, and publishers are keeping busy, too. I’ve had a number of new works published of late! [Note that links to Amazon are through their affiliate program.]

Short stories
- “The Recipe Keeper,” Flash Fiction Online
- “How to Hide a Unicorn,” Untethered
- “More Than Nine,” Reinvented Heart
Poetry
- Four works nominated for the 2022 Rhysling Award and included in the anthology: long form “The Bookstore” and “Follow the Meandering Path”; short form “Field Trip to See the Mermaid” and “How to Find Yourself Again”
- “Let’s Enjoy the Stars One Last Time” and “Today,” Star*Line 45.1
- “Forget That,” Star*Line 45.2
Nonfiction
- “Joy Amidst the Sorrow,” Chicken Soup for the Soul: Grieving, Loss and Healing
#SFWAPro
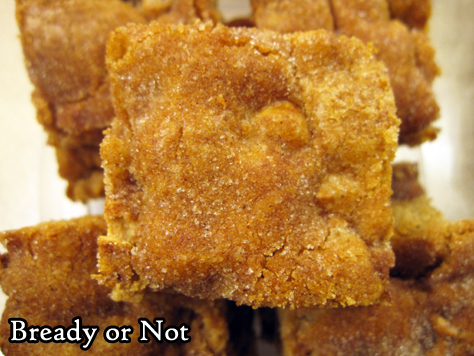
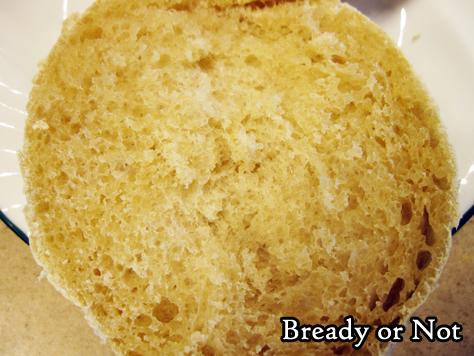
Read MoreBready or Not Original: Snickerdoodle Blondies (Redux)
I first shared this recipe for Snickerdoodle Blondies back in 2015, so it’s time for a re-bake and repost, with shiny new pictures of these delicious things!
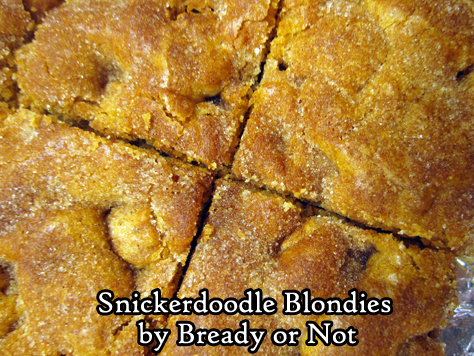
These are thick, soft, and chewy bars, packed with snickerdoodle flavor. The top is crowed with cinnamon and sugar.
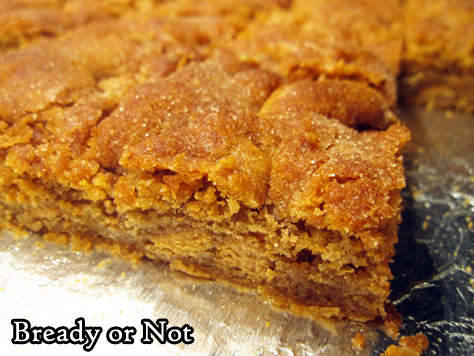
Oh yes, and through the tender crumb are sporadic caramel chips–or cinnamon chips. This recipe is fantastic using either, or both. They add extra oomph without being overkill.
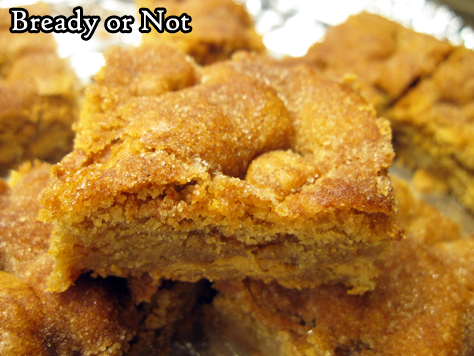
The recipe makes a big 9×13 pan, so this is a good recipe to feed a crowd!
Bready or Not Original: Snickerdoodle Blondies (Redux)
Equipment
- 9×13 pan
- aluminum foil
Ingredients
Blondies
- 1 cup unsalted butter (2 sticks) room temperature
- 2 cups brown sugar packed
- 1 Tablespoon vanilla extract
- 2 large eggs room temperature
- 2 2/3 cups all-purpose flour
- 1 teaspoon kosher salt
- 1/2 tsp cream of tartar
- 1 teaspoon ground cinnamon
- 2 teaspoons baking powder
- 10 ounces caramel chips or cinnamon chips
Topping
- 2 Tablespoons white sugar
- 2 teaspoons ground cinnamon
Instructions
- Prepare a 9×13 pan by lining it with aluminum foil and applying nonstick spray. Preheat oven at 350-degrees.
- In a large bowl, cream together the butter, brown sugar, and vanilla extract. Add the eggs one at a time.
- In a separate bowl, sift together the flour, salt, cream of tartar, cinnamon, and baking powder. Gradually add the dry mix into the wet bowl. Once everything is mixed, add the bag of caramel or cinnamon chips.
- Evenly spread the dough into the prepared pan. In a small bowl, mix the sugar and cinnamon. Sprinkle the mix over the dough.
- Bake for 30 to 40 minutes, until toothpick inserted in center comes out clean. Cool completely. Use the foil to lift out the contents and cut into bars. Store at room temperature. They will keep well for a few days if kept sealed.
OM NOM NOM!
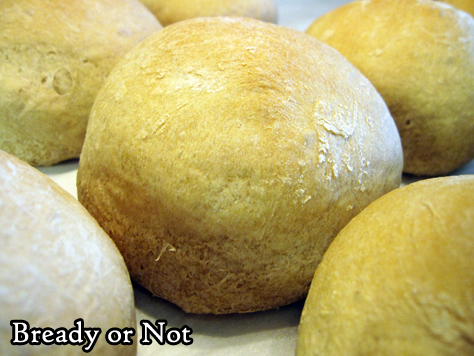
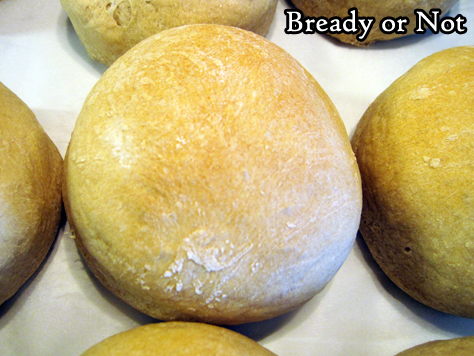
Bready or Not Original: Bread Machine Beer Bread Rolls
Your home bread machine makes delicious carbs super-easy with these Bread Machine Beer Bread Rolls!
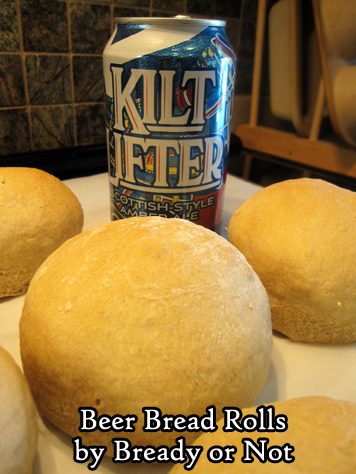
First things first: the type of beer. You could try this with any number of beers, but I suggest a darker one. I’ve tried this with Kiltlifter (a major local beer in Arizona) and also Guinness. Guinness definitely created rolls that were darker with a deeper flavor. I have not tried this with a nonalcoholic beer.
Really, choose a beer that will go well with the meal. Don’t worry about alcohol amounts in the final product, either. It’ll burn off in the baking process. Also, you don’t have to like beer to like these rolls. I do not like beer (seriously, I really do not like beer) but I do enjoy the hoppy flavor it imbues in this bread!
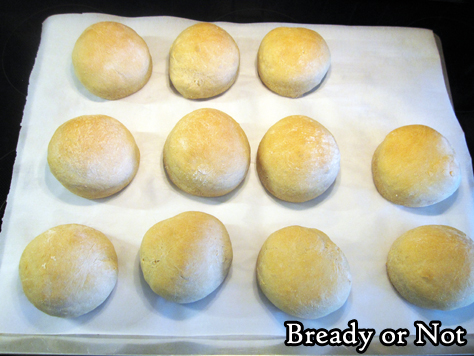
A food scale will be an immense help in creating like-sized rolls. I’ve used this recipe to make medium-sized rolls, good for a butter-lacquered side dish, as well as big rolls suitable for BBQ-sauce shredded pork or other heaped-on fixings.
The rolls are fantastic fresh and will keep fine for a few days, and they are great to freeze. If you freeze them soon after they come out from the oven, they will taste just that fresh when you later thaw them!
Bready or Not Original: Bread Machine Beer Bread Rolls
Equipment
- bread machine
- food thermometer
- food scale
Ingredients
- 12 ounces dark beer such as Kiltlifter or Guinness
- 1/2 cup water
- 1 1/2 teaspoons sea salt
- 4 to 4 1/2 cups bread flour plus more for dusting
- 1 1/2 teaspoons instant dry yeast
Instructions
- This may be a travesty for some, but place the beer and water in a large microwave-safe dish. Give the liquid a brief zap in the microwave to raise the temperature to 100 to 110-degrees. Place in the pan of the bread machine. Add the salt, 4 cups bread flour, and yeast. Start the machine on the dough setting.
- Check on the dough as it begins mixing. If your bread machine allows, as the cycle is on-going, add more flour if the dough looks too loose, or add a touch more water if it is too dense and lumpy.
- When the cycle is done, weight the dough and do the math to divide into rolls of desired size. Prepare a large baking sheet with parchment paper. Divide the dough with the help of the food scale, shaping and smoothing each piece into a roll. Set spaced out on sheet.
- Cover dough balls with plastic wrap or towels and set in a place to rise, 30 minutes to an hour.
- Preheat oven at 350-degrees. Remove cover from dough and baking sheet. For medium rolls, bake for around 24 minutes; for larger rolls, bake for about 28 minutes. Check for doneness by tapping rolls and listening for a hollow sound, or plunge the food thermometer into a discreet place to verify the temperature in the middle if above 190-degrees.
- Cool at least 20 minutes before eating. Rolls will keep in a sealed bag at room temperature for up to 2 days, and can also be frozen to enjoy much later.
OM NOM NOM!
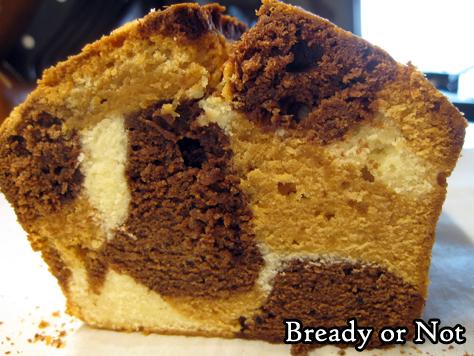
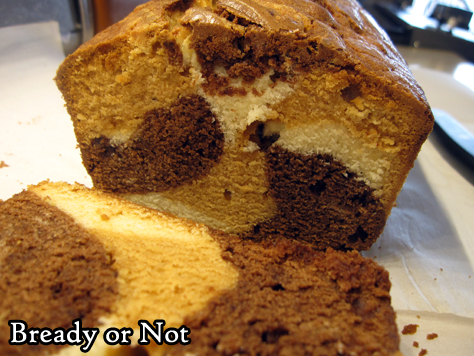
Bready or Not: Triple-Marble Pound Cake
The Triple-Marble Pound Cake is tender, soft, and has three incredible complementary flavors combined in one cake. It’s not hard to make, either, though it does dirty a few extra dishes.
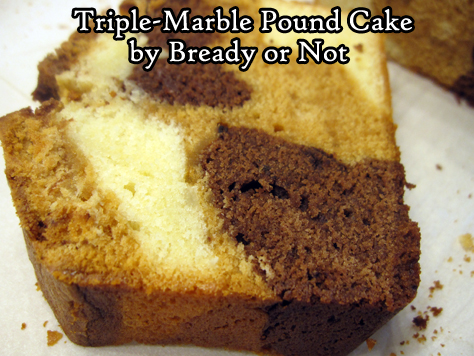
Oh yes, and it’s pretty, too. The interior reminds me of a calico cat!
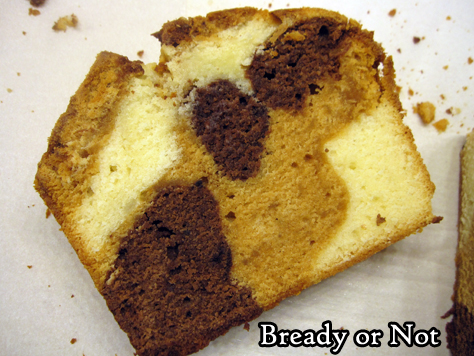
Something I really like about this recipe is that it is no-frills. The flavors are all built into the dough itself. There’s no need for frosting or glaze. The end result is a nice, tidy slice. You can throw it in a sandwich bag or some plastic wrap, and this is great as a to-go snack of treat. It might get crushed, but it won’t melt (and that is always a concern in Arizona!).
The cake keeps well, too. Store it sealed at room temperature for up to four days. It’s also fantastic to freeze in slices to enjoy later.
Greatly modified from Bake from Scratch Sep/Oct 2020.
Bready or Not: Triple-Marble Pound Cake
Equipment
- 9×5 loaf pan
- parchment paper
- food scale
Ingredients
- 3/4 cup unsalted butter (1 and a half sticks) softened
- 1 1/2 cups white sugar
- 3 large eggs room temperature
- 1 3/4 cups all-purpose flour
- 1/2 teaspoon kosher salt
- 1/4 teaspoon baking powder
- 1/2 cup vanilla Greek yogurt or sour cream
- 1/4 cup jarred caramel or dulce de leche
- 1/3 cup dark chocolate melted and cooled slightly
- 1 Tablespoon Dutch-process cocoa powder sifted
- 2 teaspoons vanilla extract
Instructions
- Preheat oven at 300-degrees. Cut a piece of parchment to fit like a sling inside the pan, extending up both long sides. Apply butter or nonstick spray in the pan, then set the parchment inside and spray it again.
- Beat together butter and sugar until fluffy. Add eggs, beating well after each addition.
- In a separate bowl, combine the flour, salt, and baking powder. Gradually add the dry ingredients in with the wet, adding in the yogurt/sour cream as well.
- Either by using a food scale or by eyeballing, divide the dough into three roughly equal portions.
- If the caramel/dulce de leche is stiff, microwave briefly in a microwave-safe bowl to make it looser. Mix that into one portion of dough.
- Add the cocoa powder with the melted chocolate, and fold that into a second portion of dough until the color is even throughout.
- To the third portion, mix in the vanilla to completely incorporate.
- Set a tablespoon with each portion. Scoop vanilla and chocolate to form a checkerboard-like formation in the bottom of the loaf pan. Add scoops of caramel dough sporadically over top. Tap pan to settle the dough. Repeat, mixing up the pattern so that different colors are near each other, tapping the pan on occasion. Once all of the dough is in the pan, use a butter knife to gently swirl for an extra marbling effect on the top. Tap pan again to level and work out bubbles.
- Bake for 1 hour 40 minutes. Check the middle with a toothpick. If it’s still wet, bake longer, checking every few minutes for doneness. Once it passes the test, let cool on stove top for 10 minutes, then use the parchment sling to lift the loaf onto a rack to cool completely.
- Cake can be served warm or at room temperature. It will keep for up to 4 days in a sealed container. It can also be frozen in slices for later enjoyment.
OM NOM NOM!
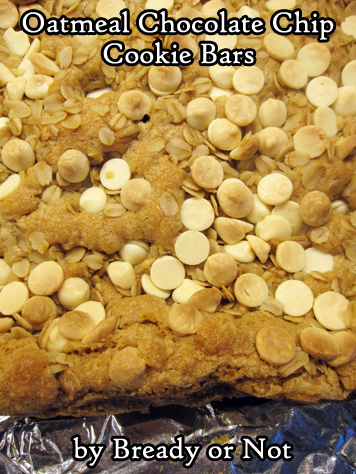
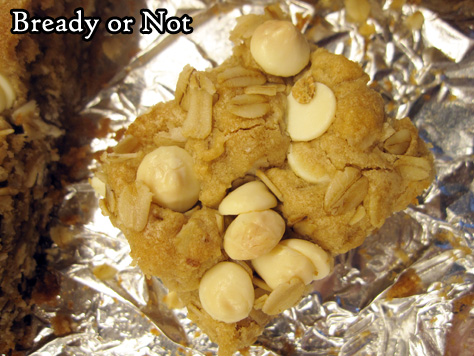
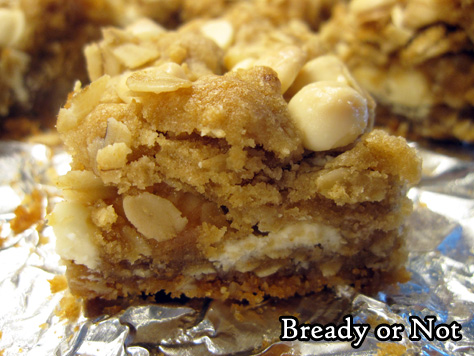
Bready or Not Original: Oatmeal Chocolate Chip Cookie Bars
These Oatmeal Chocolate Chip Cookie Bars are a delicious new twist on classic ingredients. They are incredibly thick, chewy, and indulgent, the kind of treat that makes a person want to continue nibbling away.
A big part of the deliciousness is the use of cookie butter. This is, essentially, pureed spice cookies with oil to form a peanut butter-like consistency, and they are indeed a perfect substitute for nut butters in most any recipe. The major brands are Biscoff Cookie Butter (carried at many major grocery chains in America) and Speculoos at Trader Joe’s.

Cookie butter enhances the inherent cookie dough flavor in any baked cookie/bar recipe. It’s also a delight to eat straight from the jar!
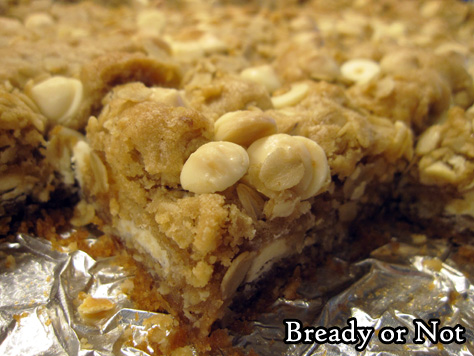
Add white chocolate chips and a generous amount of sugar and oats to that, and you really have a great combo.
These bars can be a little messy, but that’s okay. Every crumb is delicious!
Modified greatly from Bake from Scratch Magazine Sept/Oct 2018.
Bready or Not Original: Oatmeal Chocolate Chip Cookie Bars
Equipment
- 9×13 pan
- offset spatula
Ingredients
- 1 cup unsalted butter 2 sticks room temperature
- 1 cup light brown sugar firmly packed
- 1/2 cup white sugar
- 1 cup creamy cookie butter
- 2 large eggs room temperature
- 2 teaspoons vanilla extract
- 2 cups all-purpose flour
- 2 1/4 cups old-fashioned oats divided
- 1 teaspoon kosher salt
- 1 teaspoon baking soda
- 1 teaspoon baking powder
- 8 ounces white chocolate chips divided
Instructions
- Preheat oven at 350-degrees. Line a 13×9 pan with a long piece of foil. Apple nonstick spray or grease with extra butter.
- In a big bowl, beat together butter and sugars until they are light and fluffy. Add the cookie butter followed by the eggs and vanilla, scraping the bowl a few times to make sure everything is incorporated.
- In another bowl, stir together the flour, 2 cups of the oats, salt, baking soda, and baking powder. Gradually mix the dry ingredients into the butter mix. Using an offset spatula, spread half the batter into the prepared pan. Dough will be thick and somewhat sticky. Sprinkle half of the chocolate over the top. Dollop on the rest of the dough, spreading into an even later again. Sprinkle on the rest of the white chocolate chips along with the remaining 1/4 cup of oats.
- Bake for 27 to 35 minutes. The middle should be set, not jiggly, and pass the toothpick test. Cool completely at room temperature and then the fridge (the bars will be firmer and less messy to slice if they are chilled).
- Use the foil to lift contents onto a cutting board. Slice into pieces. Store in a sealed container for up to 5 days.
