Recipe Tweaks
I had to update the recipe plug-in on BethCato.com. After much weeping and gnashing of teeth (because I accidentally blew up my site for a while) I managed to get everything working again. The recipes do look a little different now and there will likely be some formatting glitches, but the content seems to be okay.
If you encounter any major problems with the recipes, please let me know!
Read MoreThe Perfect Valentine’s Weekend
Some people expect a fancy dinner out and wining and dining for Valentine’s Day. I’m a lot cheaper more practical.
 See, the VNSA Book Sale is going on this weekend. If you’re in the Phoenix area, it’s a must see. It’s an entire fairgrounds building filled with tables of books. Our first year, we went on opening day and waited two hours to even get inside and then it was so crowded it was hard to even look around. I learned the secret after that: go on Sunday. Almost all the books are 1/2 off, meaning they are probably a buck or two. Sure, the selection is picked over, but the crowds are sparser so you can actually get a clear view of the books.
I asked my husband for this to be my Valentine’s date. He smiled and said, “Of course.”
Yes, Sunday is the 15th, the day after Valentine’s. It’s fine by me. I get to treasure hunt for cheap books. A great charity gets extra funds. I get a nice lunch out with my family. Everyone wins.
Read MoreBready or Not: Biscoff Brownies
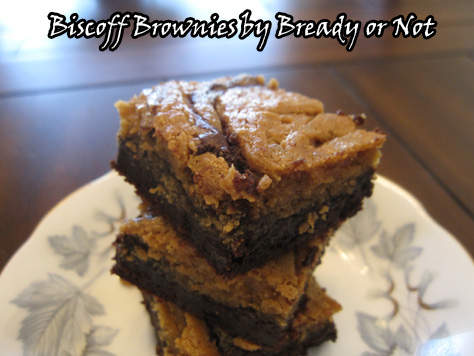
How about some beautiful brownies for Valentine’s Day?
Sometimes you want a brownie that punches you in the face with its chocolate flavor. Other times you want a gentle slap. This brownie is the latter.
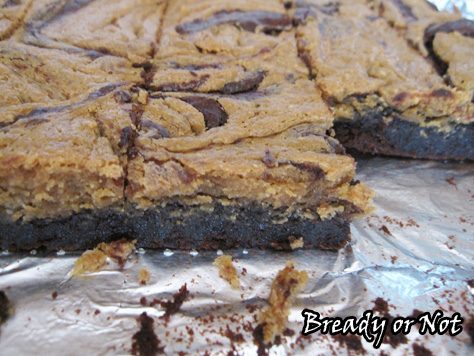
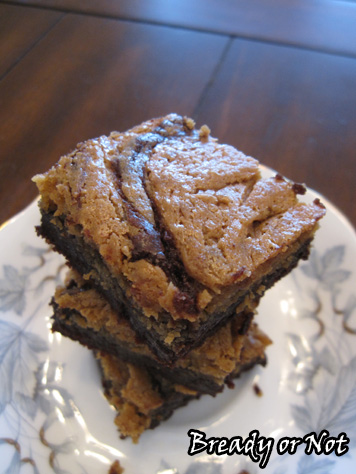
These mild brownies blend the magic of Biscoff spread/Speculoos spread with chocolately brownies. Neither flavor is strong, but together they create something delicious, tender, and good.
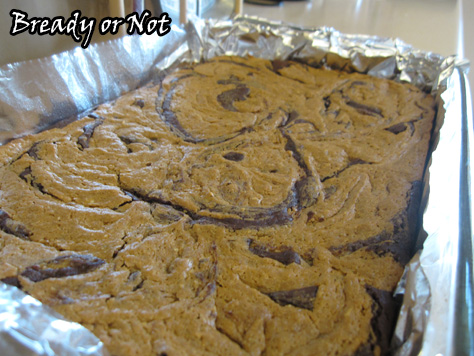
Also, they are PRETTY. Look at that swirl!
These are photogenic brownies.
They also keep really well for several days in a sealed container at room temperature. If you can restrain yourself to make them last that long.
Slightly modified from Biscoff Brownies at Bake at 350.
Bready or Not: Biscoff Brownies
Ingredients
For the Biscoff swirl:
- 1/2 cup smooth Biscoff or cookie butter spread
- 4 ounces cream cheese softened
- 2 Tbsp sugar
- 1 egg room temperature
For the brownies:
- 1 cup Dutch-process cocoa sifted
- 1 tsp kosher salt
- 1/2 tsp baking powder
- 12 Tb unsalted butter 1 1/2 sticks
- 2 cups white sugar
- 1 Tbsp vanilla extract
- 3 eggs room temperature
- 1 cup all-purpose flour
Instructions
- Preheat oven to 325-degrees. Line a 9x13 pan with aluminum foil and grease surface.
- For the Biscoff swirl: In a small bowl, combine the cookie butter spread, cream cheese, sugar, and egg, until smooth. Set aside.
- For the brownies: Sift together the cocoa, salt and baking powder and set aside.
- In a medium saucepan, melt the butter over low heat. Remove from heat and add the sugar. Once they are mixed, return to the burner and keep stirring as it heats through. You don't want it to bubble.
- Remove the pan from heat and stir in the cocoa mixture. Let it cool a few minutes. Whisk in the eggs and vanilla extract until smooth. Stir in the flour. Pour into the prepared pan and smooth it out.
- Dollop the Biscoff mixture here and there on top of the brownie batter. Use a table knife to gently swirl the mixture every which way across the surface.
- Bake for 30-35 minutes, until the swirl looks set and it passes the toothpick test. Cool on a wire rack before cutting.
OM NOM NOM!
Sunday Quote should make cookies
Read More“Writing has laws of perspective, of light and shade just as painting does, or music. If you are born knowing them, fine. If not, learn them. Then rearrange the rules to suit yourself.” ~Truman Capote
Bready or Not: Sour Cream Bread
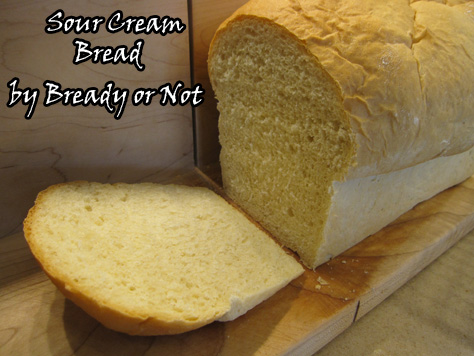
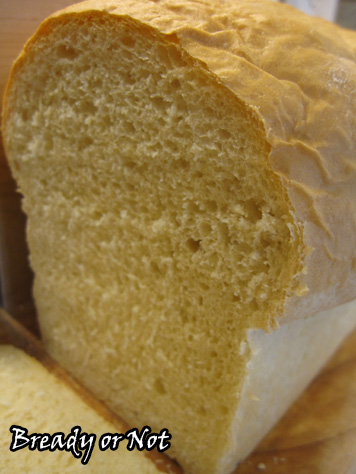
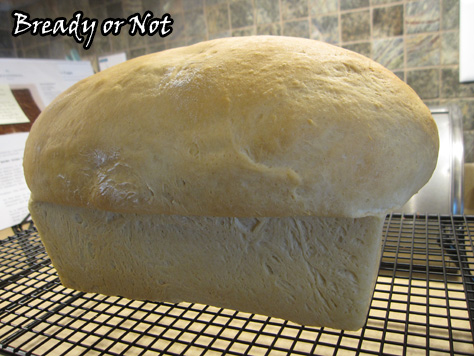
Make note: this recipe doesn’t make sourdough bread. Instead, it uses sour cream to create tender, delicious sandwich bread that isn’t the least bit sour.
I always keep sour cream around. It’s often on sale, it keeps well, and I can use it for tacos, salads, or making this bread. I actually make this bread on an almost weekly basis.
Different brands of sour cream have different consistency. That means you need to keep an eye on this in the mixing stage. If it looks lumpy, add more water. If it’s looser, add more flour.
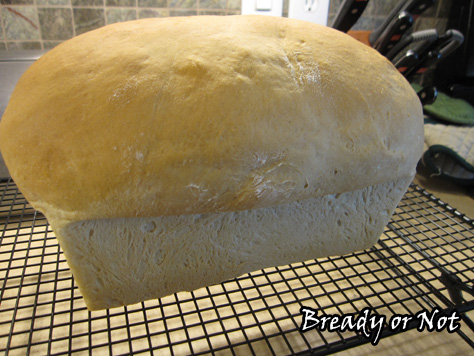
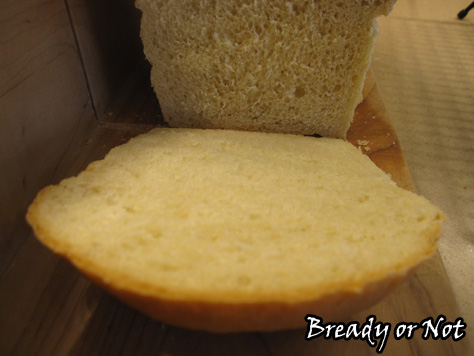
This loaf bread may be finicky, but it’s worth the effort. The end result has that perfect fresh bread smell and soft texture. It makes your whole house smell cozy and happy, and does the very same to your belly.
I originally found this recipe in a fabulous book, The Bread Lover’s Bread Machine Cookbook by Beth Hensperger.
Bready or Not: Sour Cream Bread
Ingredients
- 1/2 cup plus 1 Tablespoon water
- 1 cup sour cream use nonstick spray on measuring cup
- 3 1/2 cups bread flour
- 1 Tablespoon light brown sugar
- 2 teaspoons vital wheat gluten
- 1 1/4 teaspoons salt
- 2 1/4 teaspoons active dry yeast
Instructions
- If you're using a bread machine, add the ingredients in the recommended order and run on dough cycle or full bread mode. I prefer to do dough cycle and bake in the oven.
- If you're using a stand mixer, blend water and sour cream. In a separate bowl, combine bread flour, brown sugar, gluten, salt, and yeast. Mix wet and dry ingredients together and knead with a dough hook.
Either method: Keep an eye on the texture. If it's wet or too tacky, add more flour. If it's too lumpy or thick, splash in a tiny bit more water as needed.
- Let dough rise until it has doubled, 1-2 hours. Grease or non-stick spray a bread pan.
- Lightly grease a surface and dump your dough onto it. With your greased hands, form the dough into a loaf shape by gently folding. Set in the pan--or glop it in, and smooth it out (that's still a professional method, I think). Cover with lightly greased plastic wrap or a shower cap.
- Let dough rise in a warm spot until it's crested to desired height, 30-60 minutes. Watch it.
- Preheat oven to 350-degrees.
- Bake bread for 20 minutes. Cover the top with foil to prevent heavy browning, then bake for an additional 15-20 minutes. When it's done, it'll sound hollow when tapped.
- Remove bread from oven and hold it over a rack so it will gently drop out; use a spatula to carefully loosen it, if needed. If you want, you can brushed the top with some butter to soften the crust and give it a shine.
- Let the bread cool at least 45 minutes before cutting. Also, you can let it cool completely and then wrap it several layers of plastic wrap before placing it in the freezer. Keeps well in freezer up to one month.
OM NOM NOM.
Read More


